Introduction
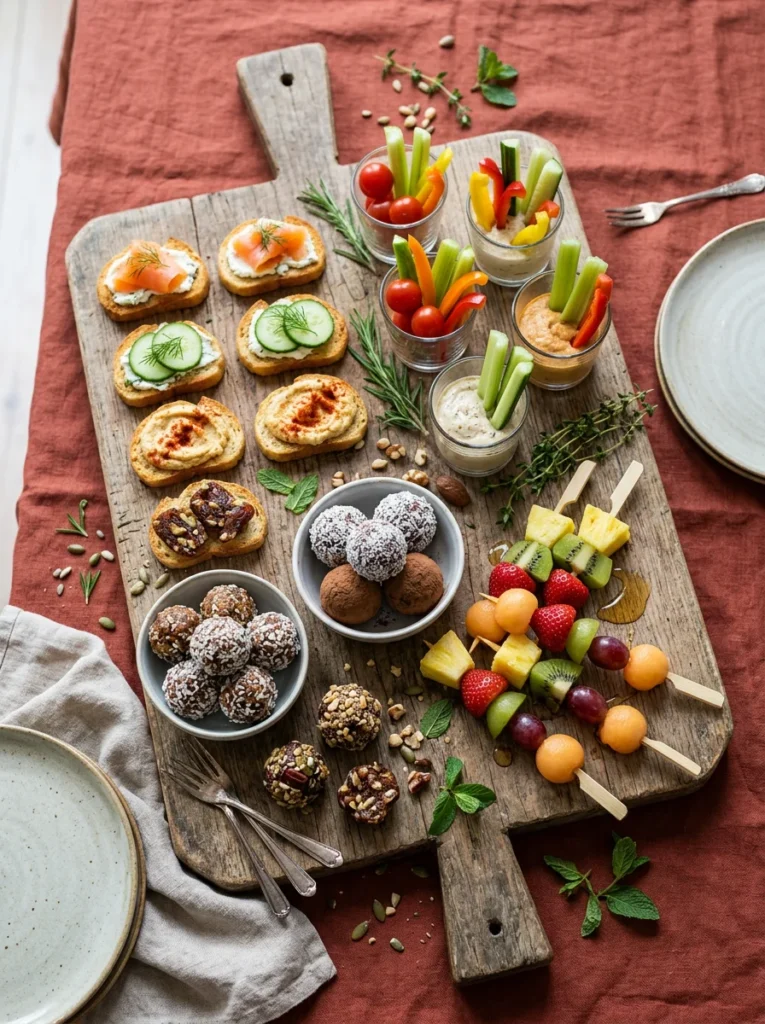
Life gets hectic and when hunger hits between meetings, school pickups, or afternoon slumps, the last thing you want is to spend 45 minutes in the kitchen. That’s exactly why this list exists. These nine quick snack recipes are smart, satisfying, and genuinely fast to pull together with pantry staples you already have on hand. Whether you’re feeding yourself, your kids, or a surprise guest, every single one of these will save your day without stressing you out.
1. Peanut Butter Banana Energy Balls
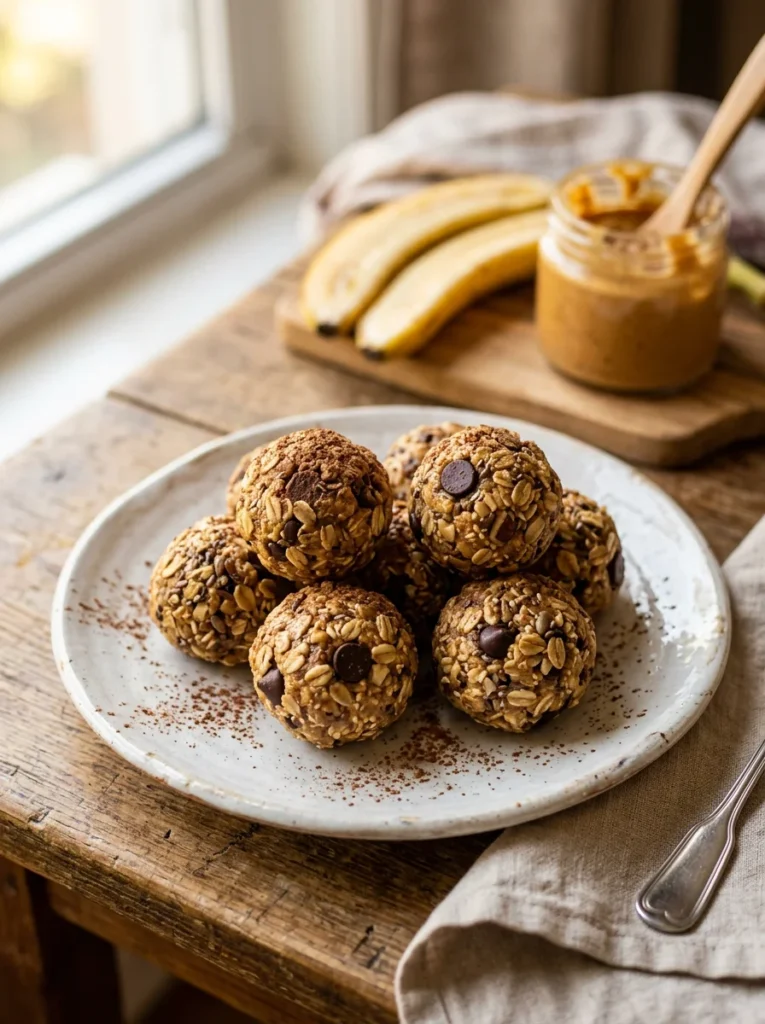
There is something quietly perfect about a snack that takes five minutes to make, requires zero baking, and still manages to taste like a treat you actually looked forward to and that is exactly what these peanut butter banana energy balls deliver every single time you make them. They are dense, chewy, naturally sweet from the ripe banana, and rich with the nutty depth of good peanut butter, all held together with rolled oats and a handful of chocolate chips that melt just slightly against the warmth of your hands as you roll them. They pack protein, fiber, and healthy fats into a two-bite snack that keeps you genuinely full for hours, not just temporarily satisfied. Make a double batch on Sunday and keep them in the fridge all week. They only get better as the flavors settle overnight and the oats soften slightly into that irresistible fudgy texture.
Ingredients
- 1 large ripe banana, mashed
- ½ cup creamy peanut butter
- 1 cup rolled oats
- 2 tablespoons honey
- ¼ cup mini chocolate chips
- 1 teaspoon vanilla extract
- Pinch of salt
Instructions
- Mash the banana in a large bowl until smooth with very few lumps remaining.
- Add peanut butter, honey, and vanilla extract. Stir until everything is fully combined and glossy.
- Fold in the rolled oats, chocolate chips, and salt. Mix until a thick, slightly sticky dough forms.
- Cover the bowl and refrigerate for 20 minutes this makes rolling much easier.
- Scoop out about 1 tablespoon of mixture at a time and roll between your palms into smooth balls.
- Place on a parchment-lined tray and refrigerate for at least 30 minutes before serving.
- Store in an airtight container in the fridge for up to one week.
How to Serve It
Roll the finished balls in shredded coconut, crushed graham crackers, or finely chopped roasted peanuts for a beautiful coating and an extra layer of texture. Arrange them on a small wooden board alongside a drizzle of melted dark chocolate for a party-worthy presentation. In warmer months, serve them straight from the freezer as a cooling afternoon bite. They hold their shape and develop a slightly firmer, fudge-like texture that is genuinely wonderful. During the holidays, roll them in crushed peppermint candy or a dusting of cinnamon and nutmeg for a festive twist that feels intentional and special.
2. Avocado Cucumber Toast Bites
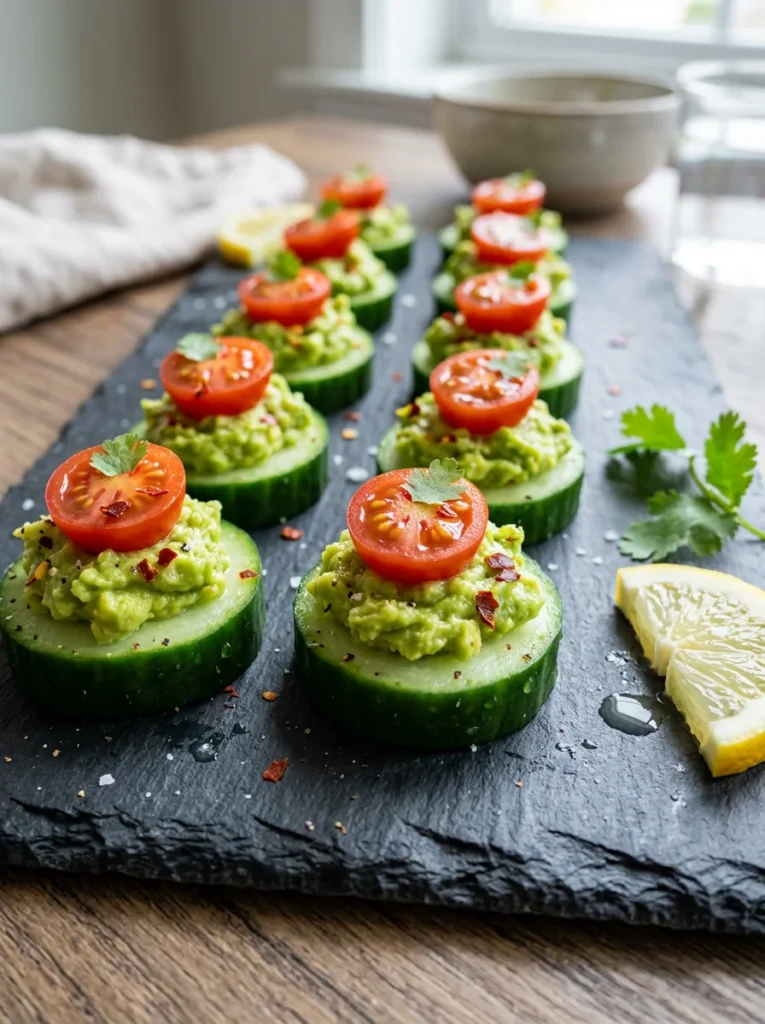
These little avocado cucumber toast bites are the kind of snack that looks like you put real effort in, but the truth is you can have a full platter ready in under ten minutes with nothing more than a cutting board, a fork, and a handful of fresh ingredients. The cool, crisp cucumber acts as the base of a refreshing, low-carb swap for bread that keeps things light without sacrificing the satisfying crunch you want in a snack. The avocado layer is creamy, bright with lemon, and seasoned just enough to make each bite taste complete. They are naturally gluten-free, vegan, and genuinely crowd-pleasing, which makes them perfect for gatherings, lunchboxes, or just yourself on a Tuesday when you deserve something that tastes a bit fancy. The color contrast alone, vivid green against the pale cucumber makes these look like something from a café menu.
Ingredients
- 1 large English cucumber
- 2 ripe avocados
- Juice of 1 lemon
- 1 clove garlic, finely minced
- Salt and black pepper to taste
- ½ teaspoon red chili flakes
- 10–12 cherry tomatoes, halved
- Fresh dill or parsley, for topping
Instructions
- Slice the cucumber into rounds about ½ inch thick and you should get roughly 20–24 slices.
- Pat the slices dry with a paper towel to keep the topping from sliding.
- In a bowl, mash the avocados with lemon juice, garlic, salt, and black pepper until mostly smooth but still slightly chunky.
- Spoon about 1 teaspoon of avocado mash onto each cucumber round.
- Press a cherry tomato half gently into the top of each one.
- Finish with a pinch of chili flakes and a small sprig of fresh dill or a torn parsley leaf.
- Serve immediately, or refrigerate (without the tomato) for up to 2 hours before topping and serving.
How to Serve It
Arrange these on a long wooden board or slate platter for a visually striking presentation at parties or brunches. Add a squeeze of extra lemon right before serving to keep the avocado vibrant green and fresh-tasting. For a more filling version, top with a small crumble of feta cheese or a tiny spoonful of smoked salmon. During summer, swap cherry tomatoes for thin slices of heirloom tomato and top with fresh basil for a bruschetta-inspired variation that feels seasonal and exciting.
3. Crispy Chickpea Snack Mix
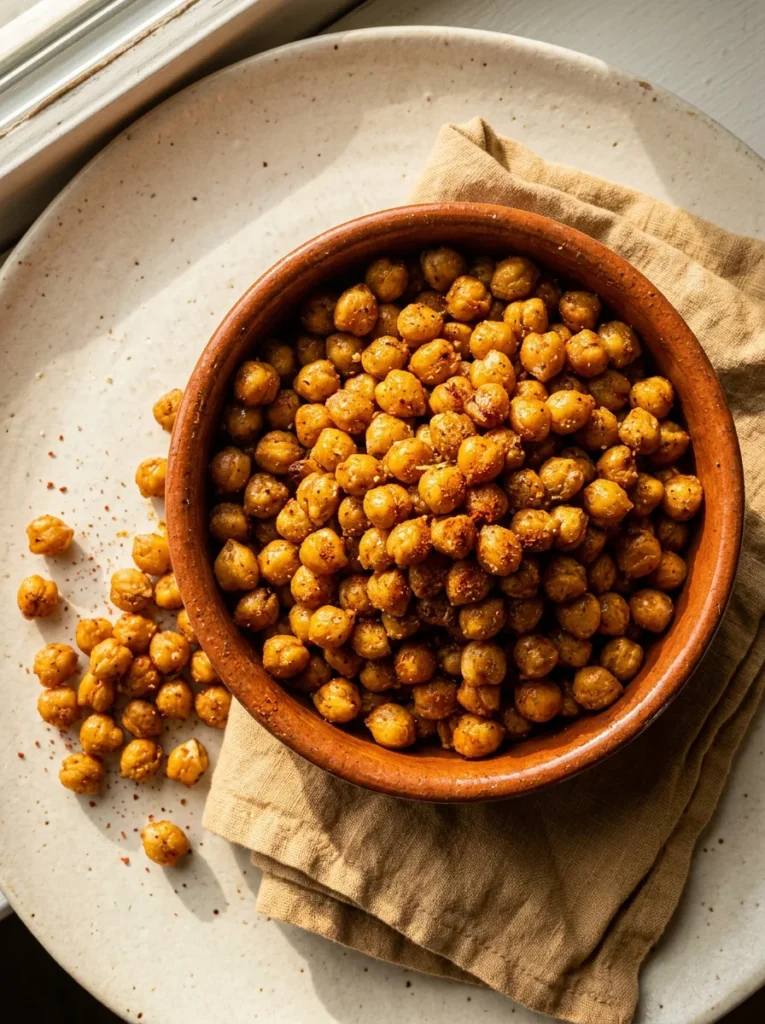
Roasted chickpeas are one of the most satisfying crunchy snacks you can make at home. They deliver that deep, savory, crackling bite that you usually only get from chips or crackers, but with a protein punch that actually keeps hunger at bay between meals. This version gets its bold flavor from smoked paprika, ground cumin, garlic powder, and a good hit of olive oil that helps the spices stick and caramelize against the chickpea skin during roasting. The key to truly crispy chickpeas is patience with the drying step. The more moisture you remove before they go in the oven, the crunchier and more snackable they become straight from the tray. Once you have the base technique down, you can take the seasoning in any direction: curry powder for warmth, za’atar for a herby Middle-Eastern twist, or cinnamon and maple for something sweet and surprising.
Ingredients
- 2 cans (15 oz each) chickpeas, drained and rinsed
- 2 tablespoons olive oil
- 1 teaspoon smoked paprika
- 1 teaspoon ground cumin
- ½ teaspoon garlic powder
- ½ teaspoon onion powder
- ½ teaspoon salt
- ¼ teaspoon cayenne pepper (optional)
Instructions
- Preheat the oven to 400°F (200°C). Line a large baking sheet with parchment paper.
- Spread the drained chickpeas on a clean kitchen towel and rub vigorously to dry them. Remove any loose skins that come off.
- Spread chickpeas in a single layer on the prepared baking sheet.
- Roast for 20 minutes, then remove from the oven and toss.
- In a bowl, whisk together olive oil and all spices. Pour over the chickpeas and toss to coat evenly.
- Return to the oven and roast for another 15–20 minutes until deep golden and crispy.
- Allow to cool completely on the pan before eating. They crisp up further as they cool.
How to Serve It
Pile these into small individual ramekins or paper cones for party grazing. They look fantastic and guests love picking at them throughout the evening. Toss them into a trail mix with roasted almonds, dried cranberries, and dark chocolate chunks for a snack bag that travels beautifully. Scatter them over a green salad for crunch instead of croutons. Store in an open container at room temperature (not sealed tight, which traps steam) for up to three days, though they are best within the first 24 hours.
4. Greek Yogurt Parfait Cups
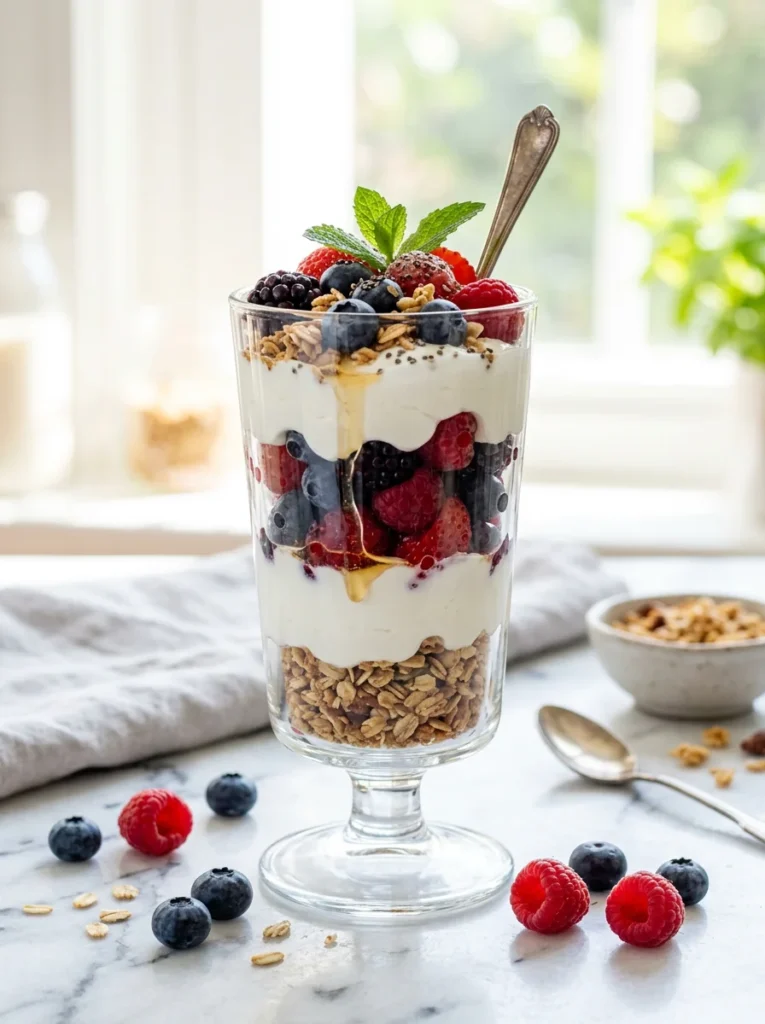
Greek yogurt parfait cups are one of those snacks that feel indulgent and substantial but come together in about three minutes flat, no cooking, no equipment, no special ingredients beyond what most of us already keep in the fridge and pantry. The beauty of this layered snack is in its contrasts: cold, tangy yogurt against sweet jammy berries, and that essential crunch from granola that makes every spoonful genuinely interesting to eat. It works as a mid-morning snack, a post-workout refuel, or even a quick dessert when you want something sweet without going overboard. The protein content from the Greek yogurt is substantial enough that this actually keeps you satisfied for a solid two to three hours which is more than most snacks can honestly claim. Customize it endlessly based on what fruit you have, what granola you love, and how sweet you want to go.
Ingredients
- 1 cup full-fat Greek yogurt
- ½ cup mixed fresh berries (blueberries, raspberries, strawberry slices)
- ¼ cup granola
- 1 tablespoon honey
- 1 teaspoon lemon zest (optional but wonderful)
- Pinch of cinnamon
Instructions
- Spoon half the Greek yogurt into the bottom of a glass or jar.
- Add a layer of mixed berries, then sprinkle half the granola over the top.
- Add the remaining yogurt as the next layer.
- Top with the rest of the berries and granola.
- Drizzle honey generously over the entire parfait.
- Zest a little lemon over the top if using, then dust lightly with cinnamon.
- Serve immediately for maximum crunch, or refrigerate (without granola) and add the granola just before eating.
How to Serve It
Use a wide-mouth mason jar for a portable version you can take to the office or a picnic. The layers look beautiful through the glass and the lid keeps everything fresh. For a more special presentation, use a wine glass and top with a single whole strawberry or a sprig of mint. In fall and winter, swap fresh berries for warm roasted stone fruits or a spoonful of apple butter for a cozy seasonal version that feels completely different from the summer original.
5. Mini Caprese Skewers
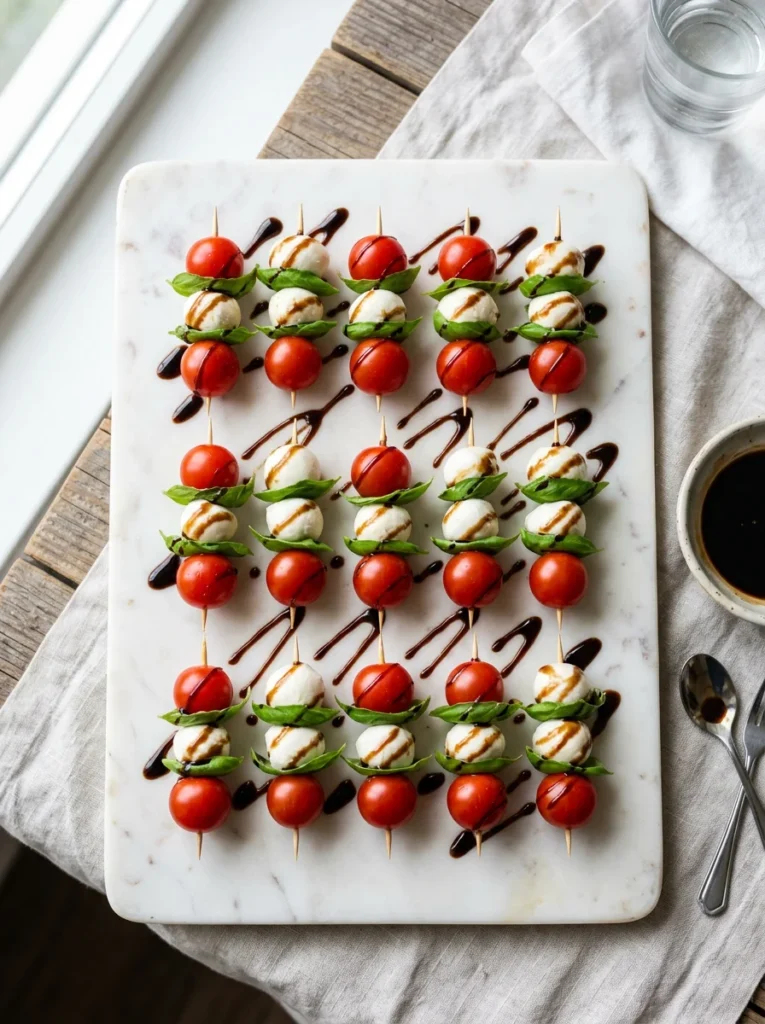
Few things in the snack world are as effortlessly beautiful and reliably crowd-pleasing as mini Caprese skewers; they are the kind of thing that disappears from a party platter within minutes because they look fancy, taste genuinely fresh, and require exactly zero cooking skill to pull together. The combination of creamy mozzarella, sweet ripe cherry tomatoes, and fragrant fresh basil is one of those flavor pairings that has existed for centuries because it is simply perfect, and threading everything onto a little skewer just makes it even more fun to eat. A drizzle of good balsamic glaze adds a sticky, slightly sweet-tart finish that ties the whole bite together and makes each skewer feel like it was made by someone who knows what they are doing, which, after making this once, you genuinely will.
Ingredients
- 20 fresh mozzarella balls (ciliegine or bocconcini)
- 20 cherry tomatoes
- 20 fresh basil leaves
- 3 tablespoons good quality olive oil
- 2 tablespoons balsamic glaze
- Flaky sea salt and cracked black pepper
- 20 mini wooden skewers or toothpicks
Instructions
- Drain and gently pat dry the mozzarella balls.
- Thread each skewer in this order: one basil leaf (folded), one cherry tomato, one mozzarella ball.
- Arrange all assembled skewers on a large serving board or plate.
- Drizzle olive oil evenly over all the skewers.
- Drizzle balsamic glaze over the top in a back-and-forth motion.
- Finish with a good pinch of flaky sea salt and freshly cracked black pepper.
- Serve within 30 minutes of assembling for the freshest flavor.
How to Serve It
Lay these across a wide marble board alongside extra basil leaves and a small bowl of extra balsamic glaze for dipping. For a summer party, add thin slices of fresh peach or watermelon to the skewer for a sweet twist that plays beautifully against the salty cheese. In winter, swap cherry tomatoes for roasted grape tomatoes (five minutes under the broiler) for a warmer, deeper flavor profile that feels more seasonal. These are also wonderful tucked into lunchboxes, keep the olive oil and glaze separate in a tiny container and drizzle at the table.
6. Almond Butter Apple Slices
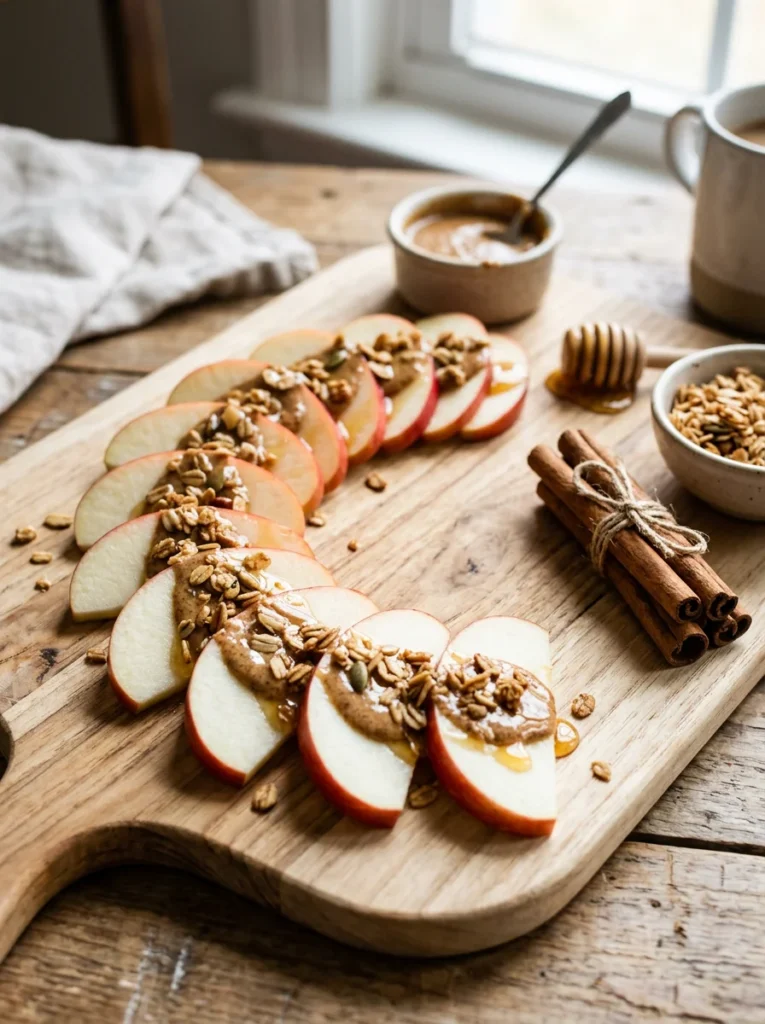
This snack is genuinely one of the oldest tricks in the book, but the combination of crisp, juicy apple and rich, nutty almond butter is one that never stops working it hits sweet, crunchy, creamy, and satisfying all at once, in a way that feels snack-worthy and nourishing in equal measure. What makes this version a step above the basics is the finishing touches: a scattering of granola or hemp seeds adds extra texture, a light drizzle of honey deepens the sweetness, and a dusting of cinnamon ties everything together into something that tastes intentional rather than thrown together. Almond butter gives you healthy monounsaturated fats and a solid hit of protein that pairs with the apple’s natural fiber to create a snack that keeps blood sugar stable and energy consistent, a rarity in the snack world, and something your body will thank you for on a long afternoon.
Ingredients
- 2 large apples (Honeycrisp or Fuji work beautifully)
- ¼ cup smooth almond butter
- 2 tablespoons granola or hemp seeds
- 1 tablespoon honey
- ½ teaspoon ground cinnamon
- Juice of ½ lemon (to prevent browning)
Instructions
- Core the apples and slice each one into 8 even wedges.
- Toss the slices immediately with fresh lemon juice and toss to coat this keeps them from browning.
- Arrange the apple slices in a fan shape or in neat rows on a cutting board or plate.
- Spoon about 1 teaspoon of almond butter onto the flat side of each slice.
- Sprinkle granola or hemp seeds generously over the top.
- Drizzle honey lightly across the whole arrangement.
- Finish with a pinch of cinnamon over everything and serve immediately.
How to Serve It
For kids, set up a small “dipping station” with almond butter in a bowl and apple slices. They love the interactive element and tend to eat more when they build it themselves. In fall, swap honey for a drizzle of warm caramel sauce and add a sprinkle of finely chopped walnuts for a snack that tastes like apple pie in the best possible way. For a more grown-up presentation, dust lightly with cardamom instead of cinnamon and serve alongside a small square of sharp cheddar for a sweet-savory flavor combination that is genuinely sophisticated.
7. Hummus and Veggie Rainbow Cups
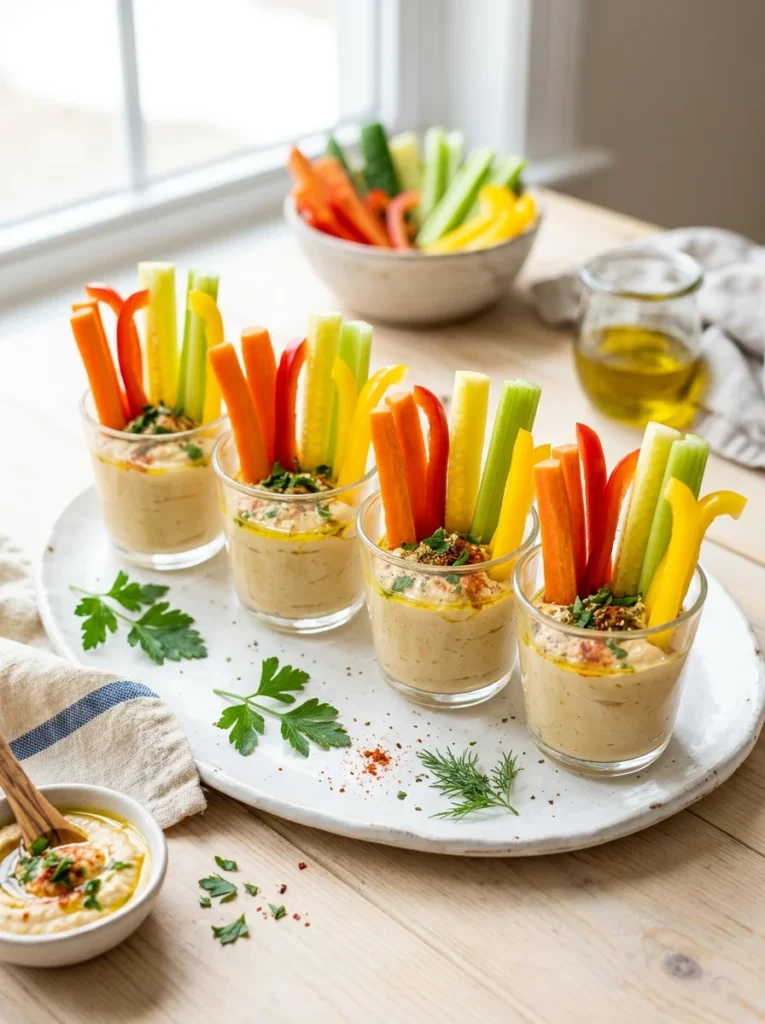
Hummus and veggie cups are the ultimate prep-ahead snack. You can assemble four or five of them in under ten minutes on a Sunday, stick them in the fridge, and have a genuinely satisfying grab-and-go snack waiting for you every single day of the week. What makes this version particularly good is the cup format, which keeps the hummus contained and the vegetables standing upright so they stay crisp and don’t get soggy sitting in moisture, a detail that sounds minor but makes a real difference when you are reaching for a snack at 3pm and want something that still tastes fresh. The veggie rainbow concept is also a quiet win for nutrition: hitting multiple colors in one snack means you are pulling in a wide spectrum of vitamins and antioxidants without having to think about it. Keep a batch of these cups in the fridge at eye level and you will genuinely reach for them first.
Ingredients
- 1 cup store-bought or homemade hummus
- 2 medium carrots, peeled and cut into sticks
- 1 red bell pepper, cut into strips
- 1 yellow bell pepper, cut into strips
- 3 celery stalks, cut into sticks
- ½ English cucumber, cut into spears
- Olive oil and smoked paprika, for finishing
- 4 small clear cups or jars
Instructions
- Divide the hummus evenly among the four cups about ¼ cup per cup.
- Smooth the top of each hummus portion with the back of a spoon.
- Drizzle a small amount of olive oil over the surface of the hummus in each cup.
- Dust lightly with smoked paprika.
- Sort the cut vegetables by color and stand them upright in each cup, arranging by color for a rainbow effect.
- Press the vegetables in firmly enough so they stay standing without falling over.
- Cover loosely with plastic wrap and refrigerate. Best consumed within 3 days.
How to Serve It
Set these out at a party without any explanation guests immediately understand what to do and the visual impact is genuinely impressive for how little effort they took. For kids’ lunchboxes, swap the spears for smaller, easier-to-handle sticks and add a few cherry tomatoes tucked around the edges. Swap the hummus base for tzatziki or white bean dip for a variation that keeps the same format but delivers a completely different flavor experience. In summer, add strips of jicama or watermelon radish for a beautiful pop of color that also brings a lovely crunch.
8. Cheese and Seed Crackers
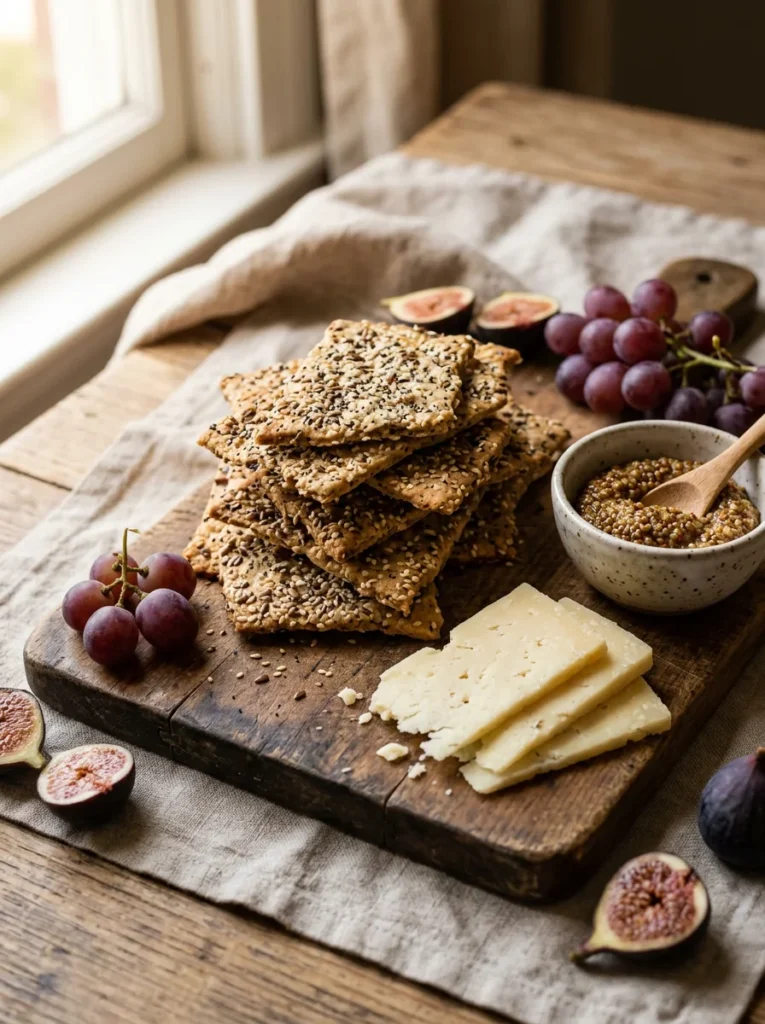
Homemade seed crackers are one of those things that sound ambitious but are genuinely straightforward once you try them they come together in about 40 minutes, require almost no technique, and produce something far better than anything that comes in a box: thin, crispy, deeply savory, and covered in seeds that toast to a nutty intensity in the oven that no commercial cracker ever quite captures. This recipe uses a mix of sesame, poppy, and sunflower seeds for depth of flavor and visual texture, all bound together with a simple mixture of flour, olive oil, and water. The cheese pairing makes these a proper snack, something with enough weight and interest to carry you from lunch to dinner without the desperate hunger that comes from eating something lighter and less substantial. Once you have the base cracker down, it becomes one of those recipes you make on repeat.
Ingredients
- 1 cup all-purpose flour
- ½ teaspoon salt
- 3 tablespoons olive oil
- ¼ cup cold water (plus more if needed)
- 2 tablespoons sesame seeds
- 1 tablespoon poppy seeds
- 2 tablespoons sunflower seeds
- ½ teaspoon garlic powder
- Aged cheddar or manchego, for serving
- Whole grain mustard or fig jam, for serving
Instructions
- Preheat the oven to 375°F (190°C). Line two baking sheets with parchment paper.
- In a bowl, combine flour, salt, garlic powder, and all seeds. Stir to mix.
- Add olive oil and stir until the mixture resembles coarse crumbs.
- Add cold water one tablespoon at a time, mixing until the dough just comes together. It should not be sticky.
- Divide the dough in half. Roll each half between two sheets of parchment paper as thin as possible about 1–2mm.
- Slide onto prepared baking sheets. Score into rectangles or rough shapes with a knife or pizza cutter.
- Bake for 18–22 minutes until golden brown and crisp. Watch closely in the last few minutes.
- Cool completely on the pan and they will continue to crisp as they cool.
How to Serve It
Arrange broken crackers on a wooden board with thin slices of aged cheddar, a small pot of whole-grain mustard, and a handful of grapes or dried figs for a snack that is absolutely worthy of company. Pair with a sharp blue cheese and a drizzle of honey for something more adventurous. These crackers keep well in an airtight container for up to five days, making them a brilliant make-ahead option. For a holiday cheese board, double the batch and tie portions in parchment paper with twine as a simple, thoughtful homemade gift.
9. Mango Chili Fruit Skewers
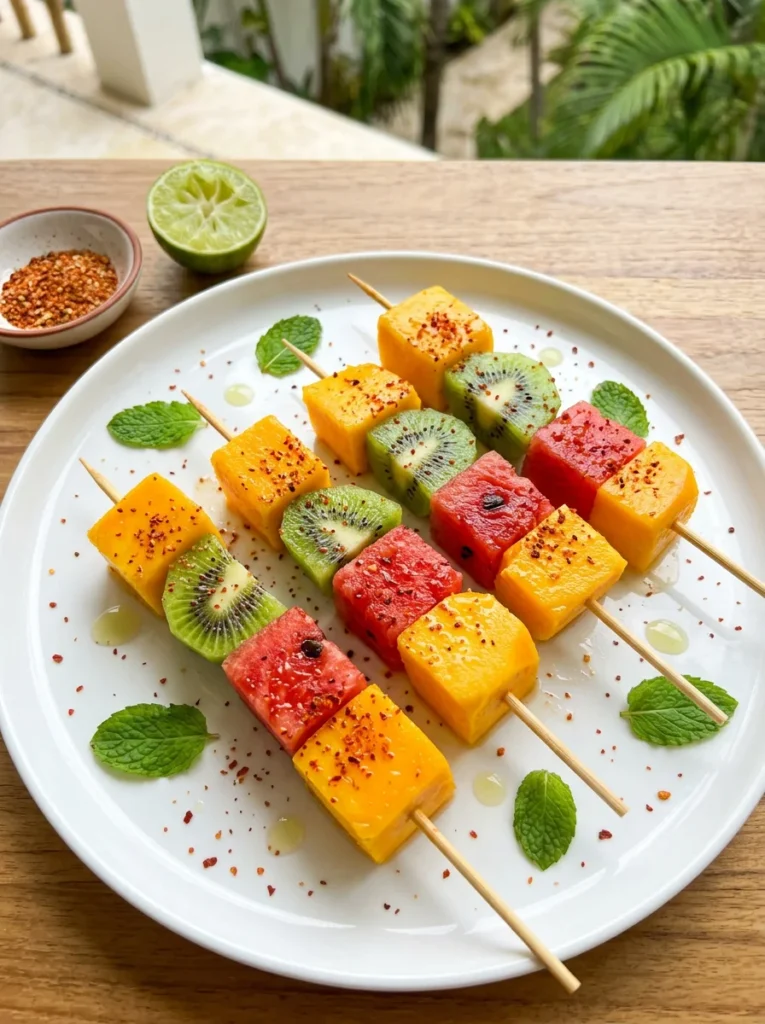
Mango chili fruit skewers are a snack that captures something genuinely exciting: the contrast between ice-cold sweet fruit and the slow, building heat of chili powder, brightened with lime, is a combination that wakes up your palate and makes you want another skewer immediately. This is a popular street food across South Asia and Latin America, and once you try it, you will understand completely why it is one of those flavor pairings that is so immediately satisfying and surprising that it feels less like a snack and more like a small experience. The assembly is fast, the ingredients are minimal, and the payoff is enormous both in flavor and in visual impact. These are refreshing in summer heat, naturally hydrating from the high water content of the fruit, and genuinely fun to eat, which matters more than people usually admit when choosing snacks.
Ingredients
- 2 ripe mangoes, peeled and cubed
- 2 cups watermelon, cubed
- 2 kiwis, peeled and sliced into half-moons
- 1 teaspoon chili powder (Tajín works wonderfully)
- Juice of 1 lime
- 1 tablespoon honey (optional)
- Fresh mint leaves, for garnish
- 12 wooden skewers
Instructions
- Cut all fruit into roughly equal-sized bite-size pieces so they thread evenly.
- Thread each skewer with alternating pieces of mango, watermelon, and kiwi about 3–4 pieces per skewer.
- Lay completed skewers on a large plate or tray.
- Squeeze fresh lime juice generously over all the skewers.
- Dust evenly with chili powder, go lighter first, then add more to taste.
- If using, drizzle a little honey across the top for extra sweetness.
- Scatter a few torn fresh mint leaves over the platter and serve immediately.
How to Serve It
Serve these straight from the fridge for the most refreshing experience cold fruit with warm chili spice is especially striking in contrast. For a party, stand the skewers upright in a tall glass or vase with crushed ice at the bottom to keep them cold and create a stunning visual centerpiece. In winter, swap watermelon for pineapple and add a dusting of cinnamon alongside the chili for a warmer, more complex flavor profile. A small bowl of extra lime wedges on the side lets guests adjust acidity to their own taste, which is a small touch that guests always appreciate.
Conclusion
There you have nine quick snack recipes that prove you do not need a lot of time, skill, or a fancy pantry to eat well between meals. From the no-bake energy balls you can make in five minutes to the showstopping mango chili skewers that steal the spotlight at any gathering, every recipe here is designed to work for real life: fast, flexible, and genuinely delicious. Save a few of your favorites to your recipe folder, pick one to try this week, and share this list with a friend who is always saying they have nothing good to eat at home. Your future hungry self will be glad you did.
Leave a Reply