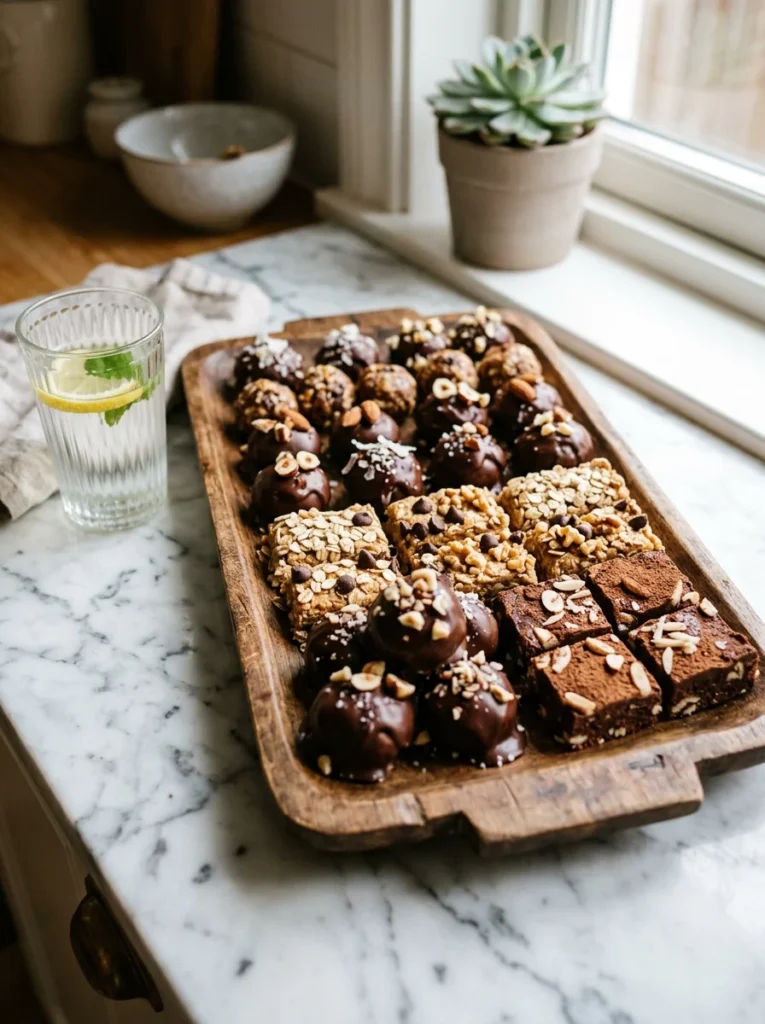
Some days call for a snack that comes together in minutes, no oven required, and that’s exactly what this list is built for. Whether you’re packing lunches, prepping for a busy week, or just craving something sweet without turning on the stove, these nine no-bake recipes use simple pantry staples and a little chill time to deliver real results. Each one is quick, kid-friendly, and easy to customize with whatever you have on hand. Grab a mixing bowl and let’s get started.
1. No Bake Peanut Butter Energy Bites
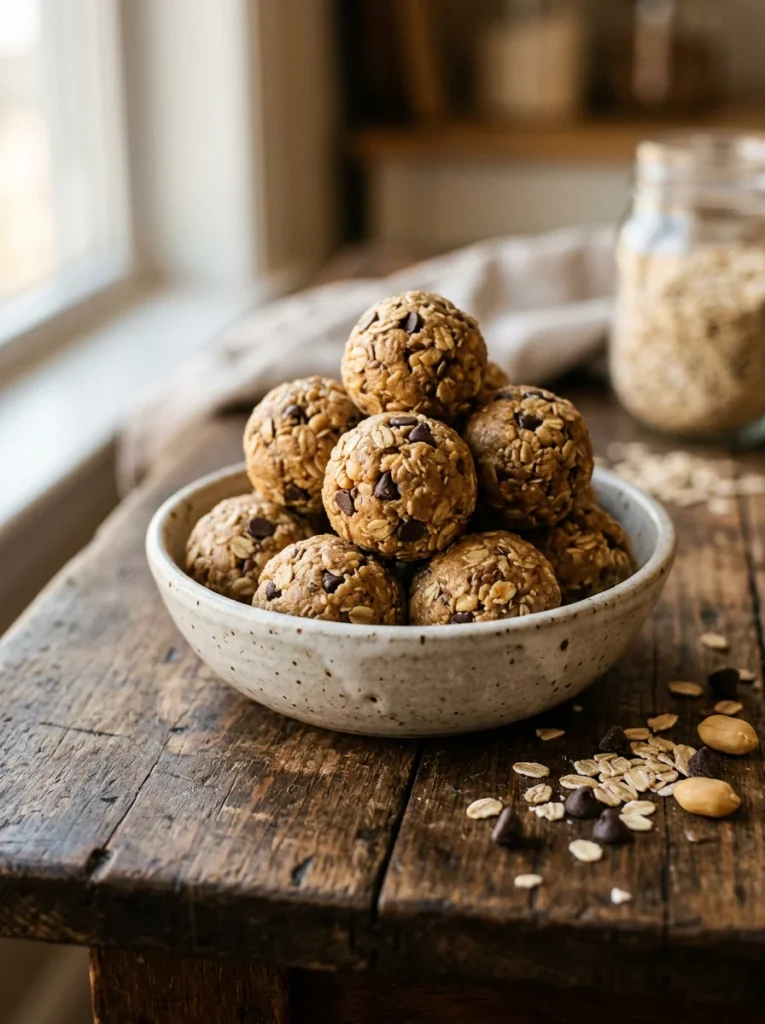
These energy bites have become a favorite for anyone who wants a quick, filling snack that doesn’t require any cooking at all, just a bowl, a spoon, and a few minutes of rolling. Peanut butter and oats form a sturdy base that holds everything together, while honey adds natural sweetness and helps bind the mixture without any added sugar. Mini chocolate chips throughout give each bite a little extra reason to reach for seconds. They’re easy to make ahead and store well in the fridge for busy mornings or afternoon slumps. Once you taste how simple and satisfying these are, they tend to become a regular fixture in the snack rotation.
Ingredients
- 1 cup rolled oats
- 1/2 cup creamy peanut butter
- 1/3 cup honey
- 1/2 cup mini chocolate chips
- 1/4 cup ground flaxseed
- 1 teaspoon vanilla extract
- Pinch of salt
Instructions
- In a large bowl, combine the oats, peanut butter, honey, ground flaxseed, vanilla extract, and salt.
- Stir until everything is evenly mixed and the mixture holds together when pressed.
- Fold in the mini chocolate chips.
- Cover the bowl and refrigerate the mixture for 20 to 25 minutes to firm up slightly, which makes rolling easier.
- Scoop out tablespoon-sized portions and roll into balls using your palms.
- Place the finished bites on a parchment-lined tray and chill in the refrigerator for at least 30 minutes before serving.
- Store in an airtight container in the fridge for up to a week.
How to Serve It
Serve these energy bites chilled, straight from the fridge, for the firmest texture and best bite. A light dusting of shredded coconut or crushed nuts rolled onto the outside adds extra flavor and a nice visual touch. Pack a few in a small container for lunches, road trips, or post-workout snacking. For a dessert-style presentation, drizzle the tops with melted chocolate and let it set before serving. They also pair nicely with a glass of cold milk or a cup of coffee for an afternoon pick-me-up.
2. No Bake Chocolate Oat Bars
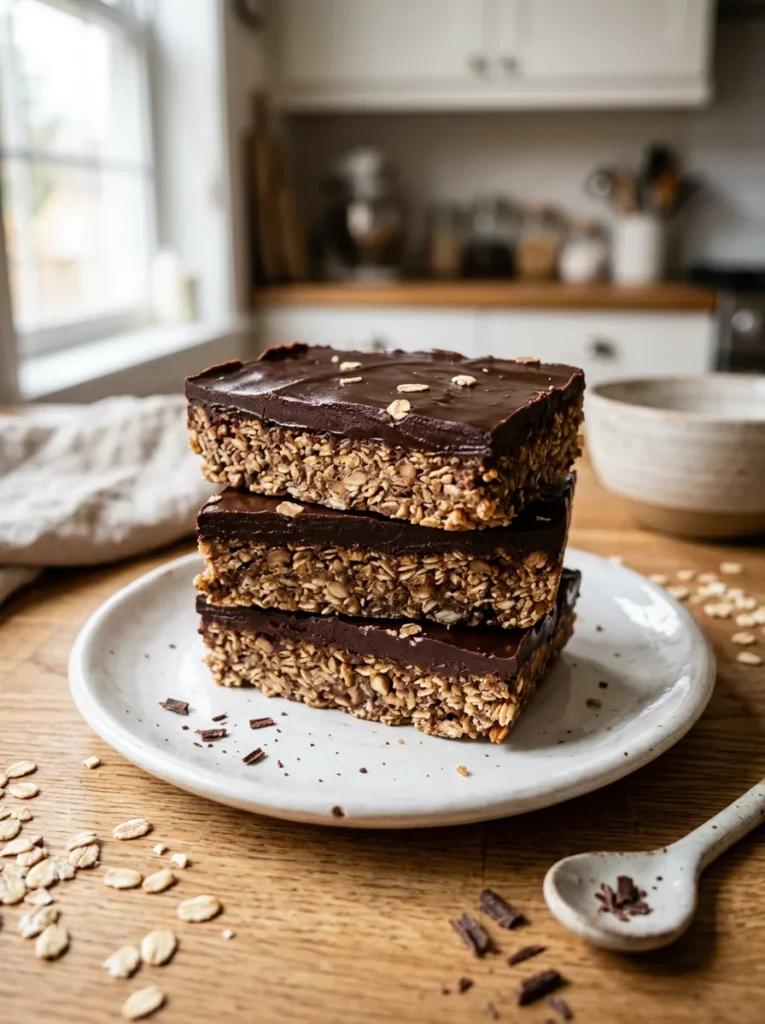
These chocolate oat bars come together with just a stovetop pot and a baking dish, no oven needed, making them a great option when you want something rich and chocolatey without heating up the kitchen. A simple syrup made from butter, brown sugar, and cocoa powder gets poured over toasted oats, creating a dense, chewy bar that firms up nicely in the fridge. The chocolate flavor is deep and satisfying without being overly sweet, and the texture holds together well for slicing into neat squares. These bars travel well, making them a smart choice for lunchboxes or office snacks. Once they’re chilled and cut, they look just as good as anything from a bakery case.
Ingredients
- 3 cups rolled oats
- 1/2 cup unsalted butter
- 1/2 cup brown sugar
- 1/3 cup honey
- 1/4 cup unsweetened cocoa powder
- 1 teaspoon vanilla extract
- 1/4 teaspoon salt
- 1/2 cup chocolate chips, for topping
Instructions
- Line an 8-inch square baking dish with parchment paper.
- In a saucepan over medium heat, melt the butter with the brown sugar and honey, stirring until smooth.
- Whisk in the cocoa powder and salt, then remove the pan from the heat and stir in the vanilla extract.
- Pour the mixture over the rolled oats in a large bowl and stir until fully coated.
- Press the oat mixture firmly and evenly into the prepared baking dish.
- Melt the chocolate chips in 20-second bursts in the microwave, stirring between each, then spread evenly over the oat layer.
- Refrigerate for at least 1 hour, or until firm, before slicing into bars.
- Store in the refrigerator in an airtight container for up to one week.
How to Serve It
Cut these bars into squares or rectangles and serve them slightly chilled for the cleanest slices and firmest bite. A sprinkle of flaky sea salt over the chocolate layer brings out the richness and balances the sweetness. They pair well with a cold glass of milk or a scoop of vanilla ice cream on the side for a dessert-style treat. For gifting, wrap individual bars in parchment and tie with twine. Store leftovers in the fridge and let them sit at room temperature for a few minutes before serving for the best texture.
3. No Bake Coconut Macaroons
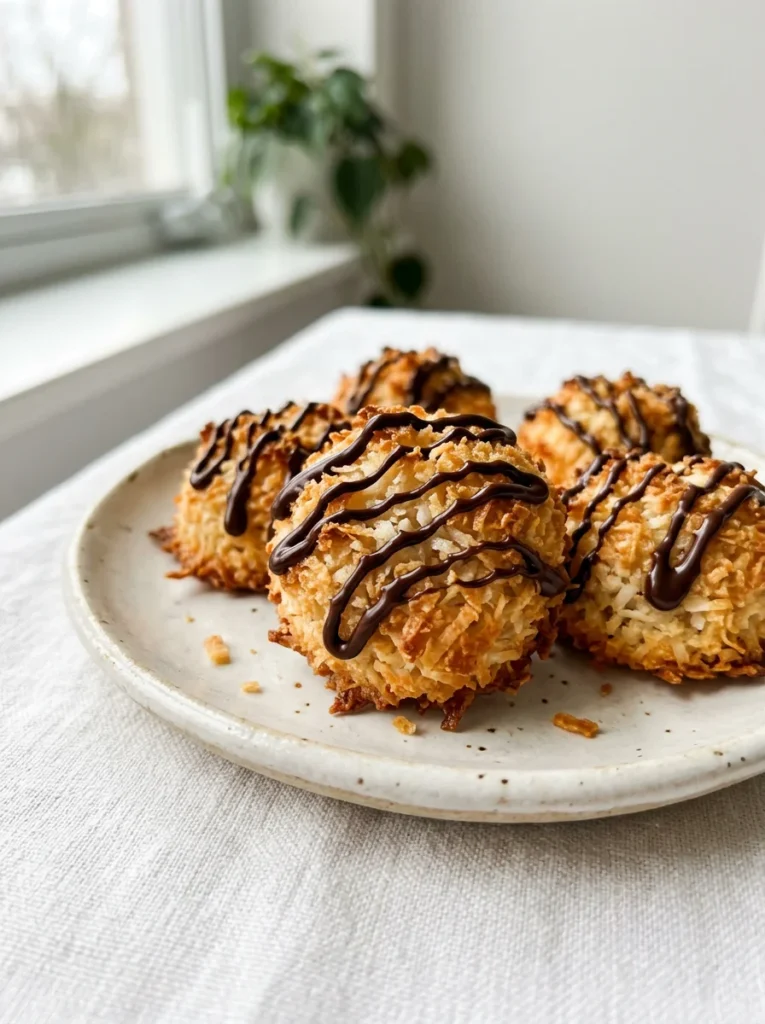
Traditional macaroons usually require an oven, but this no-bake version uses a quick stovetop method to bind the coconut together, resulting in a soft, chewy treat that sets up perfectly in the fridge without ever touching a baking sheet. Sweetened condensed milk acts as the glue here, giving the macaroons a rich, slightly caramelized flavor once everything is mixed and chilled. A dip in melted chocolate adds a nice contrast in texture and makes these feel a little more special for gatherings. They come together quickly and require very few ingredients, making them a great last-minute option. Coconut lovers tend to gravitate toward these again and again.
Ingredients
- 3 cups shredded coconut, sweetened or unsweetened
- 1 can (14 ounces) sweetened condensed milk
- 1 teaspoon vanilla extract
- 1/4 teaspoon salt
- 1/2 cup chocolate chips, for dipping
Instructions
- In a saucepan over low heat, warm the sweetened condensed milk just until it loosens slightly, about 2 minutes.
- Remove from heat and stir in the shredded coconut, vanilla extract, and salt until fully combined.
- Let the mixture cool for 10 minutes, then scoop tablespoon-sized mounds onto a parchment-lined tray.
- Shape each mound gently with your hands to form a rounded macaroon shape.
- Refrigerate the macaroons for at least 1 hour, or until firm.
- Melt the chocolate chips in 20-second bursts in the microwave, stirring between each, until smooth.
- Dip the bottom of each macaroon into the melted chocolate, or drizzle chocolate over the tops.
- Return to the fridge for 15 minutes to set the chocolate before serving.
How to Serve It
Arrange these macaroons on a small platter and serve them chilled for the best texture and cleanest bite. A light drizzle of extra melted chocolate over the tops adds a nice finishing touch for special occasions. They pair well with coffee or tea for an afternoon treat. For a festive presentation, sprinkle a few with toasted coconut flakes or crushed nuts. Store any extras in an airtight container in the fridge for up to five days.
4. No Bake Granola Bars
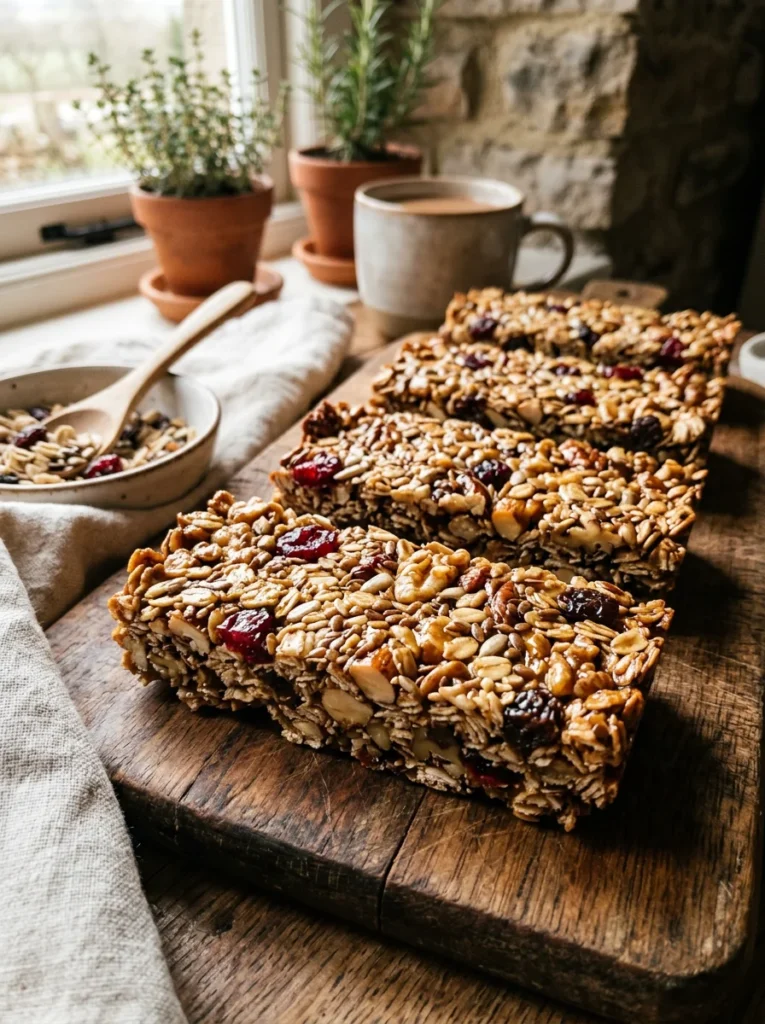
These granola bars are built for busy mornings, using a simple honey and nut butter base to hold together oats, nuts, and dried fruit into a chewy, satisfying bar that needs nothing more than a fridge to set. They’re easy to customize depending on what’s in the pantry, whether that means swapping in different nuts, seeds, or dried fruits. The bars hold their shape well once chilled, making them sturdy enough for lunchboxes or grab-and-go mornings. Unlike many store-bought versions, there’s no mystery ingredient list here, just real, simple food. Once you make a batch, it’s easy to see why homemade granola bars are worth the small effort.
Ingredients
- 2 cups rolled oats
- 1/2 cup chopped almonds
- 1/4 cup chopped dried cranberries
- 1/2 cup honey
- 1/3 cup peanut butter or almond butter
- 1 teaspoon vanilla extract
- 1/4 teaspoon salt
Instructions
- Line an 8-inch square baking dish with parchment paper.
- In a saucepan over low heat, warm the honey and nut butter together, stirring until smooth and combined.
- Remove from heat and stir in the vanilla extract and salt.
- In a large bowl, combine the oats, chopped almonds, and dried cranberries.
- Pour the warm honey mixture over the oat mixture and stir until everything is evenly coated.
- Press the mixture firmly into the prepared baking dish, smoothing the top with the back of a spoon.
- Refrigerate for at least 2 hours, or until fully firm, before slicing into bars.
- Store in an airtight container in the fridge for up to ten days.
How to Serve It
Slice these bars into even rectangles and wrap them individually for easy grab-and-go snacking throughout the week. A drizzle of melted chocolate or a sprinkle of flaky salt on top adds a nice finishing touch. They pair well with a piece of fresh fruit or a cup of yogurt for a more complete breakfast. For an extra crunch, press a few additional nuts onto the surface before chilling. Keep a batch in the fridge at all times for busy mornings when there’s no time to cook.
5. No Bake Cheesecake Bites
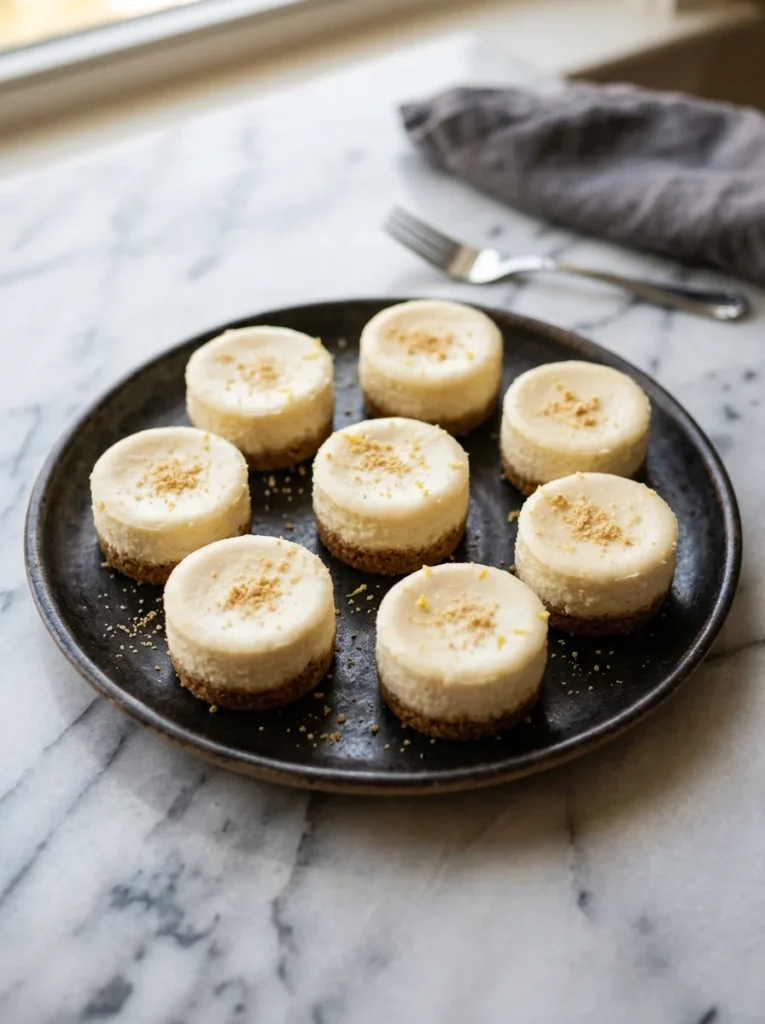
These cheesecake bites deliver all the rich, tangy flavor of a classic cheesecake without ever touching an oven, using a simple graham cracker base and a whipped cream cheese filling that sets up beautifully in the fridge. They’re portioned individually, which makes them easy to serve at parties or keep on hand for a quick dessert craving. The texture turns out smooth and creamy, much closer to traditional cheesecake than many no-bake desserts manage to achieve. A topping of fresh berries or a light drizzle of fruit sauce makes them feel a little more special without much extra work. These tend to disappear fast whenever they’re put out at a gathering.
Ingredients
- 1 1/2 cups crushed graham crackers
- 1/3 cup melted butter
- 8 ounces cream cheese, softened
- 1/2 cup powdered sugar
- 1 cup heavy whipping cream
- 1 teaspoon vanilla extract
- Fresh berries, for topping
Instructions
- Line a muffin tin with paper liners.
- In a bowl, combine the crushed graham crackers with the melted butter until evenly moistened.
- Press about a tablespoon of the crumb mixture into the bottom of each muffin liner to form a crust.
- In a separate bowl, beat the cream cheese and powdered sugar together until smooth.
- In another bowl, whip the heavy cream and vanilla extract until soft peaks form, then fold it into the cream cheese mixture.
- Spoon the cream cheese filling over each graham cracker crust, filling each liner about three-quarters full.
- Refrigerate for at least 3 hours, or until fully set, before serving.
- Top each bite with fresh berries just before serving.
How to Serve It
Remove the paper liners gently and arrange these cheesecake bites on a serving platter just before guests arrive. A light dusting of crushed graham crackers or a drizzle of fruit sauce on top adds a nice finishing touch. They pair well with a cup of coffee or a glass of dessert wine for an after-dinner treat. For variety, top half the batch with berries and the other half with a drizzle of caramel. Keep any extras stored in the fridge, since the texture is best served cold.
6. No Bake Trail Mix Clusters
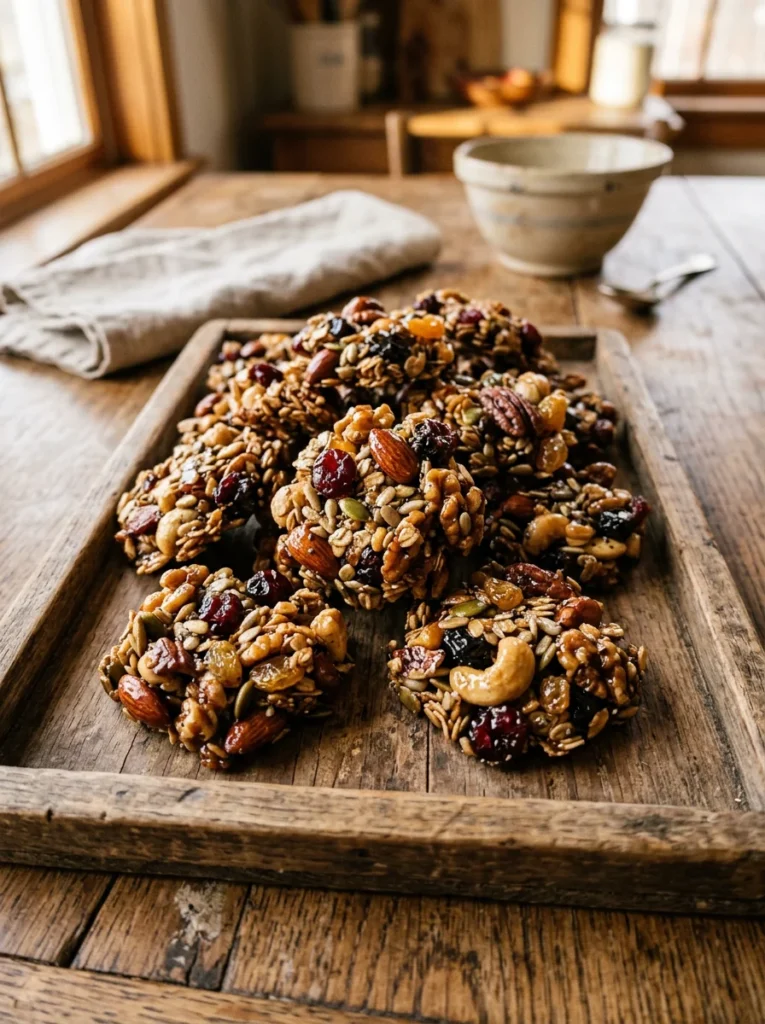
These trail mix clusters take the familiar combination of nuts, seeds, and dried fruit and bind everything together into easy-to-grab clusters using a simple honey and nut butter mixture, eliminating the loose, scattered mess of regular trail mix. They’re a great option for hiking, road trips, or simply keeping a satisfying snack on hand at home. The clusters hold together well once chilled, and the mix of textures from crunchy nuts to chewy dried fruit keeps every bite interesting. This recipe is also highly adaptable, so feel free to swap in whatever nuts or dried fruit you have available. Once you try homemade clusters, pre-packaged trail mix starts to feel a little less exciting.
Ingredients
- 1 cup mixed nuts (almonds, cashews, walnuts), chopped
- 1/2 cup pumpkin seeds
- 1/2 cup chopped dried apricots
- 1/4 cup dried cranberries
- 1/3 cup honey
- 1/4 cup almond butter
- 1/4 teaspoon cinnamon
Instructions
- Line a baking sheet with parchment paper.
- In a saucepan over low heat, warm the honey and almond butter together, stirring until smooth.
- Remove from heat and stir in the cinnamon.
- In a large bowl, combine the chopped nuts, pumpkin seeds, dried apricots, and dried cranberries.
- Pour the warm honey mixture over the nut mixture and stir until everything is evenly coated.
- Drop spoonfuls of the mixture onto the prepared baking sheet, pressing each one gently into a cluster shape.
- Refrigerate for at least 1 hour, or until firm, before separating the clusters.
- Store in an airtight container in the fridge for up to two weeks.
How to Serve It
Pile these clusters into a bowl for snacking or pack a few into small bags for an on-the-go option. A light drizzle of melted dark chocolate over the clusters adds a nice touch for a more indulgent version. They pair well alongside a piece of fresh fruit or a small cheese plate for a balanced snack spread. For outdoor trips, pack them in a reusable container to keep them from breaking apart. They also make a nice homemade gift when packed in small jars.
7. No Bake Chocolate Peanut Butter Bars
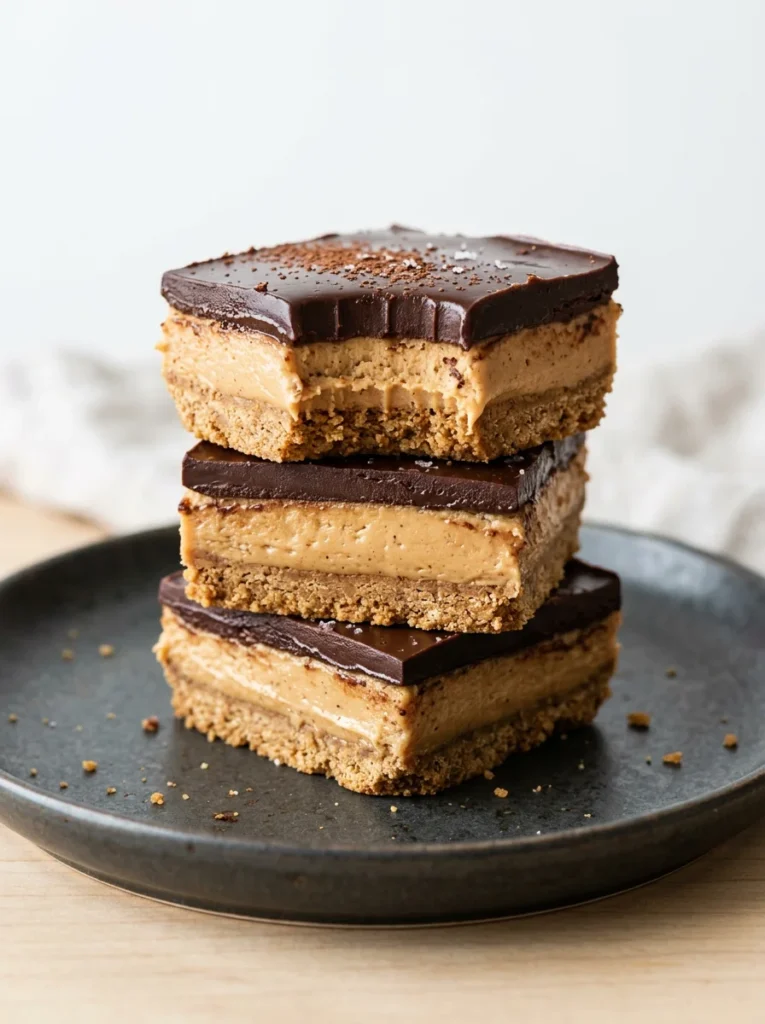
These layered bars combine a buttery graham cracker base, a thick peanut butter middle layer, and a smooth chocolate topping into one easy, no-oven dessert that tastes like a homemade version of a favorite candy bar. Each layer is simple to make on its own, and stacking them together creates a dessert that looks far more impressive than the effort required. The peanut butter layer stays soft and creamy, while the chocolate on top firms up just enough to give a satisfying snap when bitten into. These bars are rich, so smaller squares tend to go a long way. They’re a reliable choice whenever a sweet, no-fuss dessert is needed for a crowd.
Ingredients
- 1 1/2 cups graham cracker crumbs
- 1/2 cup melted butter, divided
- 1/4 cup granulated sugar
- 1 cup creamy peanut butter
- 1 cup powdered sugar
- 1 1/2 cups chocolate chips
Instructions
- Line an 8-inch square baking dish with parchment paper.
- In a bowl, combine the graham cracker crumbs, 1/4 cup of the melted butter, and granulated sugar until evenly moistened.
- Press the crumb mixture firmly into the bottom of the prepared baking dish.
- In another bowl, mix the peanut butter, remaining melted butter, and powdered sugar until smooth.
- Spread the peanut butter mixture evenly over the graham cracker layer.
- Melt the chocolate chips in 20-second bursts in the microwave, stirring between each, until smooth.
- Pour the melted chocolate over the peanut butter layer, spreading it evenly to the edges.
- Refrigerate for at least 2 hours, or until fully set, before slicing into squares.
How to Serve It
Cut these bars into small squares, since they are quite rich, and serve chilled for the cleanest slices. A light sprinkle of flaky sea salt over the chocolate layer balances the sweetness nicely. They pair well with a cold glass of milk or a scoop of vanilla ice cream for a more indulgent dessert plate. For gifting, stack squares in a small box lined with parchment paper. Keep leftovers stored in the fridge, since the layers soften at room temperature.
8. No Bake Banana Oat Cookies
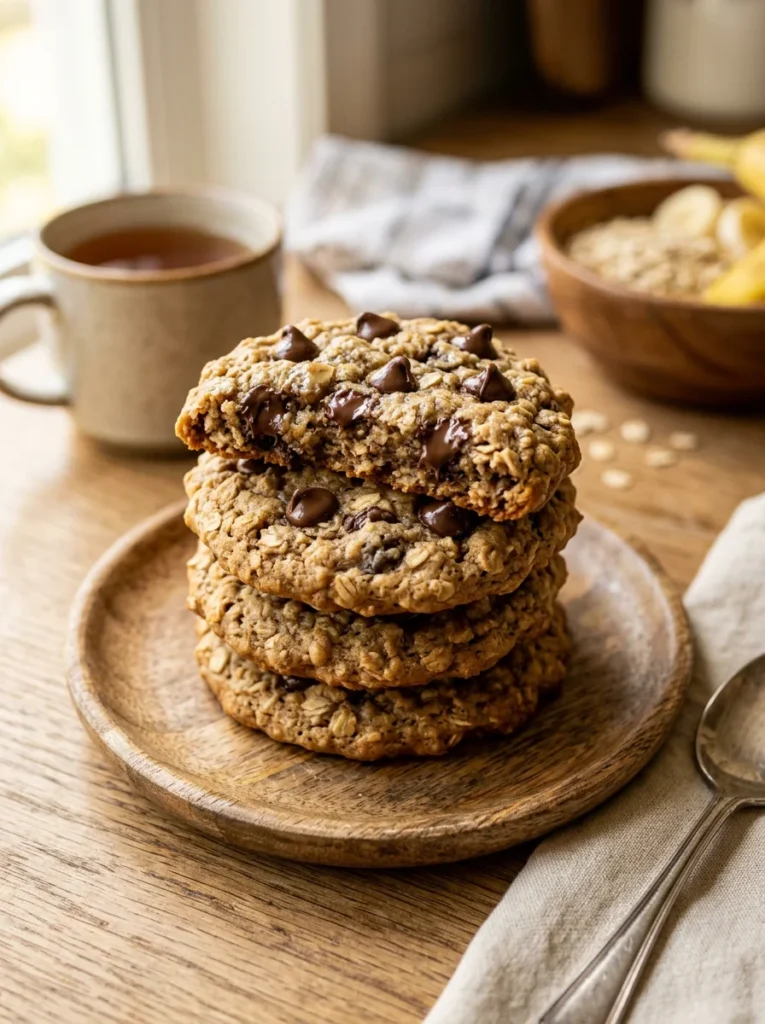
These banana oat cookies rely on ripe bananas and a quick stovetop step to bring everything together into a soft, chewy treat that sets in the fridge rather than the oven, making them a great option for a naturally sweetened snack. Mashed banana adds moisture and sweetness on its own, which means less added sugar is required compared to many traditional cookie recipes. A handful of chocolate chips or chopped nuts mixed in gives each cookie a little extra texture and flavor. These come together quickly and use ingredients most people already have at home. They’re a great option for using up overripe bananas before they go to waste.
Ingredients
- 2 ripe bananas, mashed
- 2 cups rolled oats
- 1/4 cup peanut butter
- 2 tablespoons honey
- 1/2 teaspoon cinnamon
- 1/2 cup chocolate chips or chopped walnuts
Instructions
- Line a baking sheet with parchment paper.
- In a large bowl, mash the bananas until smooth.
- Stir in the rolled oats, peanut butter, honey, and cinnamon until fully combined.
- Fold in the chocolate chips or chopped walnuts.
- Scoop rounded tablespoons of the mixture onto the prepared baking sheet, flattening each slightly with the back of a spoon.
- Refrigerate for at least 1 hour, or until firm, before serving.
- Store in an airtight container in the fridge for up to five days.
How to Serve It
Serve these cookies chilled or at room temperature, depending on preference, since the texture stays soft either way. A drizzle of melted peanut butter or honey over the tops adds extra flavor for a more dessert-like presentation. They pair well with a glass of cold milk or a cup of tea for an afternoon snack. For variety, press a few extra chocolate chips onto the tops before chilling for a prettier finish. These also work well packed into lunchboxes, since they hold up without crumbling too much.
9. No Bake Almond Date Energy Balls
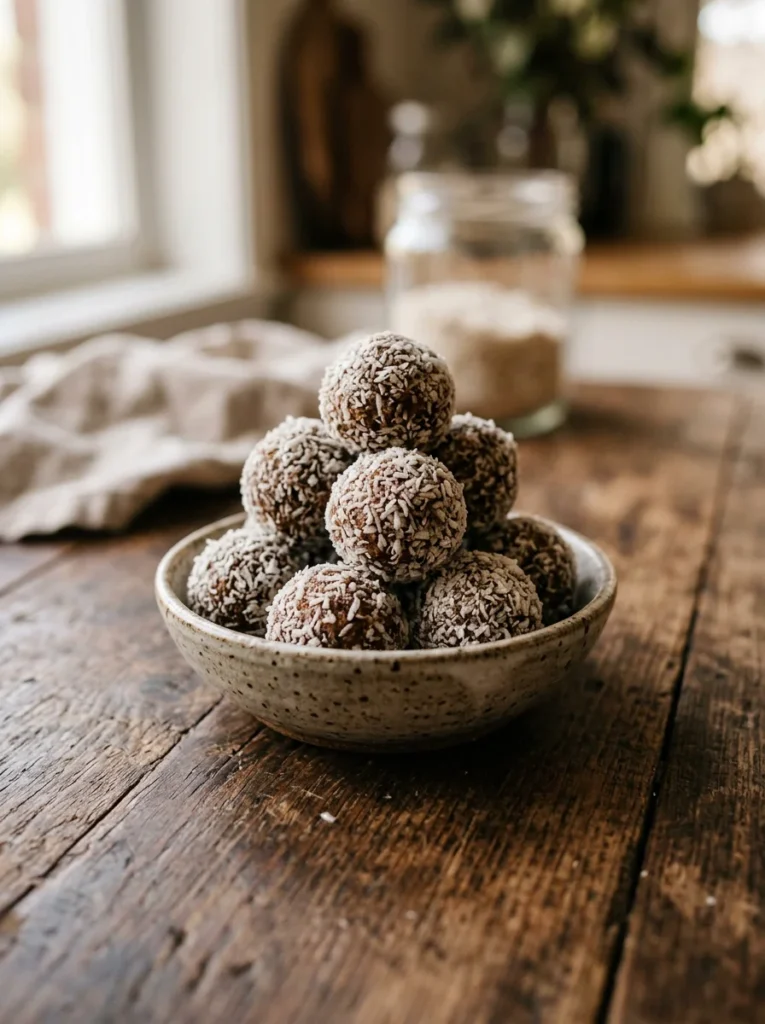
Dates bring natural sweetness and a sticky texture that makes them perfect for binding these energy balls together without any added sugar, while almonds provide a satisfying crunch and a good dose of protein. A food processor does most of the work here, breaking down the dates and almonds into a thick, moldable mixture that holds its shape once rolled. These are a great option for anyone looking for a naturally sweetened snack that still feels indulgent. A coating of shredded coconut on the outside adds texture and makes them look a little more polished. They store well and travel easily, making them a dependable snack for busy weeks.
Ingredients
- 1 cup pitted dates
- 1 cup raw almonds
- 1 tablespoon almond butter
- 1/2 teaspoon vanilla extract
- Pinch of salt
- 1/2 cup shredded coconut, for coating
Instructions
- Soak the pitted dates in warm water for 10 minutes if they feel firm, then drain well.
- Place the almonds in a food processor and pulse until finely chopped.
- Add the dates, almond butter, vanilla extract, and salt to the food processor.
- Process until the mixture forms a thick, sticky dough that holds together when pressed.
- Scoop tablespoon-sized portions and roll into balls using your palms.
- Roll each ball in shredded coconut until evenly coated.
- Refrigerate for at least 30 minutes before serving to help them firm up.
- Store in an airtight container in the fridge for up to two weeks.
How to Serve It
Serve these energy balls chilled, straight from the fridge, for the best texture and firmness. A light drizzle of melted dark chocolate over the tops adds a nice touch for a more dessert-like presentation. They pair well with a cup of coffee or tea for a mid-morning snack. For variety, roll half the batch in cocoa powder instead of coconut for a different flavor and look. Pack a few in a small container for easy snacking on busy days or after a workout.
Nine simple, no-bake snacks, each one ready in a fraction of the time a traditional recipe would take. Whether you’re craving something chocolatey, fruity, or packed with protein, there’s an option here for nearly any mood or occasion. Save this list for busy weeks, share it with friends who need quick snack ideas, and don’t be afraid to mix and match ingredients to make each recipe your own. A little time in the fridge is often all that stands between you and a homemade treat worth reaching for again and again.
Leave a Reply