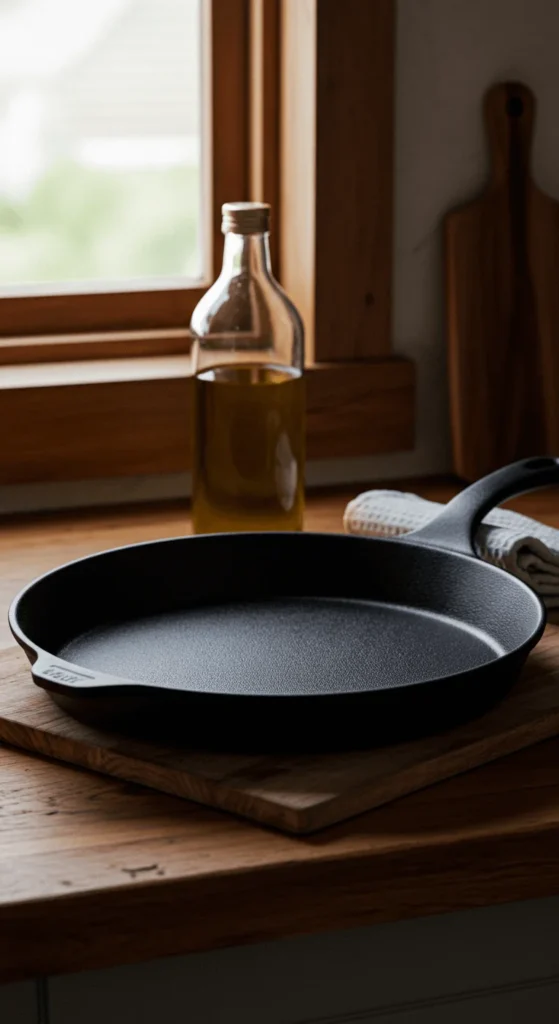
A well-seasoned cast iron pan is like a trusty old friend: it gets better with age, cooks evenly, and makes food taste incredible. Seasoning creates a natural, non-stick surface that lasts decades—if you treat it right. In this guide, you’ll learn simple, repeatable steps that turn a bare, rusty skillet into a lifetime cooking tool.
Why Seasoning Matters (Quick and Friendly)
Seasoning isn’t magic — it’s chemistry. When oil is heated on cast iron, it polymerizes and bonds to the pan’s surface, forming a hard, protective layer. That layer:
- Prevents rust
- Creates a natural non-stick surface
- Adds flavor-building patina over time
Think of seasoning as building thin, golden layers of armor — each cook and touch-up adds to the pan’s personality.
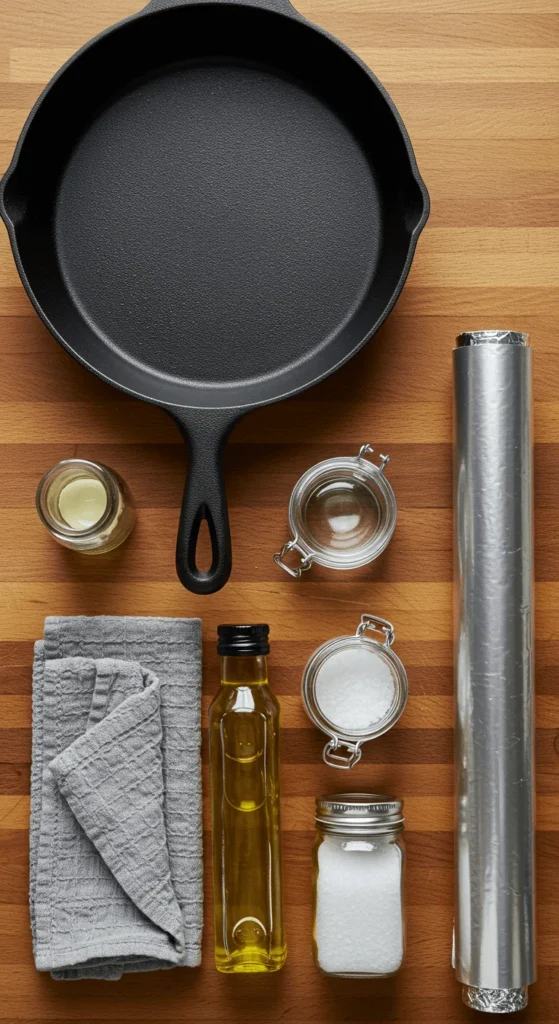
Tools & Oils You’ll Need
Keep it simple. You don’t need specialty products—just a few basics:
- Cast iron pan (clean, dry)
- Oil with a high smoke point (flaxseed, grapeseed, avocado, or refined vegetable oil)
- Paper towels or lint-free cloth
- Oven (or stovetop if you prefer)
- Aluminum foil to catch drips
- Steel wool or coarse salt (for cleaning before seasoning, if needed)
Step-by-Step: Oven Seasoning (Best for a Strong Base)
This is the classic method for building durable seasoning.
- Clean thoroughly
- If your pan is new or rusty, scrub with hot water and steel wool or coarse salt until clean. Dry completely.
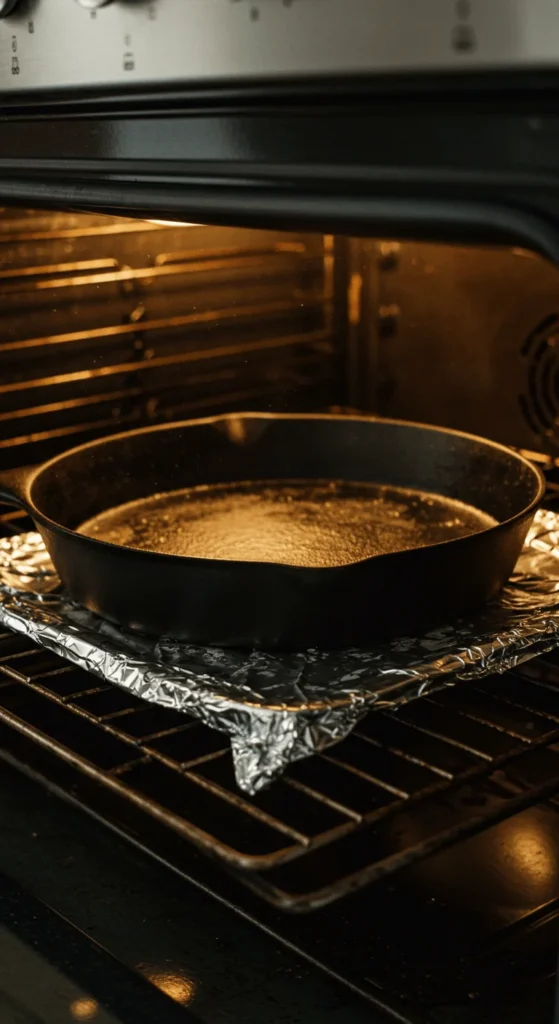
- Preheat the oven to 450–500°F (230–260°C). High heat helps polymerize the oil.
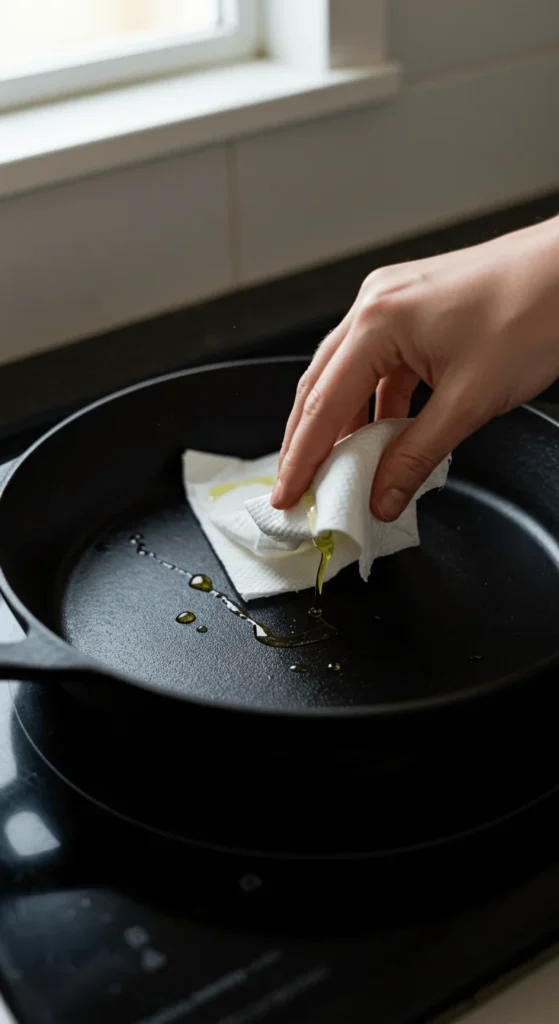
- Apply a thin layer of oil
- Pour a small amount of oil into the pan. Use a paper towel to rub a very thin, even coat over the entire surface—inside, outside, and handle. Too much oil creates sticky spots.
- Wipe excess
- Buff the surface until the pan looks almost dry. The goal is a whisper-thin film.
- Bake upside down
- Place foil on the lower rack to catch drips. Put the pan upside down on the top rack and bake for 1 hour.
- Cool in oven
- Turn off the oven and let the pan cool inside to room temperature. This prevents abrupt temperature changes.
Repeat steps 3–6 two or three times for a solid, long-lasting base layer.
Quick Stovetop Touch-Up (For Small Fixes)
If you just need to refresh the seasoning or fix sticky spots:
- Heat the pan over medium heat for a couple of minutes.
- Add a teaspoon of oil and spread it with a paper towel (use tongs).
- Keep the pan on heat until it smokes lightly, then remove and wipe off extra oil.
- Cool and store.
This method is fast and great after cooking acidic foods that may have weakened the seasoning.
Daily Care & Maintenance Habits
A little maintenance prevents big problems.
- Clean with hot water and a brush (no soap if you want to preserve seasoning). For stubborn bits, use coarse salt as a scrub.
- Dry immediately and heat briefly on the stove to evaporate moisture.
- Oil lightly after each use (a quick wipe with a thin film keeps rust away).
- Avoid soaking or long dishwasher cycles — they strip seasoning.
- Re-season lightly when food starts sticking or color dulls.
Troubleshooting: Sticky, Rusty, or Patchy?
- Sticky feel: You used too much oil when seasoning. Scrub lightly with hot water, dry, then re-season with a thinner film.
- Rust spots: Scrub off rust with steel wool, wash, dry thoroughly, and re-season with multiple oven rounds.
- Uneven color: Keep seasoning thin and repeat the oven method 2–3 times to build uniform layers.
Final Thoughts & Call-to-Action
Seasoning is simple, but consistency is the secret. A well-cared-for cast iron pan will serve you for life and often becomes a family heirloom. Start with a proper base using the oven method, keep up quick oiling after use, and re-season as needed.
Save this guide for your kitchen and try a full oven seasoning session this weekend—your future self (and pancakes) will thank you.
Leave a Reply