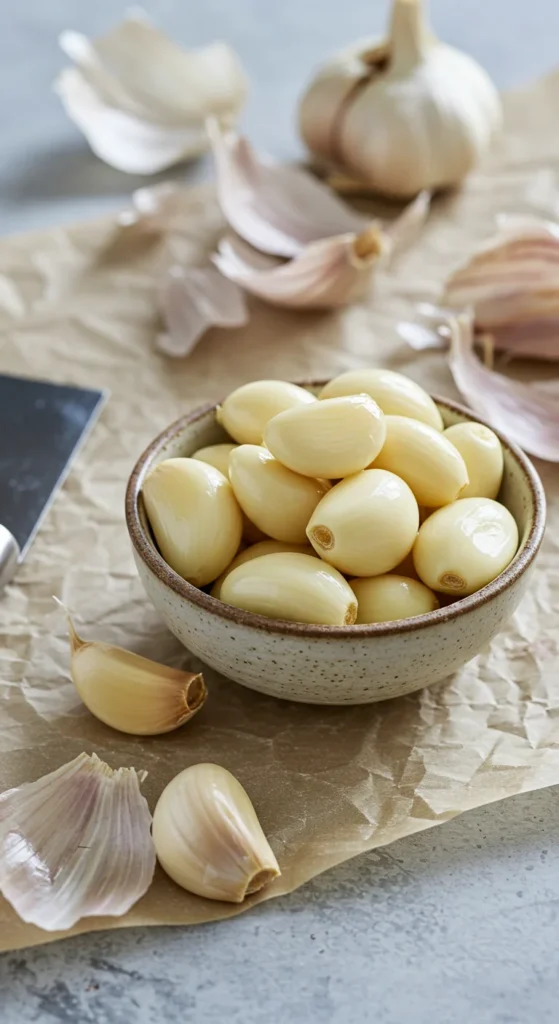
Garlic makes everything better—except the sticky fingers, papery skins, and tiny flakes that cling to your cutting board. If you’ve ever chased shards of peel across the counter, this guide is your shortcut to clean, fast cloves with zero drama.

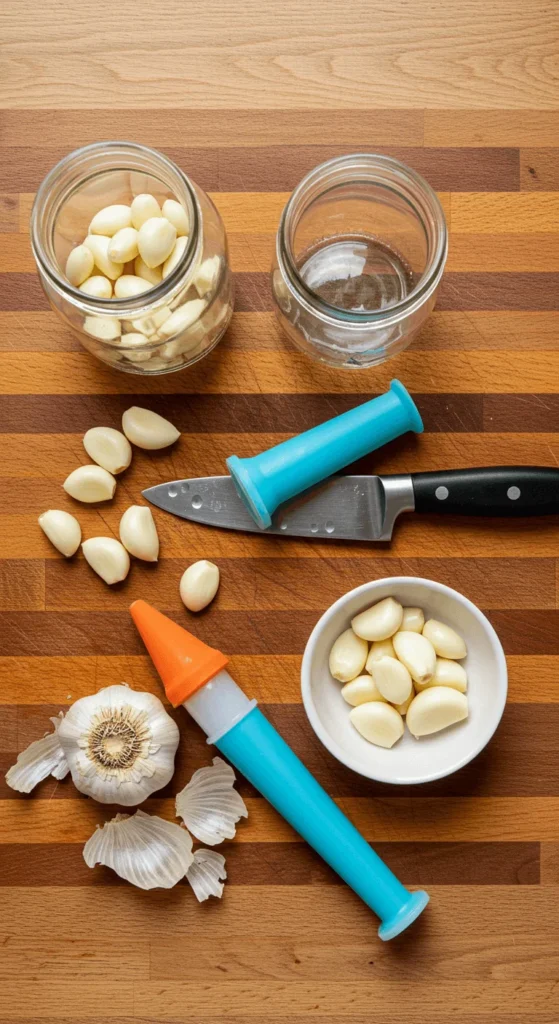
What You’ll Need (Choose Your Tools)
You don’t need fancy gadgets—just pick the method that matches what you have.
- Whole head of garlic (or loose cloves)
- Option A: Mason jar with lid (or any sturdy jar)
- Option B: Chef’s knife and cutting board
- Option C: Microwave and a small bowl
- Option D: Silicone garlic peeler tube (cheap, effective)
- Small bowl for peeled cloves, compost bin or trash for skins
Pro tip: Work near the sink and keep a damp towel handy for quick cleanup.
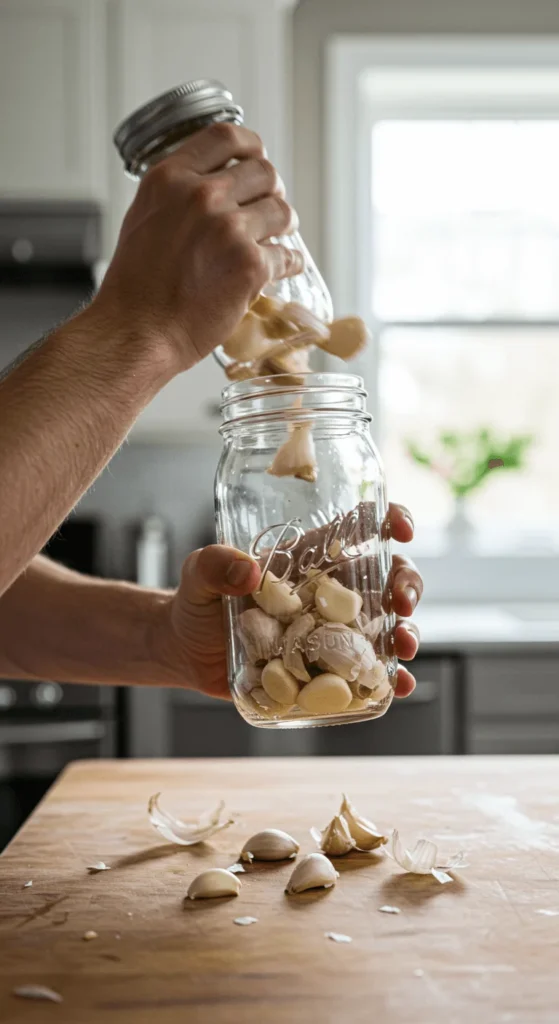
Method 1: The 10-Second Shake (Jar Trick)
This is the internet-famous hack because it works—especially when peeling a lot at once.
- Break the head: Press down with your palm to loosen cloves.
- Jar time: Toss the cloves (skins on) into a clean, dry jar.
- Shake hard: Lid on. Shake vigorously for 10–15 seconds.
- Pour & pick: Open the jar. Most cloves will be completely naked; the rest slip right out.
Why it works: The cloves slam against each other and the jar walls, loosening skins fast without smashing the garlic.
When to use: Meal prep, bulk cooking, or when you need a full head peeled in one go.
Method 2: Smash & Slide (Chef’s Knife Classic)
The pro move when you need just a few cloves—fast.
- Trim the root end of each clove (optional but helpful).
- Lay the knife flat over the clove; hold the handle firmly.
- Press down sharply with the heel of your palm to crack the skin.
- Slide skin off in one piece; discard. Done.
Why it works: A quick crush breaks the seal between clove and skin. Bonus: slightly smashed garlic releases flavor faster when cooking.
Tip: Don’t pulverize—just a firm press. If you crush too hard, the clove turns mushy.
Method 3: Quick Heat Hack (Microwave)
Heat loosens the peel so it slips right off—no shaking, minimal effort.
- Place cloves (unpeeled) in a microwave-safe bowl.
- Heat 8–10 seconds. You’ll smell a little garlic aroma—that’s your cue.
- Cool a moment, then pinch at the root end; the clove pops out.
Cautions: Don’t overheat (you’ll cook the garlic). Handle carefully—cloves can be warm.
Best for: When your jar’s in the dishwasher and you want hands-clean peeling.
Method 4: Silicone Tube Roll (Gadget That Earns Its Keep)
Simple, cheap, and weirdly satisfying.
- Drop a few cloves (unpeeled) into the tube.
- Roll with gentle pressure on the counter for 5–10 seconds.
- Tip out perfectly peeled cloves; toss skins.
Why it works: Friction + light pressure separates the papery layer without smashing the clove.
Nice for: Small batches; keeps peels contained in one spot.
Keep It Truly Mess-Free
A few small habits make cleanup almost disappear.
- Contain the skins: Peel over a large sheet of parchment or a flexible cutting mat—fold and funnel straight into the trash or compost.
- De-stick your fingers: Rub hands on stainless steel (your sink or a “steel soap” bar) under cool water to neutralize odor.
- Board cleanup: Scrape with a bench scraper or the knife’s spine to gather skins in one sweep.
- Minimal touch: Use a small bowl to catch peeled cloves as you go; keeps the board clear and tidy.
When to Use Each Method
- Bulk peeling for meal prep: Jar shake.
- One to three cloves for a quick dinner: Smash & slide.
- Hands-off, low effort: Microwave.
- Zero learning curve, minimal mess: Silicone tube.
Bonus shortcut: Buy pre-peeled garlic for high-volume cooking days—but know it loses punch faster. Fresh-peeled always tastes brighter.
Storage & Safety Tips (Read This Part!)
- Short-term: Keep peeled cloves in a sealed container in the fridge for up to 1 week.
- Longer-term: Freeze whole peeled cloves in a single layer, then bag; grate from frozen or chop after thawing.
- Garlic-in-oil safety: Storing raw garlic submerged in oil at room temperature can risk botulism. If you make garlic-in-oil, refrigerate immediately and use within a week, or freeze in small portions.
Quick Flavor Upgrades After Peeling
- Microplane magic: Finely grate a clove straight into dressings or marinades for instant emulsification.
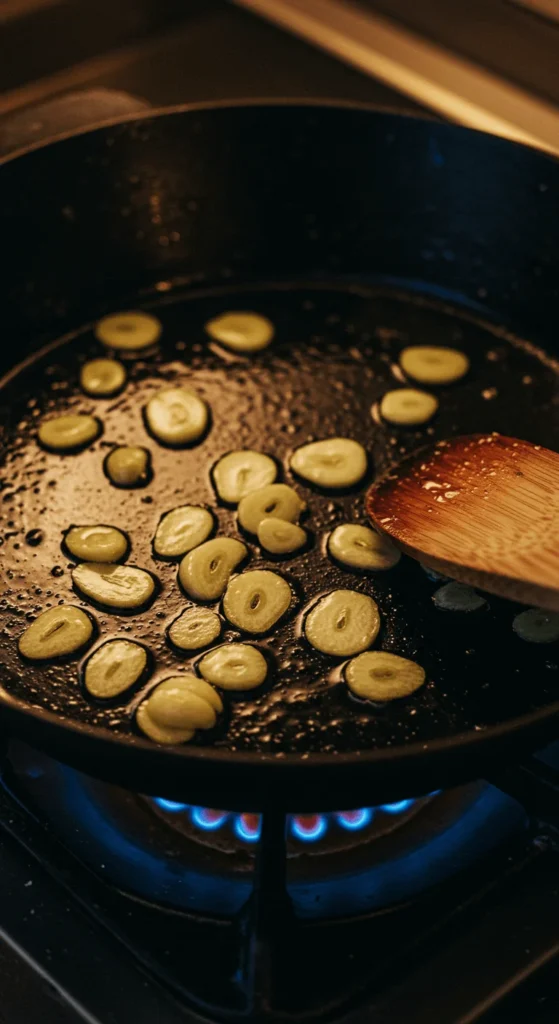
- Low-and-slow: Gently cook sliced garlic in oil until pale gold—pull it early to avoid bitterness.
- Roasted sweetness: Toss peeled cloves with oil and roast at 375°F (190°C) until soft and jammy.
Peeling garlic doesn’t need to be a chore. Pick your favorite method, keep your board tidy, and enjoy bold, clean garlic flavor in minutes—without the mess. Save this guide for later and share it with your favorite home cook!
Leave a Reply