Ever made curry that looked beautiful… but tasted flat?
You followed the recipe.
You added the spices.
And somehow it still felt like something was missing.
Here’s the truth: flavorful curry isn’t about adding more ingredients — it’s about building layers the right way.
Once you understand this method, your curry will taste rich, bold, and deeply satisfying every single time.
Let’s break it down step by step.
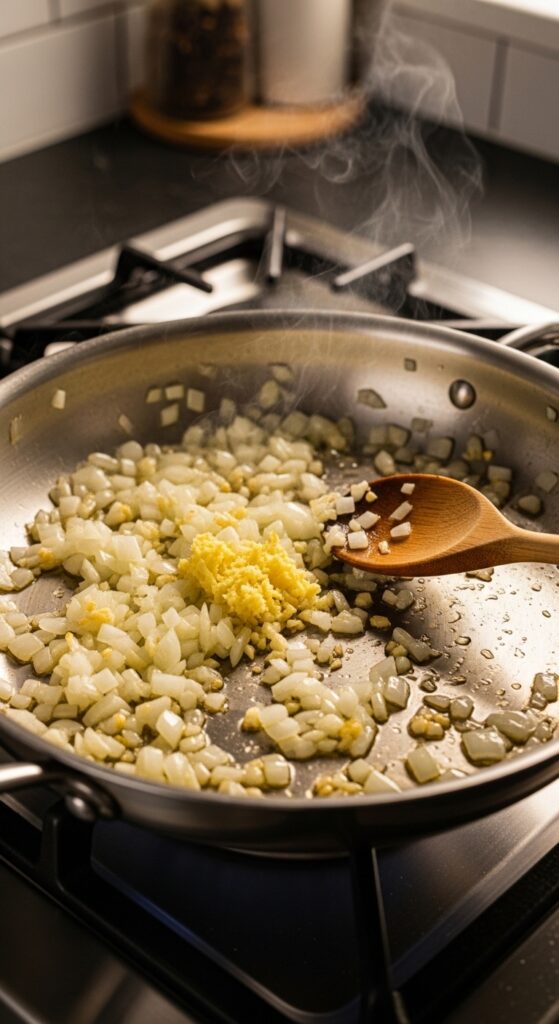
Step 1: Start With the Flavor Base (Onion, Garlic, Ginger)
Every great curry begins with aromatics.
This trio builds the foundation:
- Finely chopped onion
- Fresh minced garlic
- Fresh grated ginger
Cook them slowly in oil over medium heat for 8–10 minutes.
Don’t rush this.
You’re not just softening onions — you’re developing sweetness and depth.
If the onions are pale and watery, your curry will be too.
If they’re lightly golden and fragrant? You’re on the right track.
Step 2: Bloom the Spices (This Is the Secret)
Adding spices straight into liquid dulls their flavor.
Instead, add your dry spices directly into the hot onion mixture and toast for 30–60 seconds.
Common curry spices:
- Curry powder or curry paste
- Ground cumin
- Coriander
- Turmeric
- Garam masala
- Chili powder
Stir constantly so they don’t burn.
This “blooming” step releases essential oils and makes the spices far more aromatic.
You’ll smell the difference immediately.
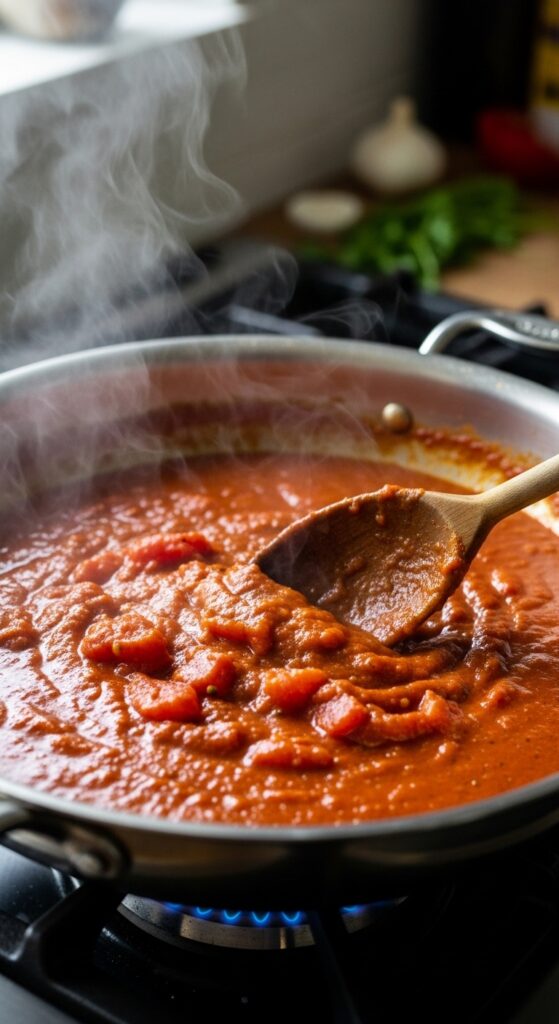
Step 3: Add Tomato for Depth
Tomatoes add acidity and richness.
You can use:
- Crushed tomatoes
- Fresh diced tomatoes
- Tomato paste (for concentrated flavor)
Let tomatoes cook down until slightly thickened and darker in color.
This removes raw acidity and deepens the flavor.
If you rush this step, your curry may taste sharp instead of balanced.
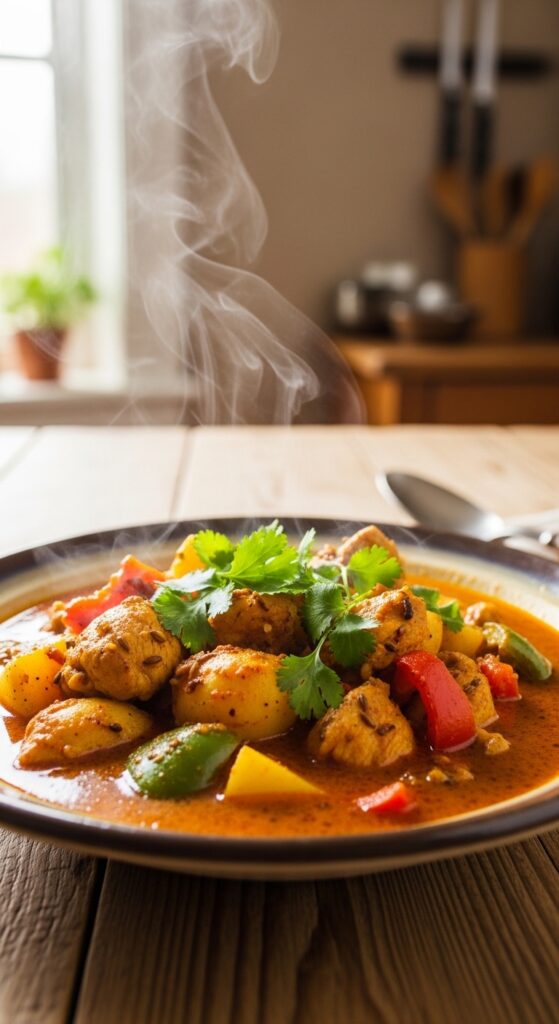
Step 4: Choose Your Protein or Vegetables
Now it’s time to build the body of your curry.
Popular options:
Protein
- Chicken thighs (stay juicy)
- Shrimp (quick cooking)
- Tofu (firm works best)
- Lentils or chickpeas
Vegetables
- Cauliflower
- Potatoes
- Bell peppers
- Spinach
Add your protein and coat it well in the spice mixture before adding liquid.
This ensures it absorbs flavor early.
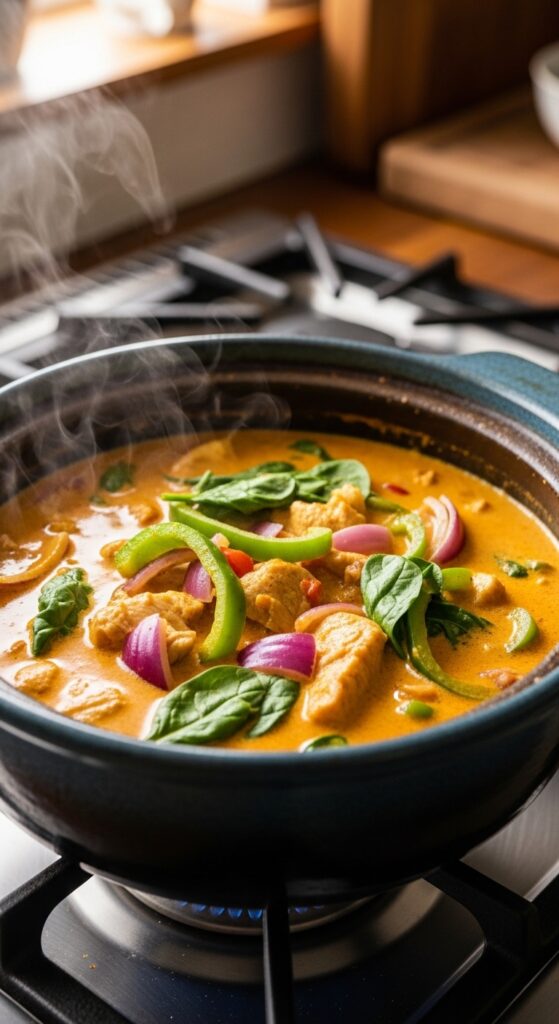
Step 5: Add Liquid and Simmer Gently
Now add your base liquid:
- Coconut milk (for creamy curry)
- Broth
- Water
- Yogurt (for tangy depth, stirred in gently)
Bring to a gentle simmer — not a rapid boil.
Simmering allows flavors to meld and ingredients to become tender.
Time guide:
- Chicken: 20–25 minutes
- Vegetables: 15–20 minutes
- Lentils: 25–30 minutes
The sauce should thicken slightly and coat the back of a spoon.
Step 6: Balance the Flavors at the End
This is what separates good curry from amazing curry.
Taste and adjust using:
- Salt (brings everything alive)
- A squeeze of lime or lemon (adds brightness)
- A pinch of sugar (balances acidity)
- Fresh herbs like cilantro
If it tastes flat, it usually needs salt or acid — not more spice.
Step 7: Let It Rest
Curry tastes even better after resting 10–15 minutes.
The flavors continue blending as it cools slightly.
It’s even better the next day — which is why curry is perfect for meal prep.
Common Mistakes to Avoid
- Not cooking onions long enough
- Skipping the spice blooming step
- Adding too much liquid
- Boiling instead of simmering
- Forgetting to adjust salt and acidity
Small details make a huge difference.
Why This Method Works
Flavorful curry comes from layers:
- Aromatics
- Bloomed spices
- Cooked-down tomatoes
- Proper simmering
- Final balance
It’s not complicated — it’s intentional.
Once you understand the flow, you can create endless variations with confidence.
Final Thoughts
Making curry that’s full of flavor isn’t about memorizing recipes.
It’s about building depth step by step.
Slow down. Toast your spices. Taste and adjust.
Do that — and your curry will never be bland again.
Save this guide for your next cozy dinner.
Or try it tonight and taste the difference for yourself. 🍛
Leave a Reply