There’s nothing more disappointing than cutting into a beautiful pie… only to find a soggy bottom or a tough, chewy crust.
But here’s the secret: flaky pie crust isn’t about luck. It’s about technique.
Once you understand a few simple rules, you can bake a bakery-worthy pie with layers so tender and crisp they practically shatter with each bite.

Let’s break it down step-by-step.
Step 1: Start with Cold Ingredients
Flakiness comes from cold butter.
When cold butter melts in the oven, it creates steam. That steam forms delicate layers inside your crust. Warm butter? No layers.
You’ll need:
- 2 ½ cups all-purpose flour
- 1 cup (2 sticks) cold unsalted butter, cubed
- 1 teaspoon salt
- 1 tablespoon sugar (optional, for sweet pies)
- 6–8 tablespoons ice water
Keep everything cold:
- Chill your butter.
- Use ice water.
- Even chill your bowl if your kitchen runs warm.
This one step makes a massive difference.
Step 2: Cut the Butter Properly
Add flour, salt, and sugar to a bowl. Toss in the cold butter cubes.
Using a pastry cutter (or your fingers), work the butter into the flour until you see:
- Pea-sized chunks
- Some slightly larger pieces
- A crumbly texture
Do not overmix.
Those visible butter pieces are what create flakiness.
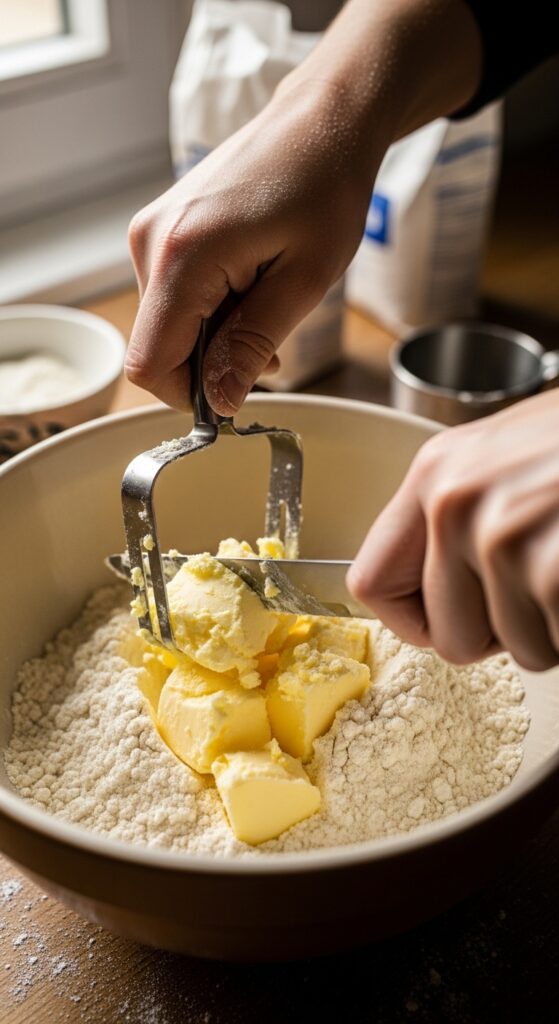
If the mixture looks like uniform sand, you’ve gone too far.
Step 3: Add Ice Water Slowly
Drizzle in ice water one tablespoon at a time.
Gently mix with a fork until the dough just begins to come together.
The dough should:
- Hold when squeezed
- Not feel sticky
- Not look wet
Stop adding water as soon as it forms clumps.
Overhydrating = tough crust.
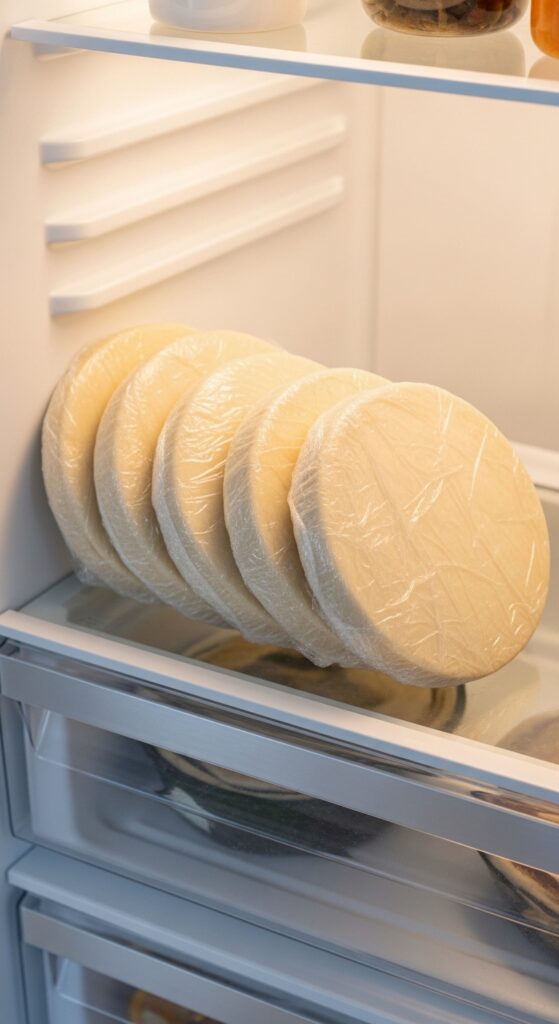
Step 4: Chill Before Rolling
Form the dough into two discs. Wrap tightly in plastic wrap.
Refrigerate for at least 30–60 minutes.
Why this matters:
- Relaxes gluten (prevents shrinkage)
- Firms up butter again
- Makes rolling easier
Skipping this step is one of the biggest mistakes beginner bakers make.
Step 5: Roll It the Right Way
Lightly flour your surface.
Roll from the center outward, turning the dough a quarter turn every few rolls. This keeps it even and prevents sticking.
Aim for:
- About 1/8-inch thickness
- A circle 2 inches larger than your pie dish
If cracks form, gently press them together. If the dough gets warm or sticky, chill it again for 10–15 minutes.
Cold dough = flaky results.
Step 6: Prevent a Soggy Bottom
For fruit pies or custard pies, moisture is the enemy.
Here’s how to avoid it:
- Preheat your oven fully.
- Place the pie on the lower rack.
- Bake on a preheated baking sheet.
- For extra protection, brush the bottom crust with egg wash before filling.
For single-crust pies, consider blind baking:
- Line crust with parchment paper.
- Fill with pie weights or dried beans.
- Bake 15–20 minutes.
- Remove weights and bake until lightly golden.
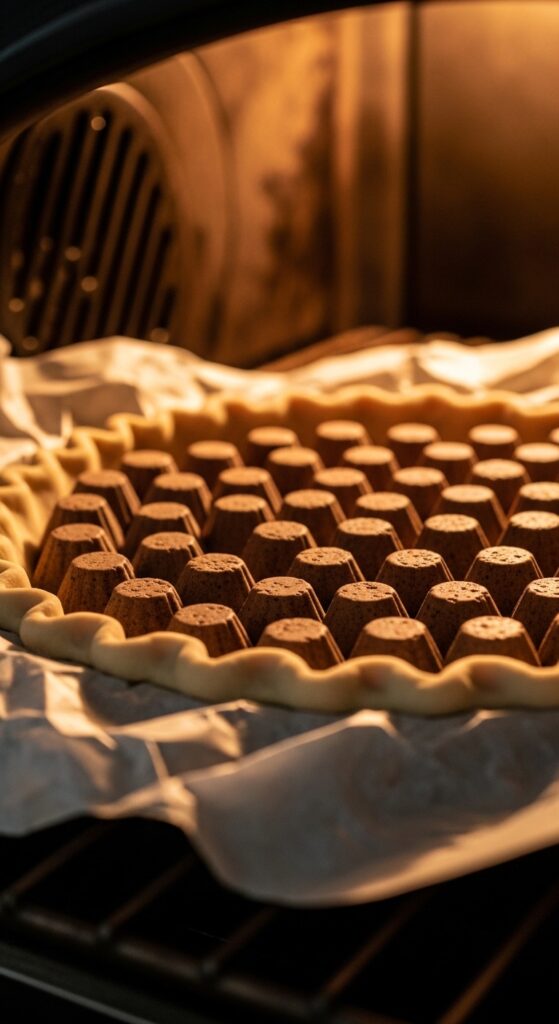
This keeps the base crisp and structured.
Step 7: Bake Until Deep Golden
A pale crust is underbaked.
Look for:
- Rich golden brown color
- Crisp edges
- Bubbling filling (for fruit pies)
If edges brown too quickly, cover them loosely with foil.
Trust color over time — ovens vary.
Common Mistakes to Avoid
Even small errors affect texture.
Using warm butter
Kills flakiness instantly.
Overworking the dough
Too much handling builds gluten → tough crust.
Skipping chill time
Leads to shrinkage and dense layers.
Adding too much flour while rolling
Can dry out the crust.
Stay gentle. Stay patient.
Pro Tips for Extra-Flaky Layers
Want bakery-level results?
Try this:
- Grate frozen butter instead of cubing.
- Fold the dough once or twice like a letter before chilling (creates extra layers).
- Brush the top crust with egg wash and sprinkle sugar for sparkle and crunch.
Small tweaks = big results.
Final Thoughts
A perfect pie with a flaky crust isn’t complicated — it’s intentional.
Cold butter.
Gentle handling.
Proper chilling.
Thorough baking.
Master these, and your pies will look beautiful and taste even better.
Bake one this weekend.
And don’t forget to save this guide for your next holiday baking day. 🥧
Leave a Reply