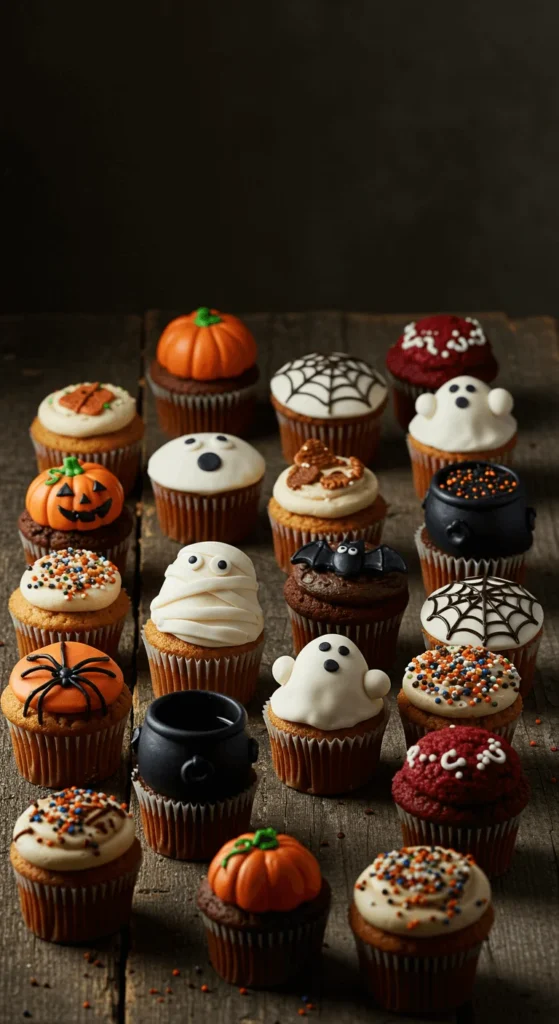
Hook your party guests with easy, eye-catching cupcakes. Quick steps. Simple tools. Wallet-friendly swaps. You’ll reuse pantry basics and a few dollar-store finds. Each idea below gives you clear actions, short ingredient notes, and low-cost decorating tricks. Pick a base flavor you like. Bake in batches. Set up a small decorating station. Then finish each theme in minutes. Your dessert table will look like a pro did it—without the stress.
Pumpkin Patch Buttercream
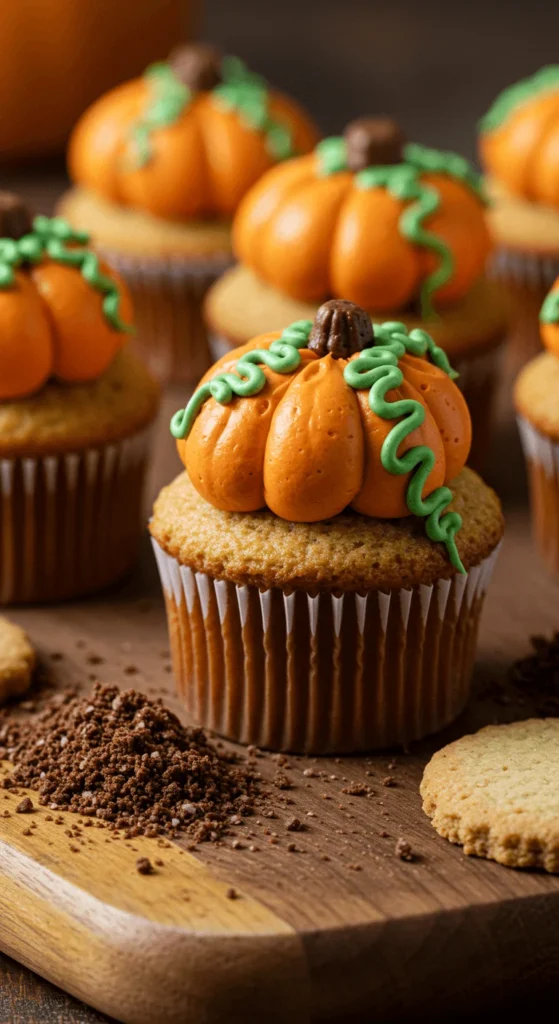
Bake chocolate or vanilla. Cool fully.
Tint buttercream orange and green. Pipe simple domes. Add a tiny curl for the vine.
Crush chocolate cookies for “soil.” Press the top into crumbs.
Stick a pretzel piece as a stem.
Keep it simple: one piping tip works.
Budget tip: Use one bowl of white buttercream and tint small portions.
DIY idea: cut a sandwich bag corner if you don’t own tips.
Want variety? Add cinnamon to the batter for a warm hint.
Arrange cupcakes on a tray with extra crumbs sprinkled around.
They look farm-stand ready in under 15 minutes.
Spooky Spiderweb Chocolate
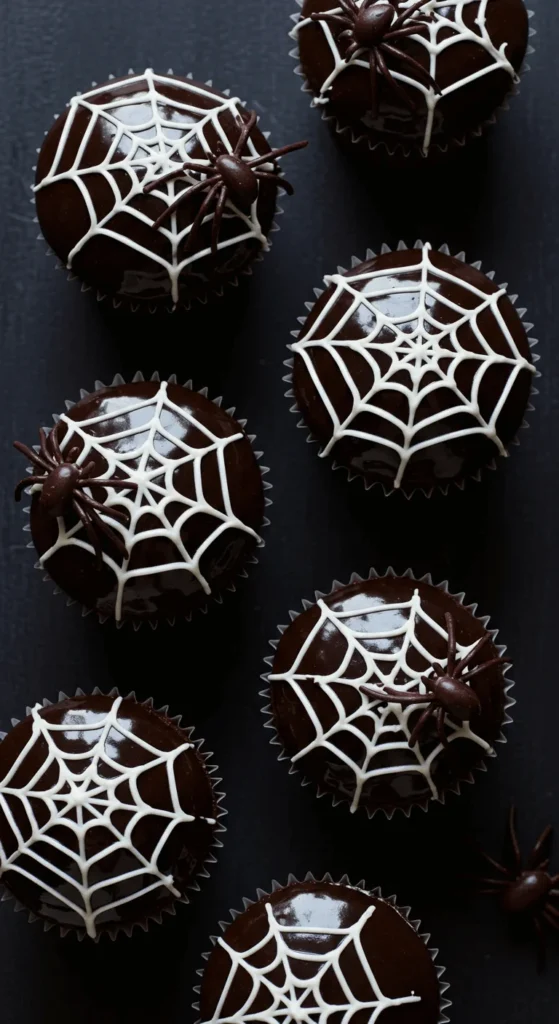
Cover cupcakes with warm ganache. Tap to smooth.
Pipe thin white lines in circles. Drag a toothpick outward to form webs.
Add a chocolate chip “spider” with mini-chips as legs.
Keep the lines thin; it dries neat.
Budget tip: Skip fancy chocolate—use baking chips and a splash of oil.
DIY piping: small zip bag with a pinhole.
Work on four cupcakes at a time so the ganache stays soft for pulling.
Set them on a black plate for a strong contrast.
Kids can help with the toothpick step.
Clean edges make them look bakery-ready.
Mummy Wrap Vanilla
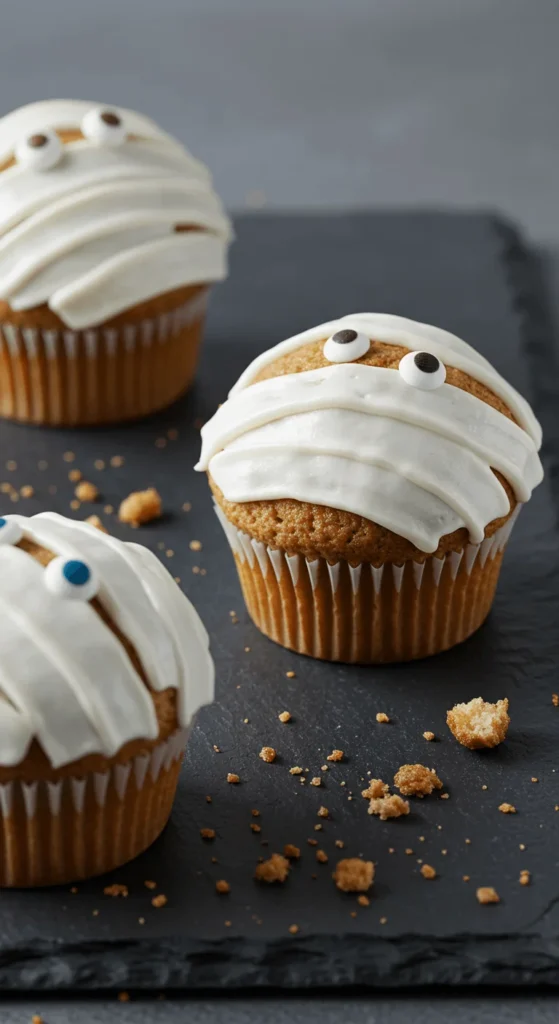
Spread a thin base of white frosting.
Fill a bag fitted with a flat tip—or use a cut bag—then zigzag strips.
Leave space for eyes. Add candy eyes last.
Random lines sell the look.
Budget tip: Buy one pack of eyes; use sparingly. Draw pupils with dots of chocolate if needed.
DIY: Mix powdered sugar and water for a quick glaze base.
Chill 10 minutes to set.
Serve in black cupcake liners for contrast.
Fast, playful, and very clear in photos.
Great for a last-minute table filler.
Graveyard Dirt & Tombstones
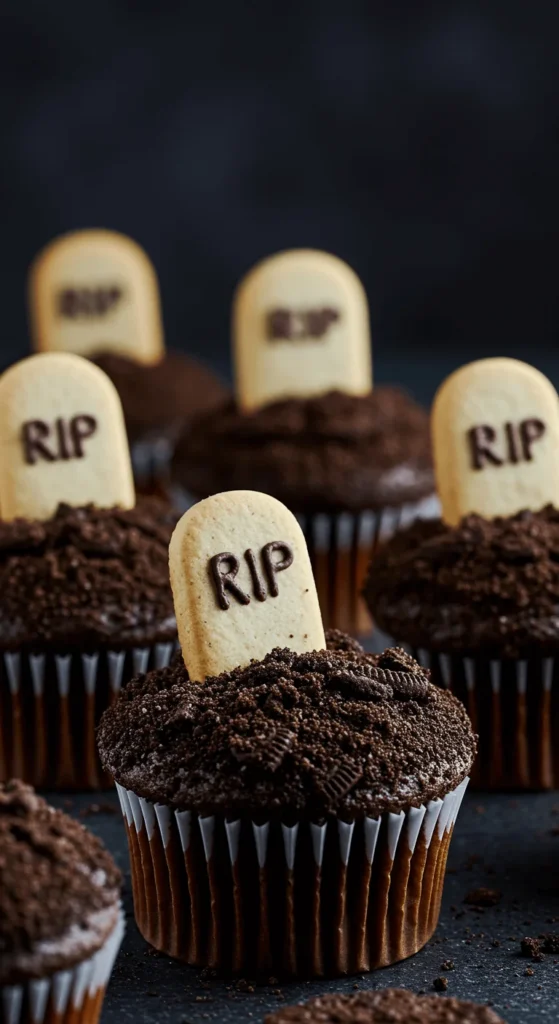
Frost lightly. Dunk tops in crushed chocolate cookies.
Stand a half cookie upright as a headstone.
Write “RIP” with white icing. Keep the letters short.
Add a mint leaf as a tiny plant.
Budget tip: Store-brand cookies crumble the same.
DIY tombstones: graham crackers cut with a serrated knife.
For extra texture, add a few chocolate sprinkles as rocks.
Place on a tray with more crumbs.
They read “Halloween” at a glance.
Zero specialty tools needed.
Witch Hat Cookies & Cream
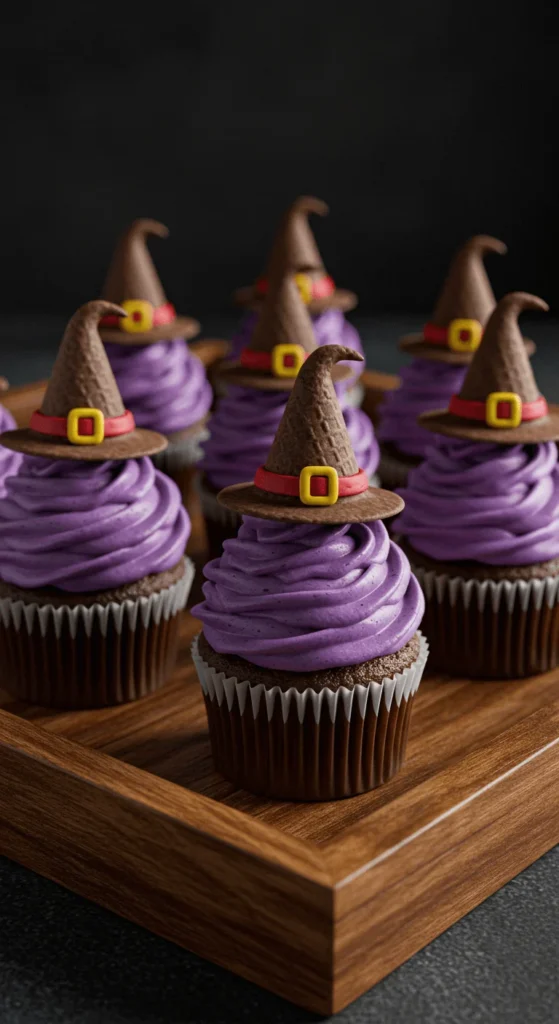
Tint frosting purple. Swirl high.
Use mini sugar cones dipped in melted chocolate.
Add a ring of orange icing as the hat band.
Stick the cone on top at a slight angle.
Budget tip: One bag of wafers can coat many cones.
DIY: Use a round cookie as the brim if cones are small.
Sprinkle crushed cookies for contrast.
Set a few star sprinkles to finish.
They stand tall and photo nicely.
Make cones the night before to save time.
Ghostly Marshmallow Peaks
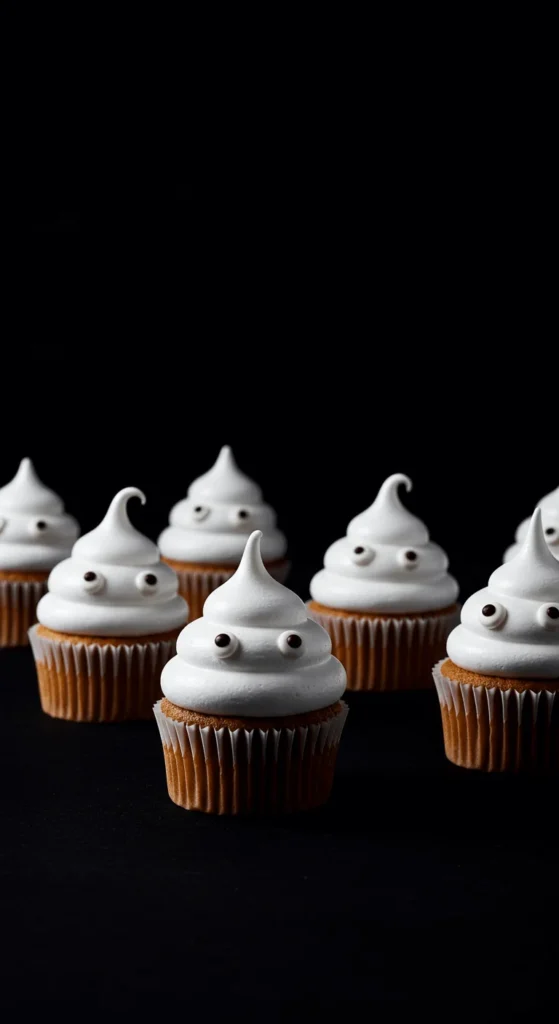
Pipe tall mounds of white frosting.
Add two tiny chocolate dots as eyes.
For shape, pull up as you lift the piping bag.
Budget tip: Use mini marshmallows under the frosting to add height.
DIY: Melt white chips with a splash of milk for a quick drizzle look if no piping tip.
Keep faces simple.
Chill briefly so they hold on the walk to the table.
Group them in threes for a “ghost family.”
Fast, cute, and kid-approved.
No special flavors required.
Vampire Bite Red Velvet
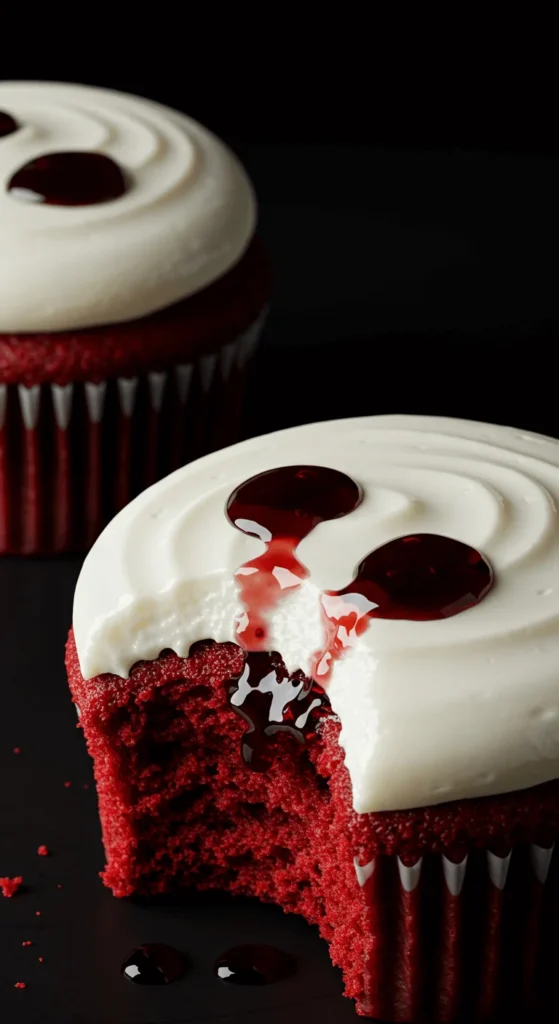
Frost smooth with white cream cheese.
Use a skewer to poke two small holes.
Fill with red gel or warmed jam. Let it drip slightly.
Budget tip: Make red gel from jelly plus a touch of food color.
DIY: Toothpicks help with precise dots.
Add a tiny chocolate shard for “fang” detail if you like.
Keep the drip short for neat plates.
Serve in red liners for theme.
Takes minutes and gets a reaction.
Store chilled; add gel right before serving.
Monster Eye Candy Pupils
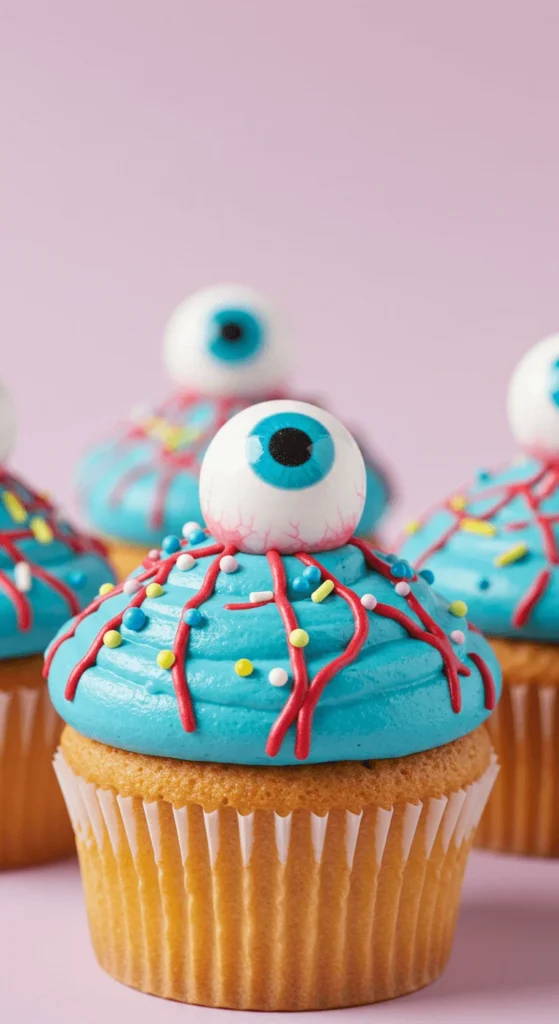
Tint frosting neon green or blue.
Add a round candy melt as the eyeball.
Draw a pupil with melted chocolate.
Use red sprinkles or drawn lines for veins.
Budget tip: One bag of candy melts makes many eyes.
DIY: Cut mini marshmallows in circles if you lack candy melts.
Keep shapes simple.
Kids love placing pupils.
Arrange on a white platter so colors pop.
They stare back in the best way.
Cauldron Bubble Gumdrops
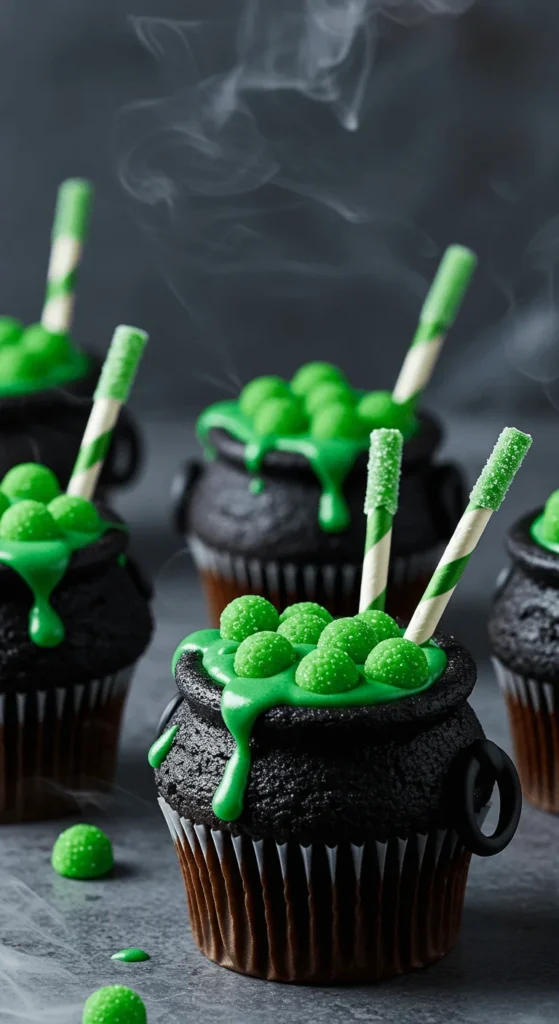
Frost dark with black cocoa buttercream.
Press green gumdrops or sixlets on top as bubbles.
Add two pretzel sticks as a handle shape.
Budget tip: Tint chocolate frosting black with dark cocoa first; use less color.
DIY bubbles: cut gummy bears into rounds.
A tiny sprinkle of white sugar looks like steam.
Group cupcakes on a tray with a small plastic spider.
They look like tiny pots simmering away.
Quick build, big look.
Perfect next to a punch bowl.
Black Cat Silhouette
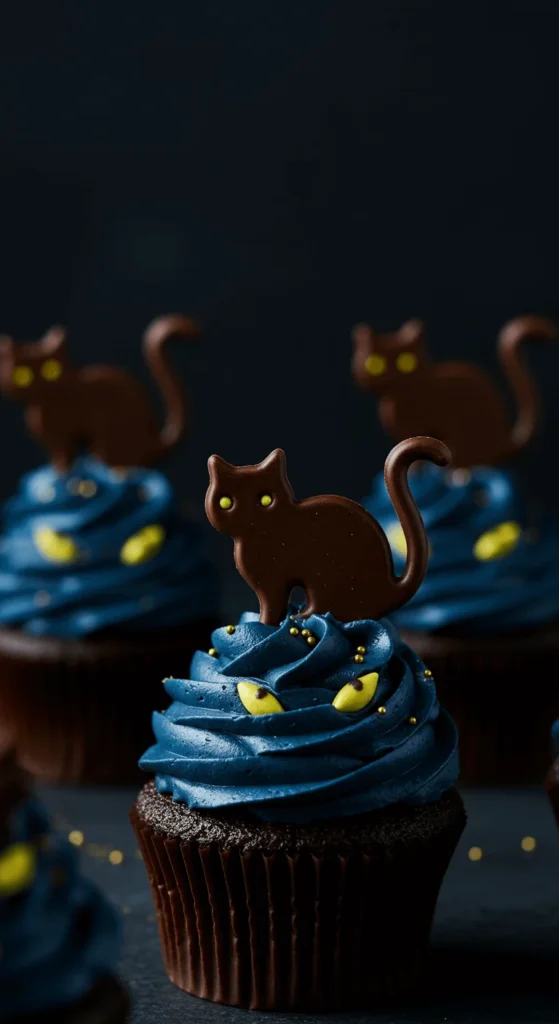
Frost flat and dark.
Cut cat shapes from a chocolate bar using a warmed knife.
Stand the shape upright or lay it across.
Add two yellow sprinkles as eyes.
Budget tip: One cheap chocolate bar works for many toppers.
DIY template: trace a cat on parchment and cut around it.
Keep lines simple so they don’t snap.
Chill toppers 10 minutes.
They sit clean and graphic on the table.
A little eerie, very fast.
Candy Corn Ombre Layers
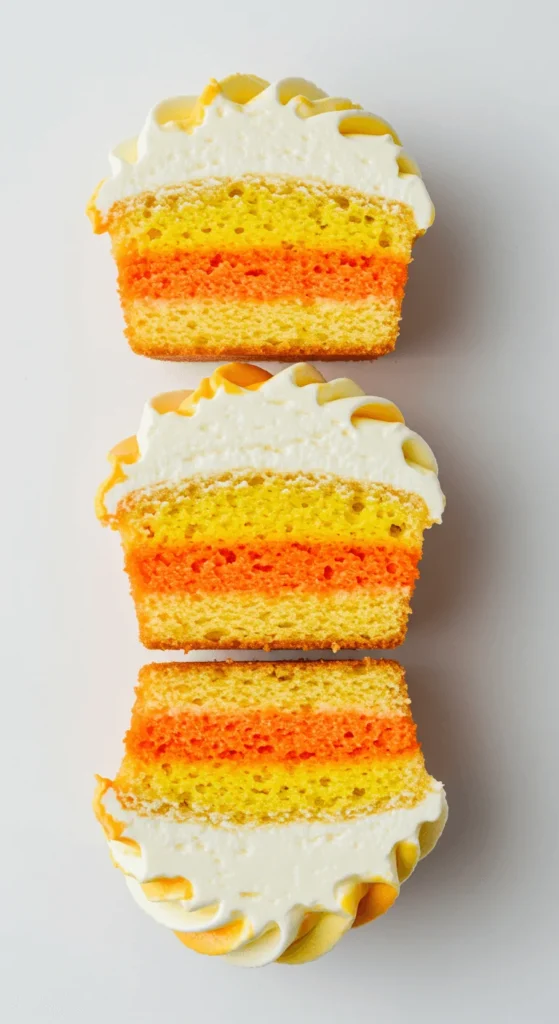
Split frosting into white, orange, yellow.
Pipe a ring of yellow, then orange, then white on top.
Smooth slightly with a warm spoon.
Budget tip: Use one piping bag with three stripes by brushing colors inside the bag.
DIY: If no tips, snip a larger hole for thick bands.
Add a single candy corn on top.
Keep bands short for a tidy bite.
Arrange in tight rows for a uniform look.
Great for bake sales and trays.
Colorful without heavy work.
Zombie Brain Strawberry Swirl
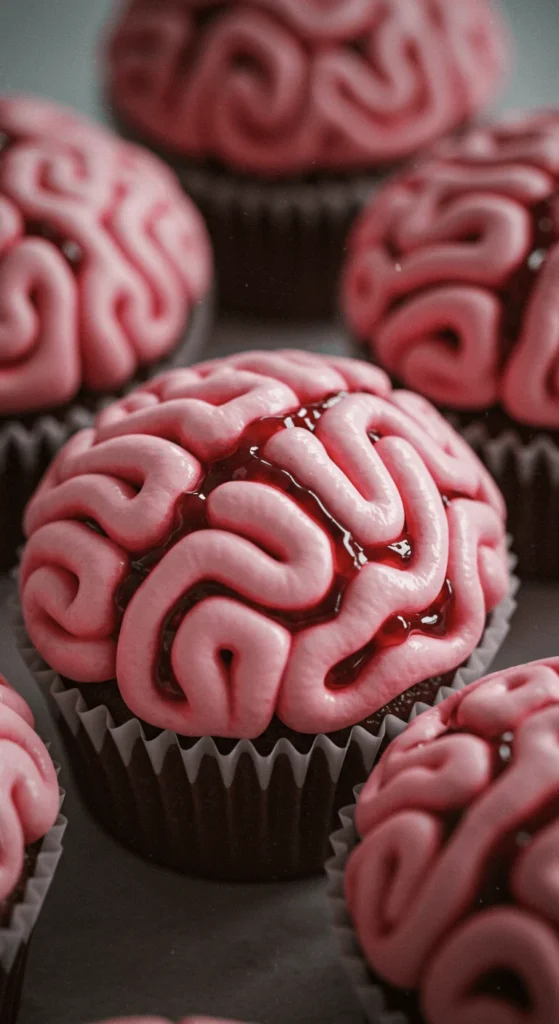
Tint frosting light pink.
Pipe two curvy lines that meet in the center.
Add red jam into the grooves with a skewer.
Budget tip: Use store jam; strain seeds with a spoon.
DIY piping: a small round hole gives clean lines.
Keep the lines tight for that brain pattern.
Chill briefly so the shape holds.
Set on a metal tray for a lab vibe.
It’s weird in the best way.
Fast once you get the motion.
Edible Blood Gel Syringes
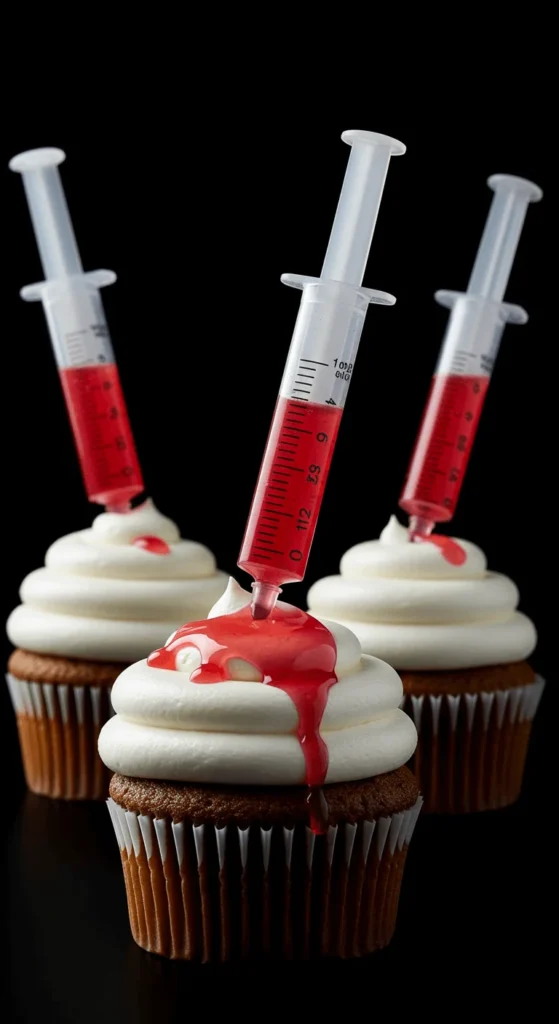
Frost smooth and white.
Fill mini food-safe syringes with red gel or jam.
Stick one into each cupcake at serving time.
Budget tip: Reusable syringes are cheap online; wash and store.
DIY gel: heat jelly with a spoon of water, cool slightly.
Keep the gel thick so it doesn’t flood.
Offer napkins nearby.
People love the interactive squeeze.
Store syringes separately and assemble on the table.
Great for photos and parties.
Bat Wing Brownie Toppers
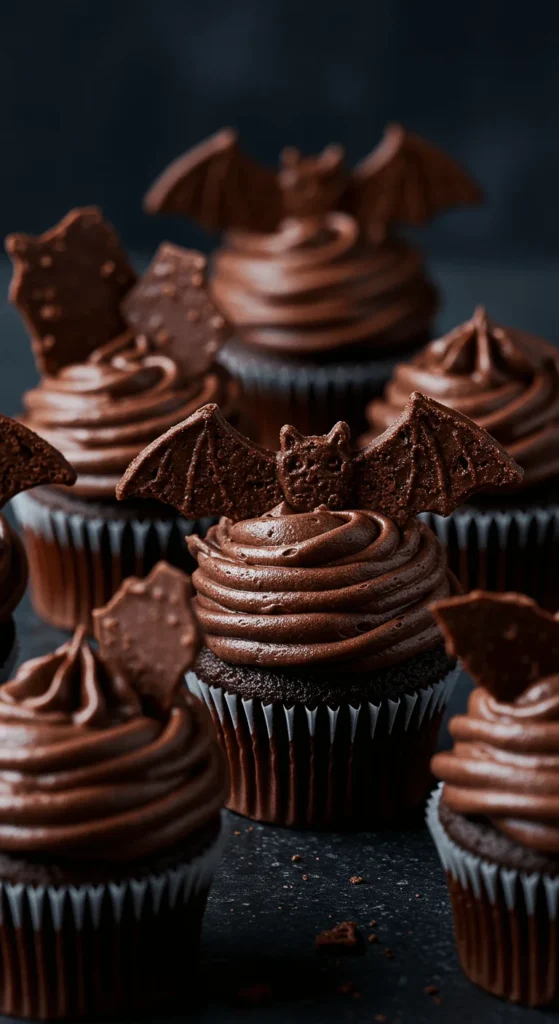
Bake a thin brownie sheet.
Cut wing shapes with a knife or template.
Frost cupcakes dark and press wings in.
Budget tip: One small pan of brownies makes dozens of wings.
DIY bark: melt chocolate, spread thin, score, chill, snap.
Add a sprinkle of black sugar for texture.
Keep wings short so they don’t tip.
Chill 5 minutes to set.
Neat silhouette.
Works with any cupcake flavor.
Caramel Apple Drizzle
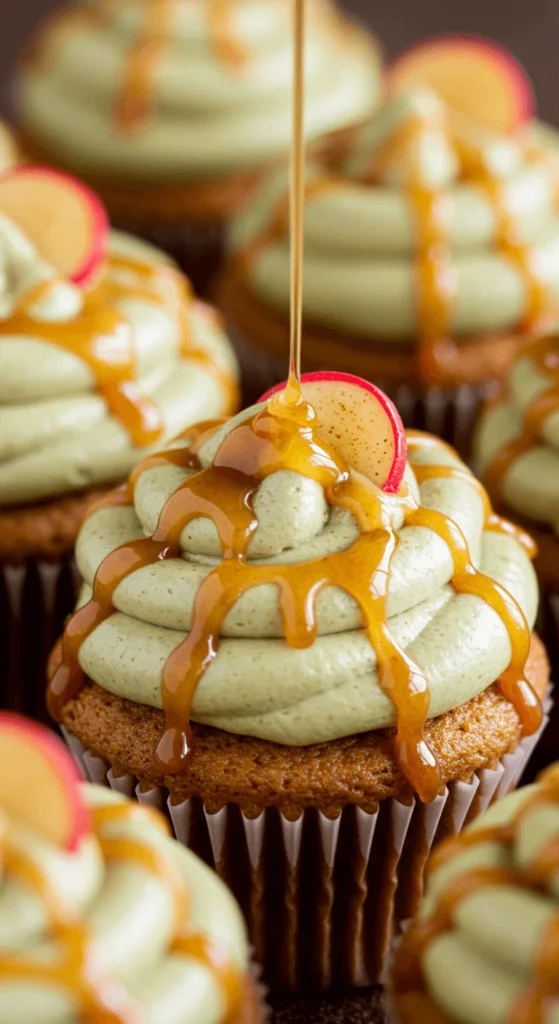
Tint frosting light green.
Drizzle thick caramel over the top.
Dust with cinnamon.
Budget tip: Microwave caramel candies with a splash of milk.
DIY apple look: use red gummy slices cut thin.
Keep drizzle short so liners stay clean.
Add a pretzel stick as a stem for fun.
Serve on a wood board for autumn style.
Sweet, a little tart if you add apple extract.
Crowd-pleaser with simple parts.
Haunted Forest Chocolate Shards
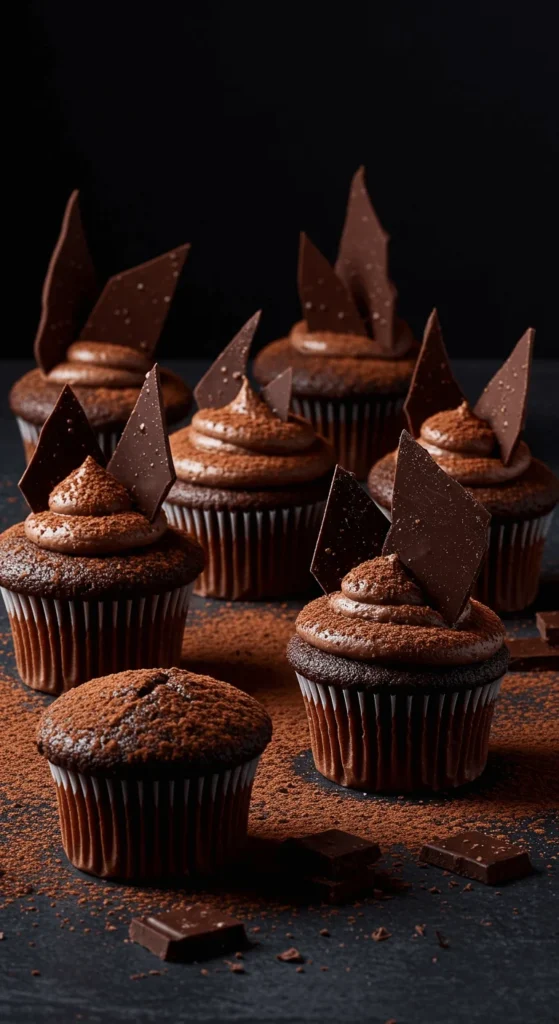
Melt chocolate. Spread thin on parchment.
Chill and snap into tall shards.
Frost cupcakes and stand shards upright.
Budget tip: Use compound chocolate; it sets fast.
DIY effect: dust with cocoa for “tree bark.”
Add a few silver sprinkles as “moonlight.”
Keep shards varied for a wild look.
Transport chilled so they stay upright.
Minimal tools, big shape.
Pairs nicely with vanilla cake.
Skeleton Bone Meringues
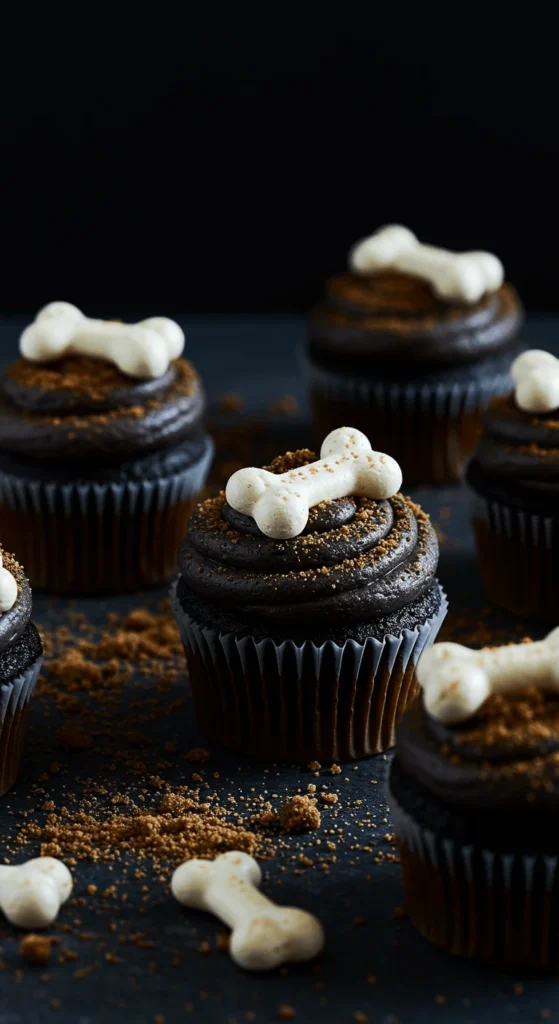
Pipe mini bone shapes from simple meringue.
Bake low and slow until dry.
Frost cupcakes dark and press bones in.
Budget tip: Egg whites and sugar are cheap and go far.
DIY shortcut: bone-shaped pretzels dipped in white chocolate.
Add cookie crumb dirt.
They hold for days, so bake ahead.
Store meringues airtight.
Set a small skull prop near the tray.
Creepy and light in texture.
Werewolf Fur Chocolate Shavings
Use a grass tip or cut bag to pipe short strokes.
Cover the top in layers for a shaggy look.
Sprinkle rough chocolate shavings to finish.
Budget tip: Make shavings with a vegetable peeler and a store bar.
DIY color: mix a bit of black cocoa into brown frosting for deeper tone.
Add a small yellow candy “moon.”
Keep strokes short; it reads as fur.
Fast once the motion clicks.
Serve with napkins—these are tall.
Kids love the texture.
Jack-O’-Lantern Faces
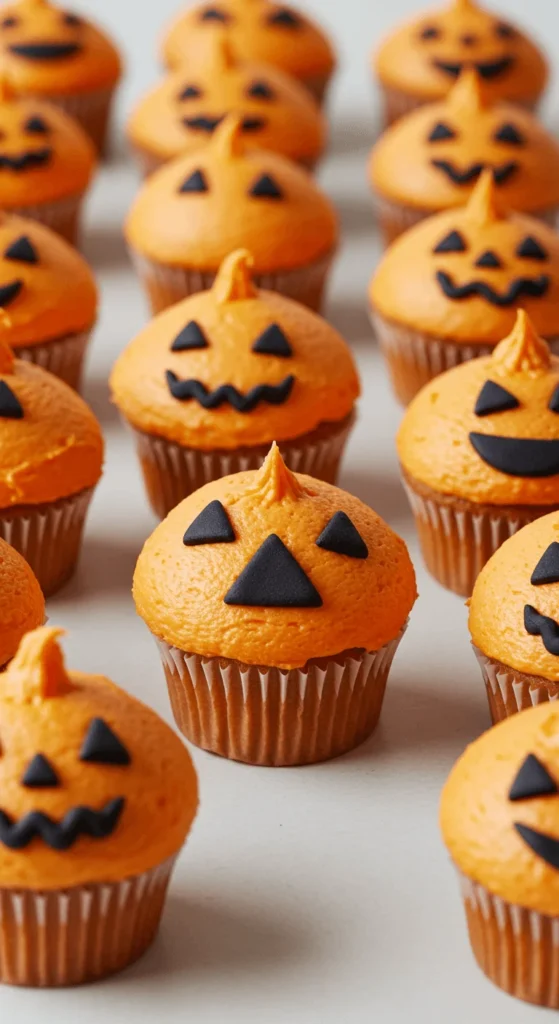
Frost orange domes.
Cut simple eyes and smiles from black fondant.
Or draw shapes with melted chocolate.
Budget tip: Skip fondant; use chocolate sandwich cookie centers tinted black.
DIY: Print a small face template for consistency.
Add a tiny green sprinkle as a stem.
Keep faces bold and simple for clarity.
These read well from a distance.
Arrange in a big grid for impact.
Great for classrooms and potlucks.
Grave Soil S’Mores Crunch
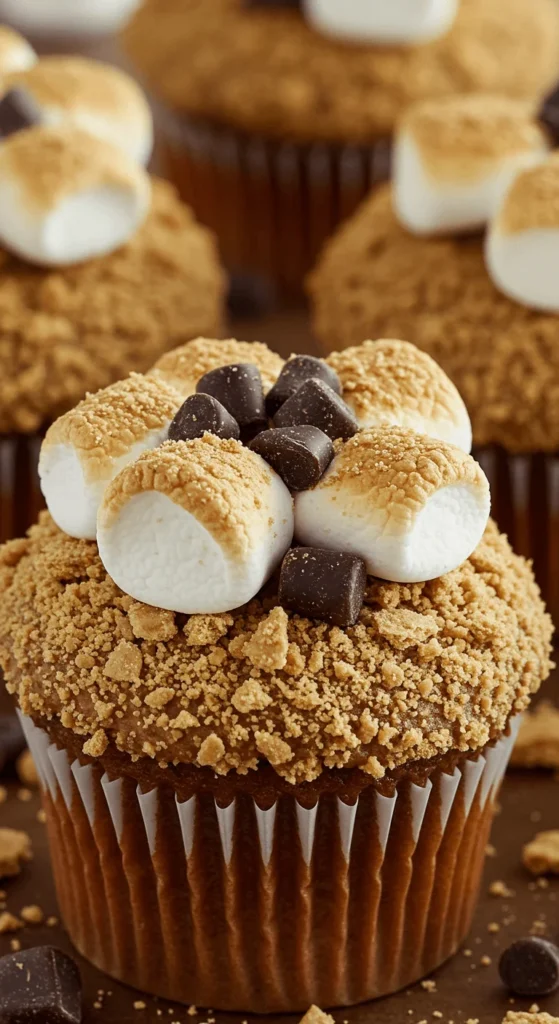
Top frosting with crushed graham crackers.
Press in a few mini marshmallows.
Toast lightly with a torch or under a broiler.
Budget tip: Use a lighter-style kitchen torch; they’re cheap.
DIY chocolate bits: chop any bar you have.
Drizzle a thin line of melted chocolate.
Add a small cookie “tombstone” if you want the theme stronger.
Crunch, soft, and melty in one bite.
Works best eaten the same day.
Crowd pleaser for cool nights.
Poison Apple Skulls
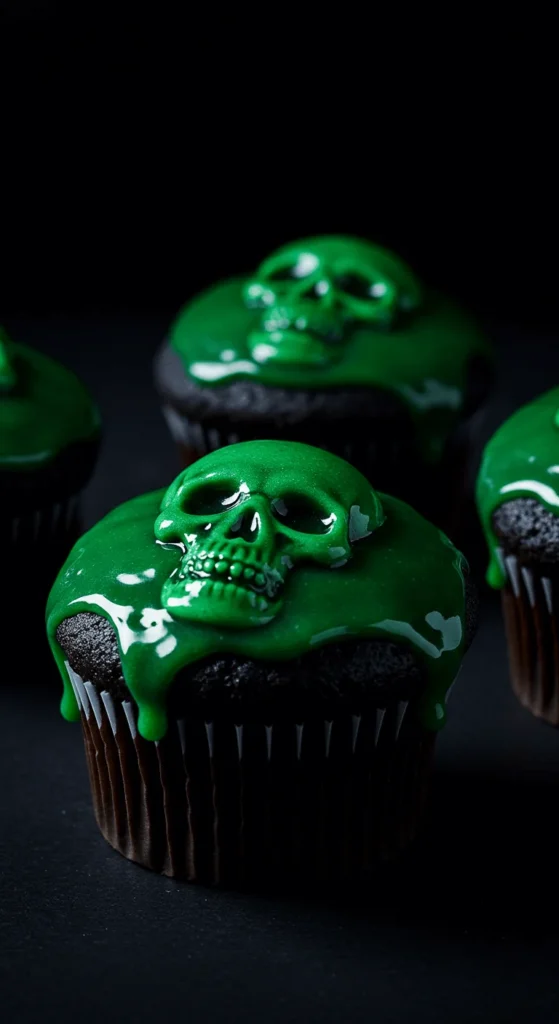
Frost dark. Chill 10 minutes.
Spoon thick green glaze so it drips like a skull mask.
Let a few holes show “eyes” and “nose.”
Budget tip: Make glaze from powdered sugar, milk, and a little corn syrup.
DIY guide: draw three dots for eyes/nose, then connect with glaze.
Keep drips short for tidy liners.
Set on a black tray for drama.
Add a red candy near one for the apple nod.
Simple parts, big theme.
Works on mini cupcakes too.
Full Moon Howl Silhouettes
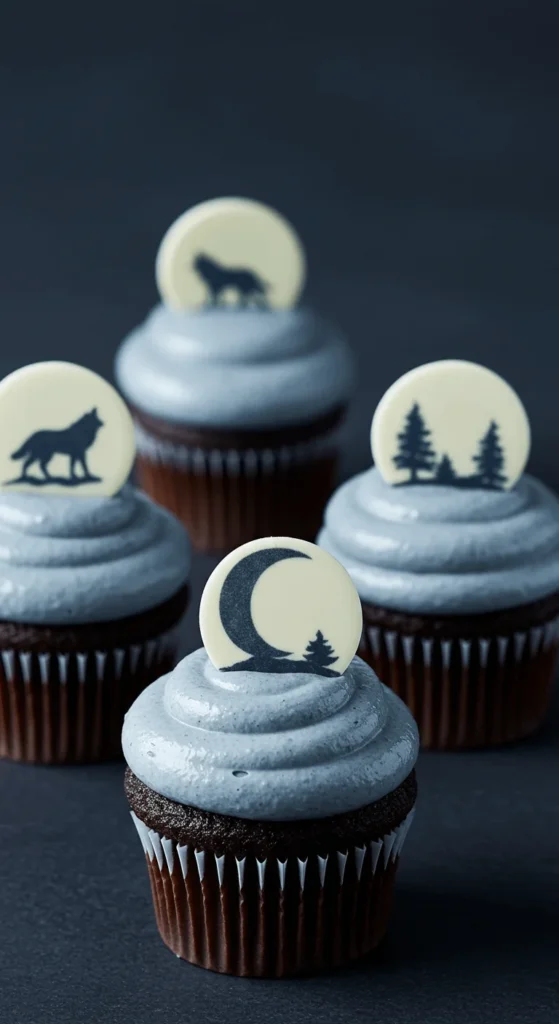
Frost in soft gray.
Press a white chocolate disk as the moon.
Add a tiny black silhouette cut from chocolate bark.
Budget tip: Use candy melts for moons; one bag makes many.
DIY stencil: print a small wolf or tree, trace on parchment, cut.
A sprinkle of white sugar looks like stars.
Keep moons large for a clear circle.
Line cupcakes in a ring on the table.
They photograph clean and moody.
Fast assembly once disks are set.
Witch’s Broom Peanut Pretzel
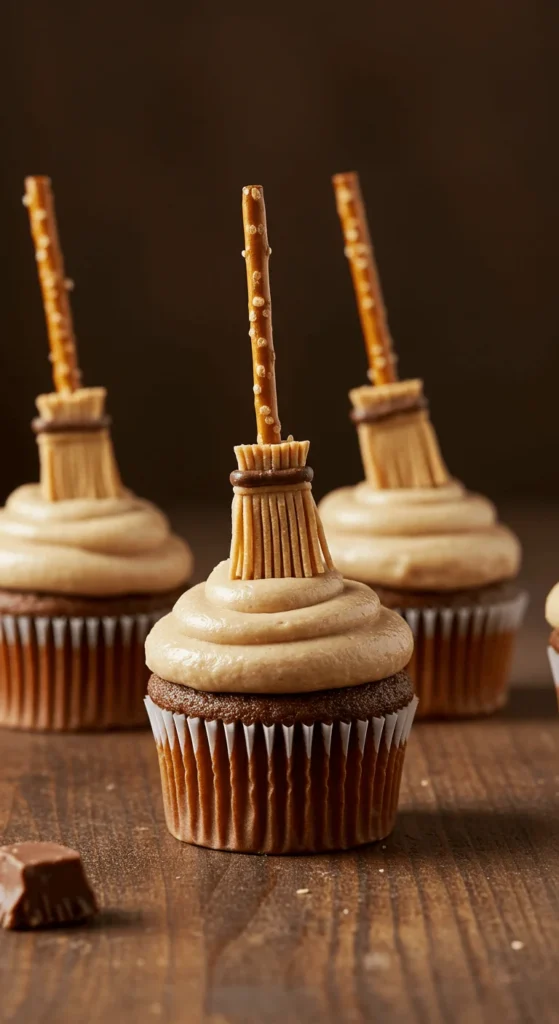
Pipe a soft swirl of peanut butter frosting.
Insert a pretzel stick.
Slice a mini peanut butter cup and fan pieces as bristles.
Budget tip: Store-brand candies work fine.
DIY nut-free: use caramel squares cut into fringe.
Add a dusting of cocoa for “floor.”
Keep brooms short so they don’t tip.
Place two per tray for variety.
Sweet-salty and simple.
Kids can assemble with supervision.
Toxic Slime Lime Swirl
Whip a tangy lime frosting.
Swirl high. Add a spoon of thick green glaze to drip.
Press a few round candies as bubbles.
Budget tip: Lime drink mix flavors frosting cheaply.
DIY glaze: powdered sugar, water, gel color.
Keep drips controlled; use a small spoon.
These pop under party lights.
Serve on a white platter.
Add a tiny sign near the tray for a laugh.
Fast, bright, and tasty.
Coffin Lid Brown Sugar Crunch
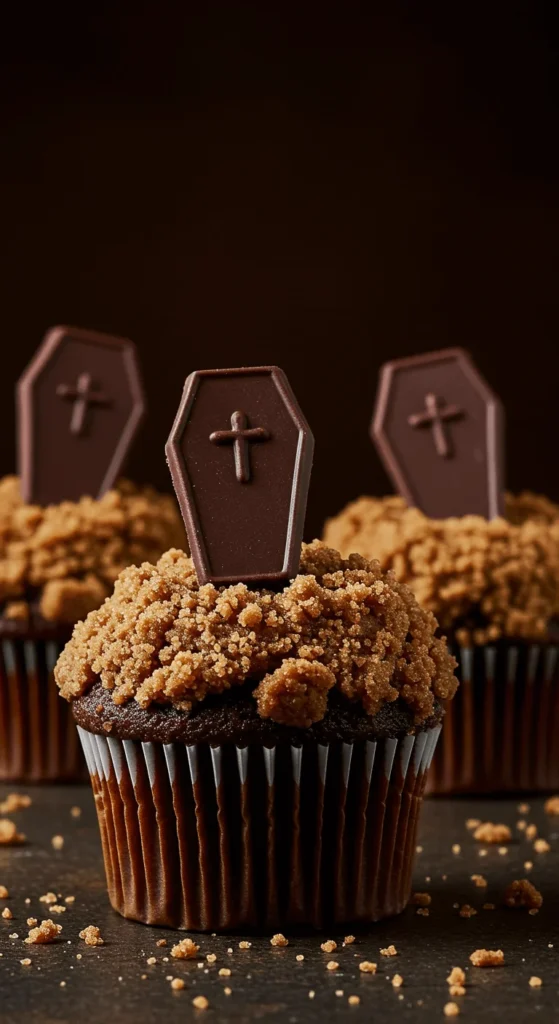
Top batter with quick streusel (butter, flour, brown sugar). Bake.
Cool and frost lightly so the crunch shows.
Add a small chocolate rectangle as a coffin lid at an angle.
Budget tip: Break a chocolate bar along its lines for perfect lids.
DIY dust: cocoa powder brushed on top.
Keep frosting thin for balance.
Arrange lids pointing different ways.
Sweet crunch plus dark chocolate bite.
Easy prep with pantry staples.
Looks thoughtful without extra tools.
Midnight Maple Candied Seeds
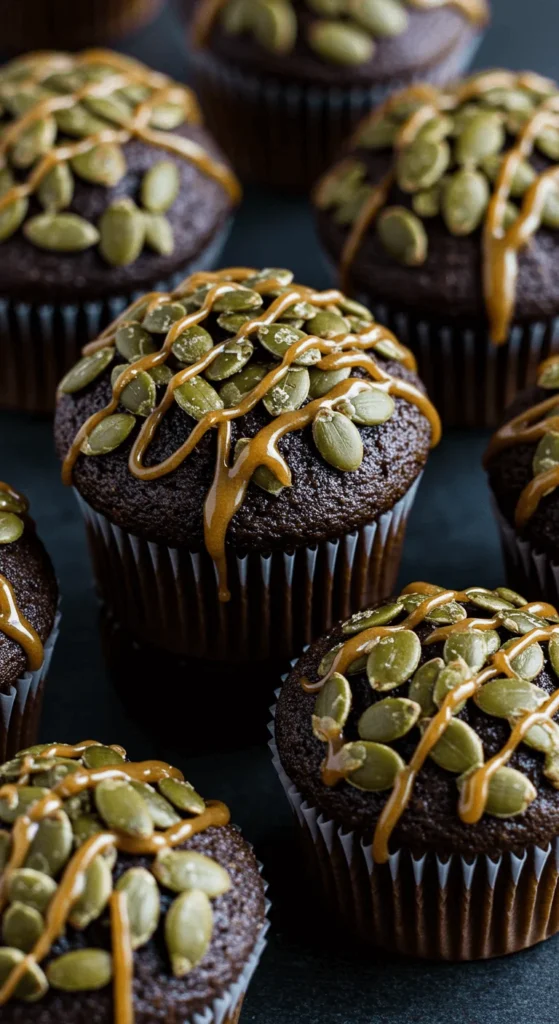
Frost dark.
Candy pumpkin seeds in a pan with sugar and a pinch of salt. Cool.
Sprinkle seeds on top.
Thread a little maple glaze across.
Budget tip: Buy raw seeds in bulk; a handful decorates a dozen cakes.
DIY glaze: maple syrup whisked with powdered sugar.
Adds crunch, shine, and a cozy taste.
Keep the glaze thin so it sets.
Great for adults who like less sweetness.
Simple, clean, and seasonal.
Cauldron Smoke Cotton Candy
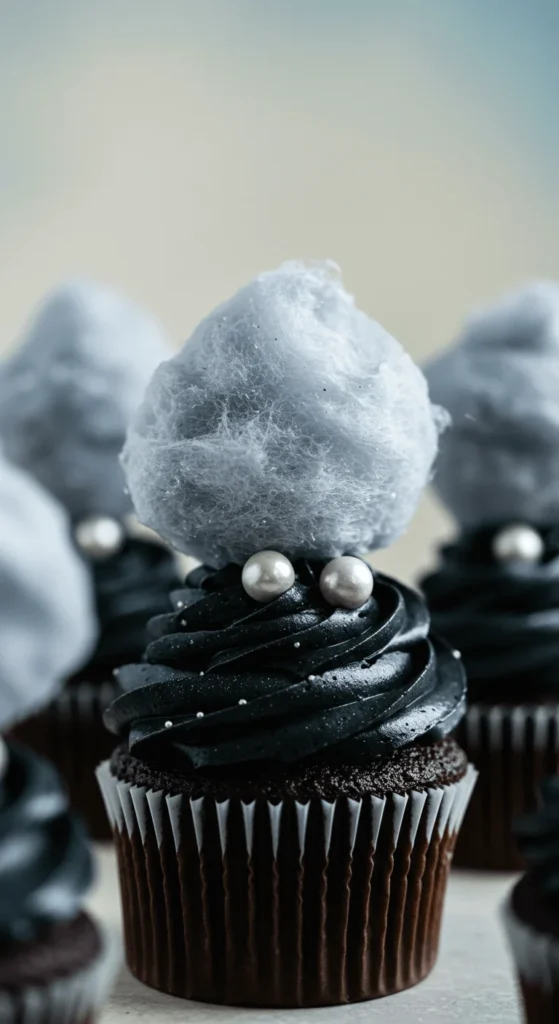
Frost dark and flat.
Right before serving, add a small tuft of cotton candy as “smoke.”
Press a few candy pearls as sparks.
Budget tip: One small tub decorates many cupcakes.
DIY gray: mix white and a touch of black cotton candy together.
Add at the last moment so it doesn’t melt.
Great centerpiece row on the tray.
No piping skills needed.
Kids will point and grab these first.
Photo-ready with minimal work.
Conclusion
You don’t need pastry school or pricey tools to wow a crowd. Pick 3–5 designs, batch your base frosting, and tint small portions. Use common snacks—cookies, pretzels, gummies—as toppers. Keep shapes bold. Keep lines clean. Assemble close to serving time. Your table will look themed, tidy, and fun. Now choose your favorites, make a quick shopping list, and start frosting. Your guests will talk about these cupcakes all night.
Leave a Reply