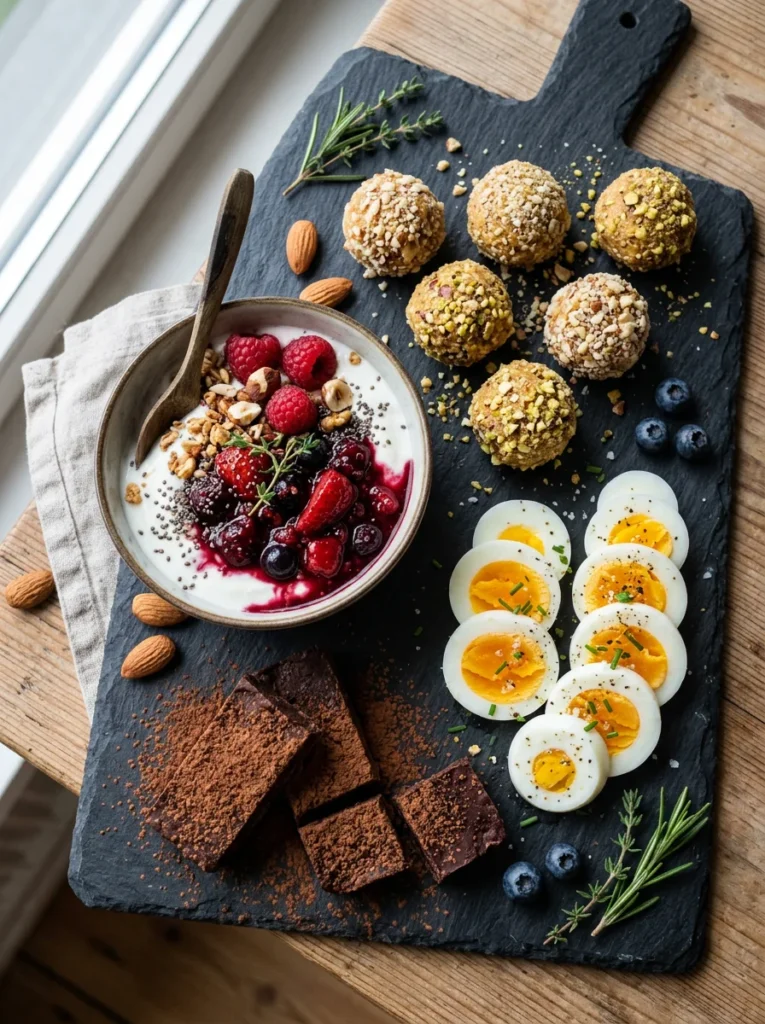
Whether you’re powering through a busy workday, recovering after a workout, or just chasing that 3 p.m. slump away, protein-packed snacks are your best friend. These 13 recipes are easy to make, genuinely satisfying, and loaded with the kind of fuel your body actually craves no chalky protein shakes required. Let’s dig in.
1. Peanut Butter Chocolate Protein Balls
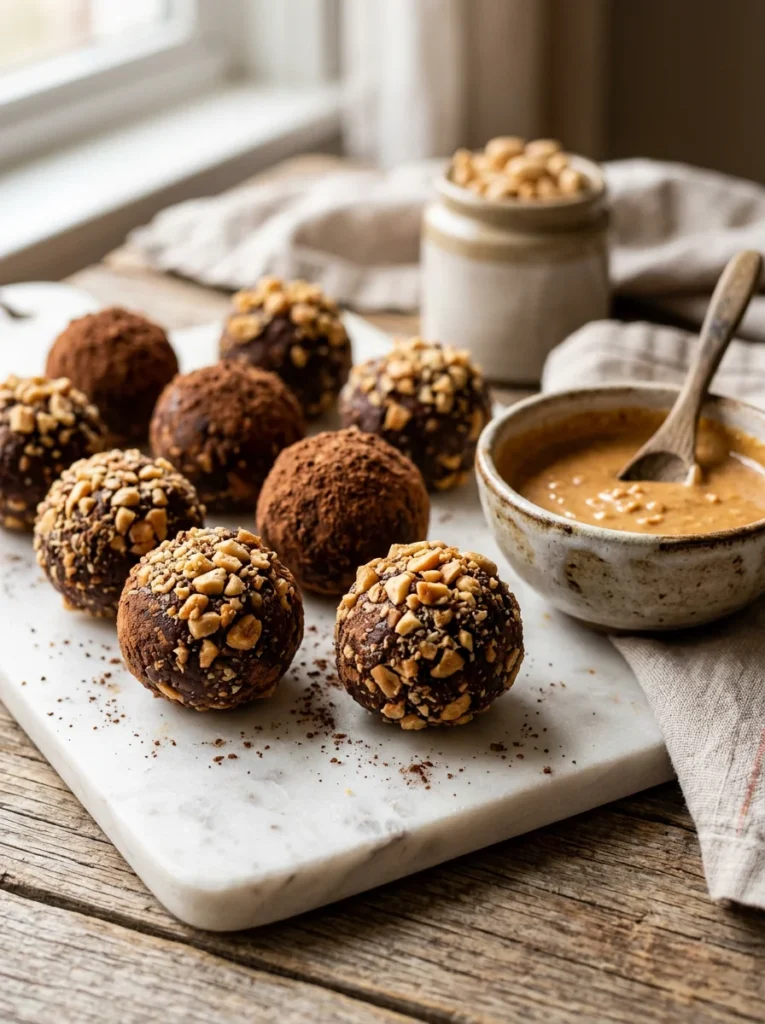
These no-bake peanut butter chocolate protein balls are one of those recipes that feels like a treat but works hard like a meal they’re chewy, deeply nutty, and laced with just enough dark chocolate bitterness to satisfy a sweet tooth without sending your blood sugar on a rollercoaster; made with just a handful of pantry staples, they come together in under 15 minutes and keep in the fridge for up to a week, making them the kind of snack you prep on Sunday and reach for happily on Thursday when energy is running low and time is nonexistent.
Ingredients
- 1 cup old-fashioned rolled oats
- ½ cup natural peanut butter
- ⅓ cup honey or maple syrup
- ¼ cup chocolate protein powder (vanilla or chocolate)
- 2 tablespoons mini dark chocolate chips
- 1 tablespoon chia seeds
- 1 teaspoon vanilla extract
- Pinch of sea salt
Instructions
- Add all ingredients to a large mixing bowl and stir until fully combined. The mixture should hold together when pressed. If it feels too sticky, add a tablespoon more oats; if too dry, add a drizzle of more honey.
- Cover the bowl with plastic wrap and refrigerate for 30 minutes. Chilling makes rolling much easier.
- Once chilled, scoop out about 1 tablespoon of mixture and roll firmly between your palms to form a ball.
- Repeat with the remaining mixture and you should get 14–16 balls.
- Store in an airtight container in the refrigerator for up to 7 days, or freeze for up to 2 months.
How to Serve It
Roll the finished balls in a coating before refrigerating for extra texture and visual appeal: crushed roasted peanuts, shredded coconut, sesame seeds, or a light dusting of cocoa powder all work beautifully. In summer, serve them straight from the fridge slightly cold and firm. In colder months, let them sit at room temperature for 5 minutes before eating so the peanut butter softens slightly and the flavors open up. They pair surprisingly well with a small cup of black coffee as an afternoon snack, and they make a great lunchbox addition alongside fruit.
2. Greek Yogurt Berry Parfait Cups

Greek yogurt berry parfait cups are the kind of snack that looks like it belongs on a café menu but takes all of four minutes to put together at home the thick, tangy yogurt provides a serious protein punch that keeps you full far longer than most grab-and-go options, and layering it with fresh seasonal berries and crunchy honey granola means every single spoonful delivers a mix of textures and natural sweetness that genuinely satisfies; this is the recipe you’ll find yourself making on repeat, both because it’s ridiculously simple and because it adapts to whatever fruit is in season or sitting in your fridge.
Ingredients
- 1 cup full-fat or 2% Greek yogurt (plain, unsweetened)
- ½ cup mixed fresh berries (blueberries, strawberries, raspberries)
- ¼ cup honey granola
- 1 tablespoon honey or pure maple syrup
- ½ teaspoon vanilla extract
- Optional: 1 tablespoon hemp seeds or flaxseeds for extra protein
Instructions
- In a small bowl, stir the vanilla extract and half the honey into the Greek yogurt until combined and smooth.
- In a tall glass or mason jar, add a layer of Greek yogurt (about ⅓ of the total).
- Add a layer of fresh berries, then a light sprinkle of granola.
- Repeat the layers yogurt, berries, granola finishing with granola on top.
- Drizzle remaining honey over the top.
- Serve immediately for crunchy granola, or refrigerate up to 4 hours (granola will soften slightly but still taste great).
How to Serve It
For a beautiful presentation, use a clear glass or a wide-mouth mason jar so the layers are fully visible. It genuinely makes the snack feel more special. Top with a single whole strawberry, a sprig of fresh mint, or a few edible flowers for a polished look. In warmer months, frozen berries (thawed slightly) work brilliantly and create a gorgeous natural juice that swirls into the yogurt. Add a sprinkle of cinnamon or cardamom on top for a warm spice note that pairs wonderfully with honey. If packing for a work snack, store the granola separately and add just before eating.
3. Baked Egg Muffin Cups with Spinach and Cheese

These baked egg muffin cups are essentially a portable mini-frittata crispy at the edges, fluffy in the center, and packed with protein from both whole eggs and cheese, making them one of the most satisfying savory snacks you can meal-prep at the start of the week; they reheat beautifully in about 60 seconds in the microwave, they’re easy to customize with whatever vegetables or mix-ins you have on hand, and they’re a genuinely smart way to make sure that even on your busiest days you’re reaching for something real rather than defaulting to whatever’s nearest.
Ingredients
- 6 large eggs
- ¼ cup whole milk
- 1 cup fresh spinach, roughly chopped
- ½ cup shredded cheddar or mozzarella cheese
- ¼ cup diced bell pepper (any color)
- 2 tablespoons diced red onion
- Salt and black pepper to taste
- Olive oil spray for the muffin tin
Instructions
- Preheat the oven to 375°F (190°C). Lightly spray a standard 6-cup muffin tin with olive oil spray.
- In a medium bowl, whisk together eggs, milk, salt, and pepper until the mixture is smooth and slightly frothy.
- Divide the spinach, bell pepper, onion, and half the cheese evenly among the muffin cups.
- Pour the egg mixture over the vegetables in each cup, filling about ¾ full.
- Top each cup with remaining shredded cheese.
- Bake for 18–22 minutes until the egg is set in the center and the tops are lightly golden.
- Let cool in the tin for 5 minutes before running a butter knife around the edges and lifting out.
- Store in an airtight container in the fridge for up to 5 days.
How to Serve It
These muffin cups are fantastic, slightly warm. 60 seconds in the microwave is all they need from the fridge. Serve them with a dollop of salsa or hot sauce on the side for a punchy kick, or pair with sliced avocado and a squeeze of fresh lime for a more substantial snack. For a seasonal spin, swap the spinach for roasted butternut squash and crumbled feta in autumn, or use sun-dried tomatoes and fresh basil in summer. A sprinkle of smoked paprika or everything bagel seasoning on top before baking adds a gorgeous flavor and color boost.
4. Almond Butter Banana Protein Smoothie
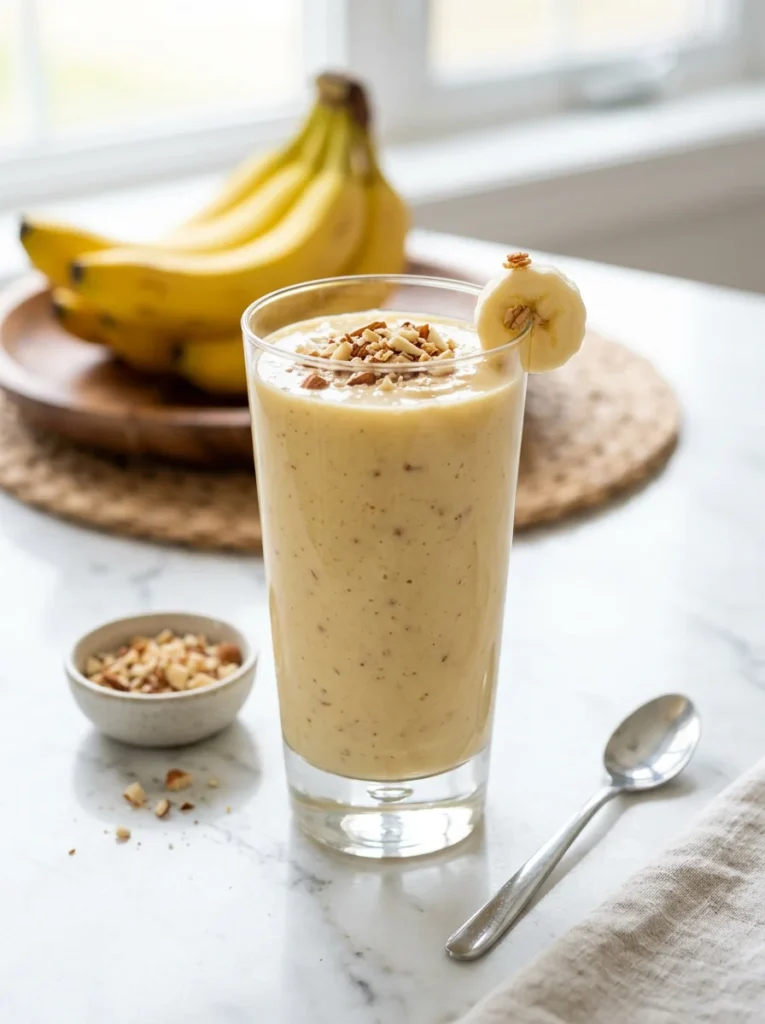
This almond butter banana protein smoothie sits right at the intersection of indulgent and genuinely nourishing the frozen banana gives it an ice-cream-thick texture that makes it feel like a total treat, while the almond butter and protein powder pack in enough protein and healthy fat to keep hunger at bay for two to three solid hours; it takes under five minutes to blend, which makes it perfect for post-workout recovery, a quick pre-meeting energy hit, or honestly just breakfast when you’re running behind and need something that will actually hold you together until lunch.
Ingredients
- 1 large ripe banana, sliced and frozen
- 2 tablespoons natural almond butter
- 1 scoop vanilla protein powder (about 25g)
- 1 cup unsweetened almond milk (or milk of choice)
- ½ teaspoon cinnamon
- 1 teaspoon honey (optional)
- 4–5 ice cubes
- Pinch of sea salt
Instructions
- Add the frozen banana slices, almond butter, and protein powder to a blender.
- Pour in the almond milk and add the cinnamon, honey (if using), and sea salt.
- Add ice cubes on top.
- Blend on high for 45–60 seconds until completely smooth and creamy.
- Taste and adjust add more banana for sweetness, more almond butter for richness, or another splash of milk to thin it out.
- Pour into a tall glass and serve immediately.
How to Serve It
For a café-style finish, sprinkle the top with a pinch of cinnamon, a few crushed almonds, or a drizzle of almond butter thinned slightly with warm water. A banana slice perched on the rim of the glass is a simple but charming touch. In warmer months, serve it extra thick by reducing the milk slightly and eating it with a spoon as a smoothie bowl top with granola, coconut flakes, and sliced fresh fruit. For a winter version, add a teaspoon of maca powder and a pinch of nutmeg for a warming depth of flavor.
5. Cottage Cheese and Cucumber Bites

Cottage cheese and cucumber bites are one of those snacks that seem almost too simple to be satisfying and then you eat them and realize how completely wrong that assumption was; the cucumber provides a cool, refreshing crunch that contrasts perfectly with the rich, creamy cottage cheese, and together they create a light but protein-dense snack that feels genuinely fresh and clean rather than diet-food sad; they come together in literally two minutes, require zero cooking, and are naturally low-carb, making them a brilliant option for anyone managing blood sugar or simply wanting a snack that won’t slow them down.
Ingredients
- 1 large English cucumber
- 1 cup full-fat or 2% cottage cheese
- 1 tablespoon fresh dill, finely chopped (or ½ teaspoon dried)
- 1 teaspoon lemon juice
- ¼ teaspoon garlic powder
- Salt and cracked black pepper to taste
- Optional: pinch of red chili flakes for heat
Instructions
- Slice the cucumber into rounds about ½ inch thick thick enough to hold a generous topping without flopping.
- In a small bowl, stir together the cottage cheese, dill, lemon juice, garlic powder, salt, and pepper until well combined.
- Lay cucumber rounds out on a plate or board.
- Spoon a generous mound of the cottage cheese mixture onto each cucumber round about 1 heaped teaspoon per round.
- Add a pinch of chili flakes and a sprig of fresh dill on top if desired.
- Serve immediately; these are best eaten fresh before the cucumber softens.
How to Serve It
These are best served immediately after assembly so the cucumber retains its crisp snap against the creamy cheese. For a party-friendly version, arrange them on a long serving board with a sprig of fresh dill in between each piece; they look elegant and disappear fast. In summer, try topping with a tiny piece of smoked salmon for a mini appetizer feel. In winter, add a very thin slice of roasted red pepper on top for a pop of sweetness and color. The cottage cheese mixture can be prepared up to 24 hours ahead and kept refrigerated just slice and assembled when you’re ready.
6. Hard-Boiled Eggs with Everything Bagel Seasoning
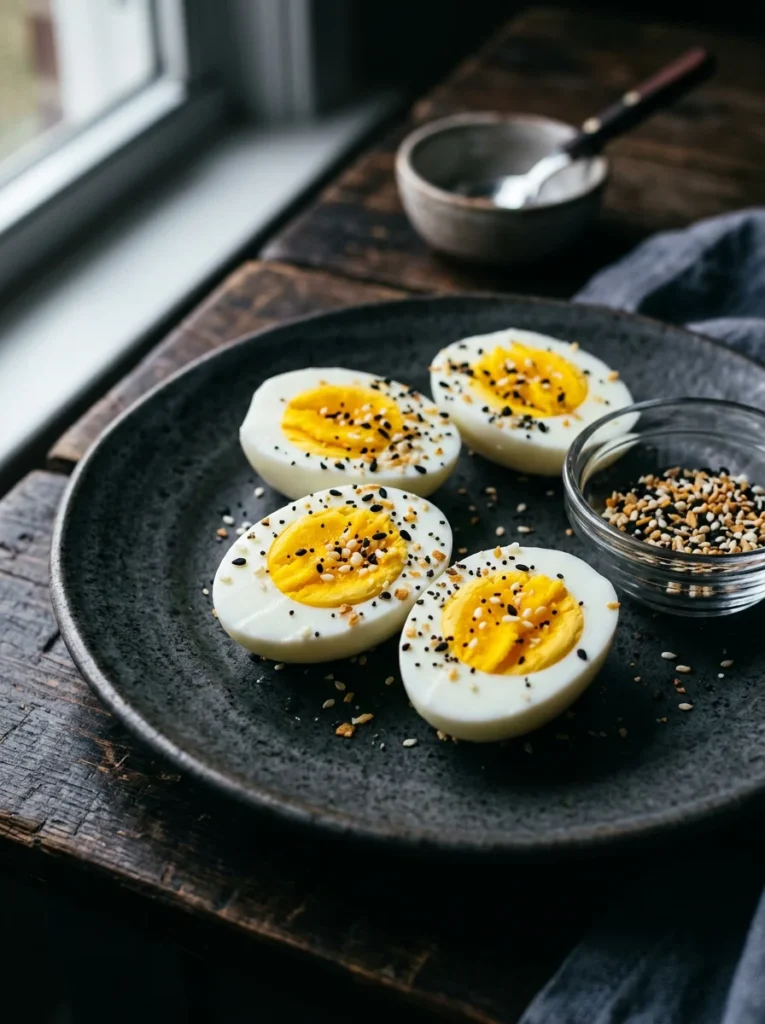
Hard-boiled eggs are the original high-protein snack portable, filling, nearly zero prep, and completely underrated until you add a shower of everything bagel seasoning and suddenly they become something you actively look forward to eating; the blend of sesame seeds, poppy seeds, dried garlic, dried onion, and flaky sea salt adds crunch, depth, and a savory punch that transforms the plain boiled egg into something genuinely craveable; batch-cook a dozen on Sunday and you have an instant, ready-to-go protein snack waiting for you every day through the week.
Ingredients
- 6 large eggs
- Cold water (enough to cover eggs by 1 inch)
- 2 tablespoons everything bagel seasoning
- Optional: light drizzle of olive oil or a swipe of cream cheese
Instructions
- Place eggs in a single layer in a medium saucepan. Cover with cold water by at least 1 inch.
- Bring to a full boil over medium-high heat. Once boiling, reduce heat to a gentle simmer.
- For perfectly set yolks: simmer for exactly 10–11 minutes.
- Transfer immediately to a bowl of ice water and let sit for 10 minutes. This stops the cooking and makes peeling dramatically easier.
- Peel the eggs and store unpeeled in the refrigerator for up to 5 days (unpeeled eggs last longer).
- When ready to eat, halve the eggs and sprinkle generously with everything bagel seasoning.
How to Serve It
Halve the eggs lengthwise for a more dramatic presentation and a better surface area for seasoning. A very light swipe of cream cheese on each half before adding the seasoning adds richness and a gorgeous creamy contrast to the yolk. For a snack board setting, arrange the halves on a slate board alongside cherry tomatoes and sliced avocado for a beautiful spread. In spring and summer, add a few capers and thin slices of red onion for a smoked salmon–adjacent flavor without the fish. Keep a small container of everything bagel seasoning in your desk drawer. It makes the snack infinitely more enjoyable even when you’re eating at your computer.
7. Edamame with Sea Salt and Lime
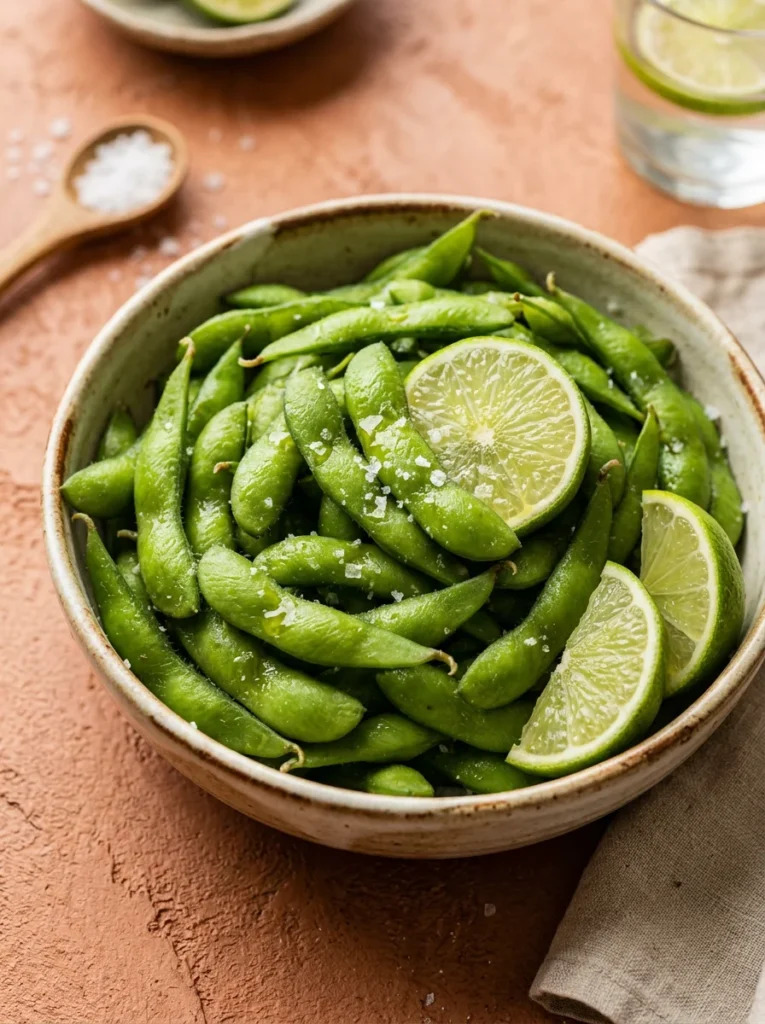
Edamame is one of those rare snacks that manages to be completely effortless, genuinely delicious, and remarkably filling all at once as a complete plant protein, it delivers all essential amino acids in a single small bowl, making it an especially powerful snack for vegans and vegetarians looking to hit their daily protein targets; the combination of bright lime and flaky sea salt turns a plain steamed bean into something bright and addictive, and the act of popping each pod makes eating it slower and more satisfying than anything you could eat with a spoon.
Ingredients
- 2 cups frozen edamame in pods (or 1 cup shelled)
- 1 lime (zested and cut into wedges)
- ½ teaspoon flaky sea salt (Maldon or similar)
- ¼ teaspoon chili powder or Tajín seasoning (optional)
- 1 teaspoon olive oil (optional, for coating)
Instructions
- Cook edamame according to package instructions. Most frozen edamame can be microwaved in their bag for 3–4 minutes, or boiled in salted water for 5 minutes.
- Drain well and pat dry if needed.
- Toss immediately with olive oil (if using), lime zest, and chili powder.
- Arrange in a bowl and sprinkle generously with flaky sea salt.
- Serve with lime wedges for squeezing over just before eating.
How to Serve It
Edamame is best served warm. The heat helps the seasoning stick and makes the beans taste sweeter and more vibrant. Squeeze fresh lime over the entire bowl right before eating for maximum citrus brightness. In summer, serve chilled edamame tossed with sesame oil, soy sauce, and a sprinkle of toasted sesame seeds for a cool, umami-forward version. For a movie-night snack, swap the lime for a generous pinch of smoked paprika and serve in a large shared bowl. The shelled version travels better in lunchboxes and can be stirred into salads, grain bowls, or eaten by the handful straight from a small container.
8. Turkey and Avocado Lettuce Wraps
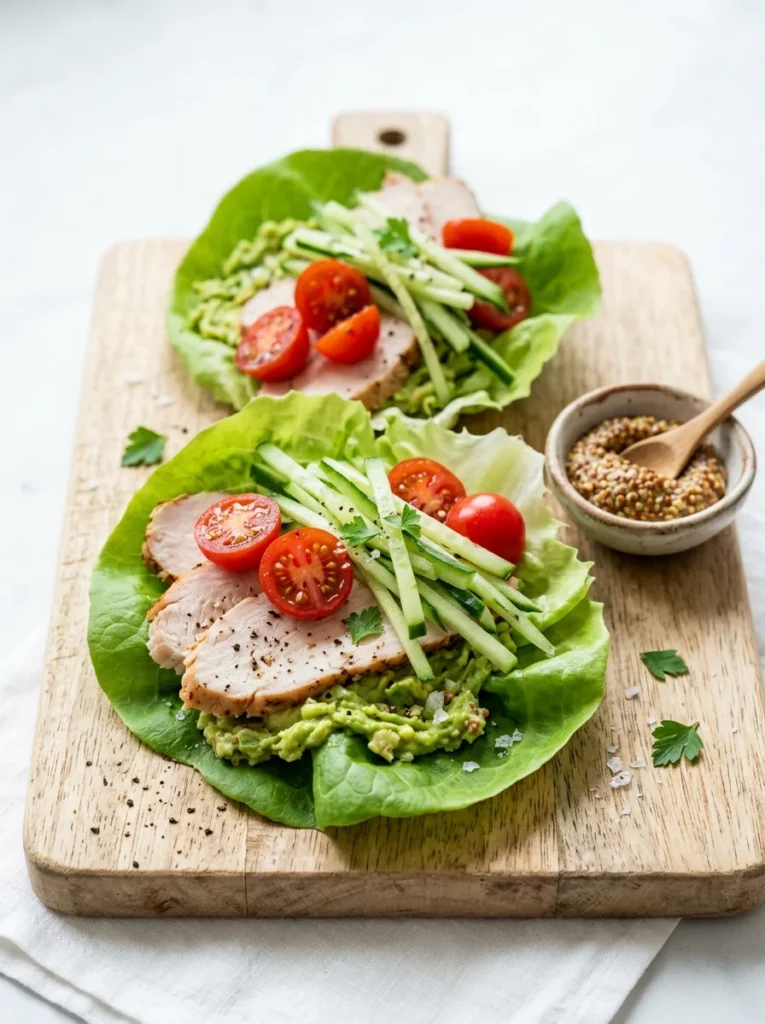
Turkey and avocado lettuce wraps manage to feel indulgent and light at the exact same time the lean deli turkey delivers a clean, high-quality protein hit, the avocado adds healthy monounsaturated fats and a buttery richness that makes the whole thing incredibly satisfying, and the crisp butter lettuce holds it all together in a fresh, low-carb wrapper that feels refreshing rather than restrictive; these come together in under 5 minutes, require no cooking, and can be customized endlessly based on what you have on hand, which makes them one of the most reliably useful snacks in any high-protein rotation.
Ingredients
- 4 large butter lettuce or romaine leaves
- 4 oz (115g) sliced deli turkey breast (low-sodium preferred)
- 1 ripe avocado, mashed or sliced
- ½ cup cherry tomatoes, halved
- ¼ cup cucumber, cut into thin matchsticks
- 1 teaspoon Dijon mustard
- 1 teaspoon lemon juice
- Salt and pepper to taste
- Optional: everything bagel seasoning on the avocado
Instructions
- Wash and dry the lettuce leaves thoroughly; wet leaves will make the wraps soggy.
- Mash the avocado with lemon juice, salt, and pepper in a small bowl until smooth but still slightly chunky.
- Lay lettuce leaves flat on a board or plate.
- Spread a thin layer of Dijon mustard on each leaf, then add a portion of turkey slices.
- Add a generous dollop of mashed avocado, then top with cherry tomatoes and cucumber matchsticks.
- Fold the edges of the lettuce in and roll loosely and eat immediately.
How to Serve It
Serve these wraps immediately after assembly to preserve the crisp lettuce texture once made, they don’t store well for more than 20–30 minutes. For a snack board presentation, lay out all the components separately and let people build their own wraps. In summer, add thin slices of mango or a drizzle of sweet chili sauce for a tropical twist. Top the avocado layer with a pinch of everything bagel seasoning or smoked paprika for color and extra flavor. A small side of salsa or guacamole makes an excellent dipping sauce if you’re serving these as part of a larger snack spread.
9. Dark Chocolate Peanut Butter Protein Bark
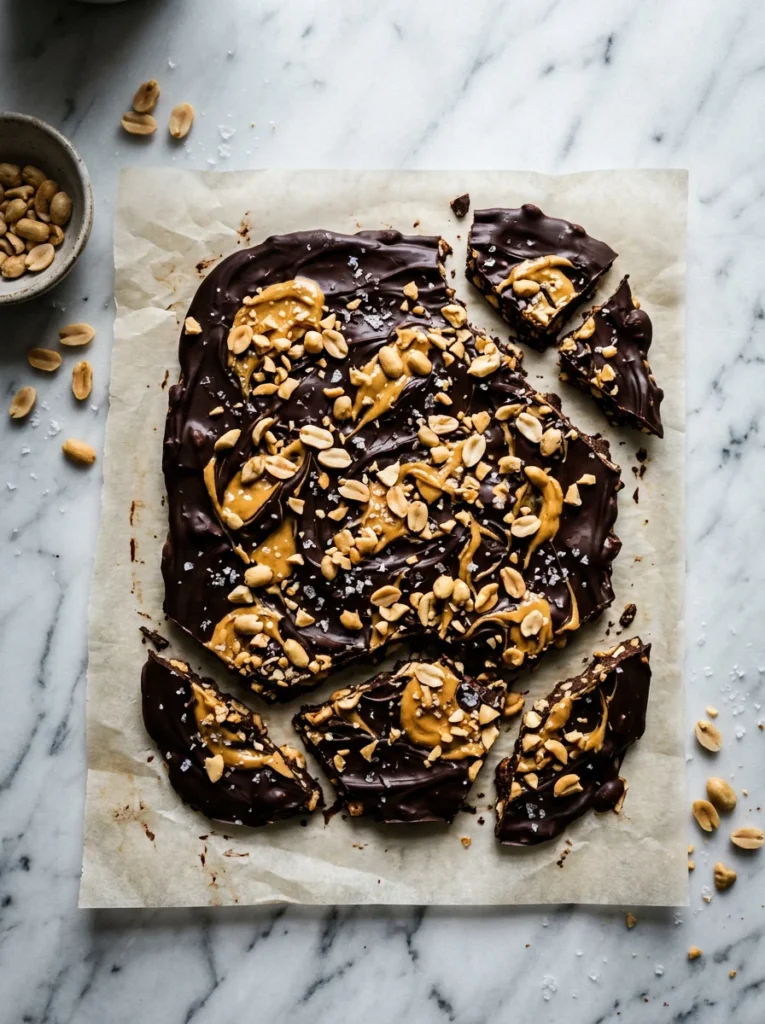
Dark chocolate peanut butter protein bark is the rare intersection of legitimate dessert and actual nutrition rich, glossy dark chocolate provides antioxidants and a deeply satisfying bittersweet base, the swirls of peanut butter add protein and a nutty depth that makes every bite feel complete, and a finish of flaky sea salt elevates the whole thing from snack to something that feels genuinely special; it comes together in about 10 minutes of active work, sets in the freezer in under an hour, and breaks into shareable shards that store beautifully in the fridge for the entire week.
Ingredients
- 1½ cups dark chocolate chips (70% cocoa or higher)
- ¼ cup natural peanut butter, warmed until pourable
- 2 scoops chocolate or vanilla protein powder
- 2 tablespoons coconut oil
- ¼ cup roasted peanuts, roughly crushed
- 1 teaspoon flaky sea salt
- Optional: 2 tablespoons hemp seeds or chia seeds mixed into the chocolate
Instructions
- Line a baking sheet with parchment paper.
- Melt chocolate chips and coconut oil together in a microwave-safe bowl in 30-second intervals, stirring between each, until fully smooth, about 1½–2 minutes total.
- Stir the protein powder into the melted chocolate until fully incorporated and no lumps remain.
- Pour the chocolate mixture onto the parchment paper and spread to an even layer about ¼ inch thick.
- Drizzle warmed peanut butter over the top, then use a toothpick or skewer to swirl it into the chocolate.
- Sprinkle crushed peanuts and flaky sea salt evenly over the surface.
- Transfer to the freezer for 45–60 minutes until completely set.
- Break into irregular shards and store in an airtight container in the fridge for up to 10 days.
How to Serve It
Serve the bark cold straight from the fridge so it has that satisfying snap when you break it. For a festive presentation, arrange the shards on a dark slate board or in a small glass jar tied with twine for gifting. In winter, add a sprinkle of dried cranberries or crushed candy cane over the peanut butter swirls before freezing for a seasonal version. Pair a shard or two with a handful of mixed nuts for a complete snack that balances protein, fat, and a small amount of natural sugar. A piece alongside a cup of black coffee in the afternoon is genuinely one of life’s small pleasures.
10. Hummus and Veggie Snack Plate

A hummus and veggie snack plate is one of those things that is simultaneously the most practical snack you can assemble and also one of the most genuinely pleasurable the hummus delivers plant-based protein and fiber from chickpeas and tahini, the vegetables add crunch, water content, and a rainbow of micronutrients, and the whole combination is satisfying in a clean, clear-headed way that leaves you feeling energized rather than sluggish; this is the snack you can make from scratch in 10 minutes or pull together in 2 with a good store-bought hummus, and either way it works beautifully.
Ingredients (Homemade Hummus)
- 1 can (15 oz/425g) chickpeas, drained and rinsed
- 3 tablespoons tahini
- 2 tablespoons fresh lemon juice
- 1 garlic clove, minced
- 2 tablespoons ice-cold water
- 2 tablespoons extra-virgin olive oil, plus more for drizzling
- ½ teaspoon ground cumin
- Salt to taste
Veggie Dippers
- 2 large carrots, cut into sticks
- 1 bell pepper, sliced
- 3 celery stalks, cut into sticks
- 6 radishes, halved
- 1 small cucumber, sliced into rounds
Instructions
- Add chickpeas, tahini, lemon juice, garlic, cumin, and a generous pinch of salt to a food processor.
- Process for 1 minute, then scrape down the sides.
- With the processor running, slowly drizzle in the ice-cold water and olive oil. Process for another 2–3 minutes until completely smooth and creamy.
- Taste and adjust more lemon for brightness, more tahini for depth, more salt as needed.
- Spoon into a shallow bowl, use the back of a spoon to create a swirl on top, drizzle with olive oil, and dust with paprika.
- Arrange vegetables around the bowl on a board or plate.
How to Serve It
The swirl in the hummus isn’t just decorative, it creates a little well for pooling good olive oil, which makes every scoop more luxurious. Dust with smoked paprika for warmth, a pinch of za’atar for herby earthiness, or a sprinkle of sumac for bright acidity. In summer, serve chilled alongside warm pita triangles for contrast. For individual snack-prep, portion hummus into small jars and pack pre-cut veggies in separate containers for a grab-and-go option throughout the week. A drizzle of pomegranate molasses or a few whole roasted chickpeas on top make the presentation feel truly restaurant-worthy.
11. Tuna Stuffed Mini Bell Peppers
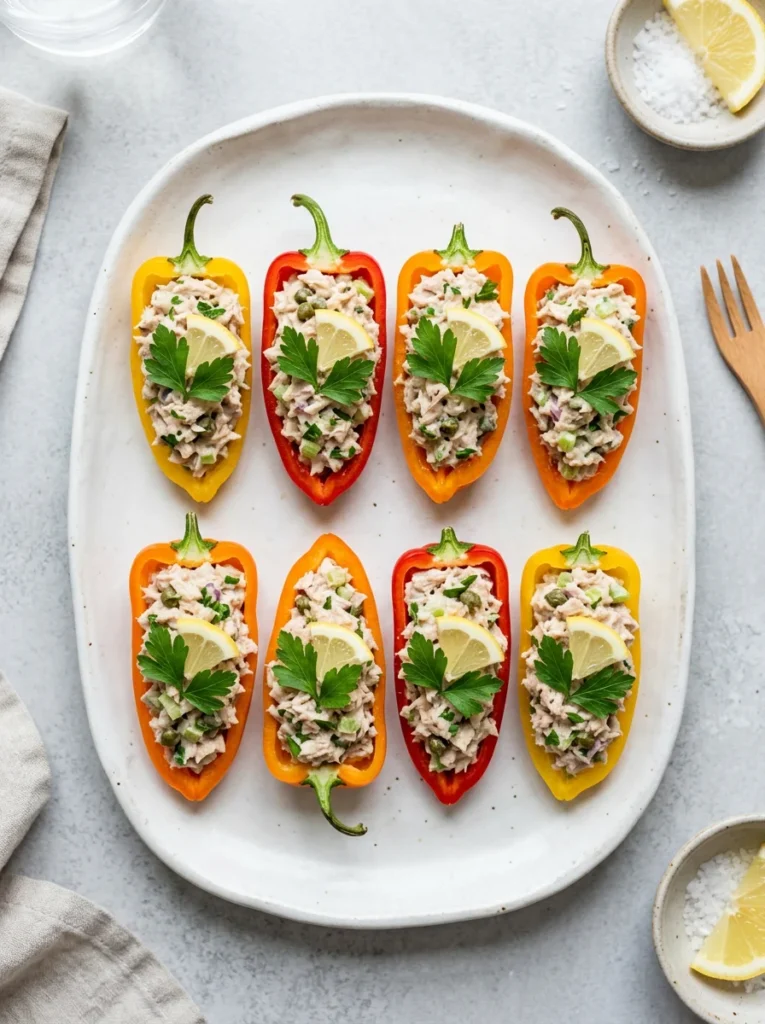
Tuna stuffed mini bell peppers pack an impressive protein punch into a snack that’s genuinely fun to eat the sweet, crisp mini pepper acts as a natural edible cup that holds a creamy, herb-flecked tuna filling, making each piece a self-contained bite of protein, healthy fat, and fresh vegetable; they’re bright, colorful, and require absolutely zero cooking beyond the mixing of ingredients, which means you can throw them together while standing at the kitchen counter in about 8 minutes flat and still end up with something that looks like you put real effort into it.
Ingredients
- 2 cans (5 oz/140g each) tuna in water, well drained
- 8 mini bell peppers, halved lengthwise and seeded
- 3 tablespoons mayonnaise or Greek yogurt (or a mix of both)
- 1 tablespoon Dijon mustard
- 2 tablespoons finely diced celery
- 1 tablespoon finely diced red onion
- 1 tablespoon fresh lemon juice
- 2 tablespoons fresh parsley, finely chopped
- Salt and cracked black pepper to taste
- Optional: pinch of smoked paprika for topping
Instructions
- Drain the tuna thoroughly and press out as much liquid as possible using the can lid to keep the filling from becoming watery.
- Add tuna to a bowl and break up with a fork.
- Add mayonnaise, Dijon mustard, lemon juice, celery, red onion, and parsley. Stir until well combined.
- Season with salt and pepper to taste.
- Halve the mini bell peppers lengthwise and remove seeds and membranes.
- Spoon a generous mound of tuna filling into each pepper half.
- Dust with smoked paprika if using. Serve immediately or refrigerate for up to 2 hours before serving.
How to Serve It
Arrange the stuffed pepper halves on a long rectangular plate or wooden board, alternating colors for a vibrant visual effect. A lemon wedge on the side and a scattering of fresh parsley leaves makes the presentation feel polished. In spring and summer, add a tiny piece of avocado on top of the tuna filling for richness and color contrast. For a spicier variation, mix a teaspoon of hot sauce or sriracha into the tuna filling. These make fantastic party appetizers served at room temperature, or pack them in a container for lunch to keep the filling and peppers separate and stuff just before eating to preserve the crunch.
12. Overnight Chia Pudding with Protein
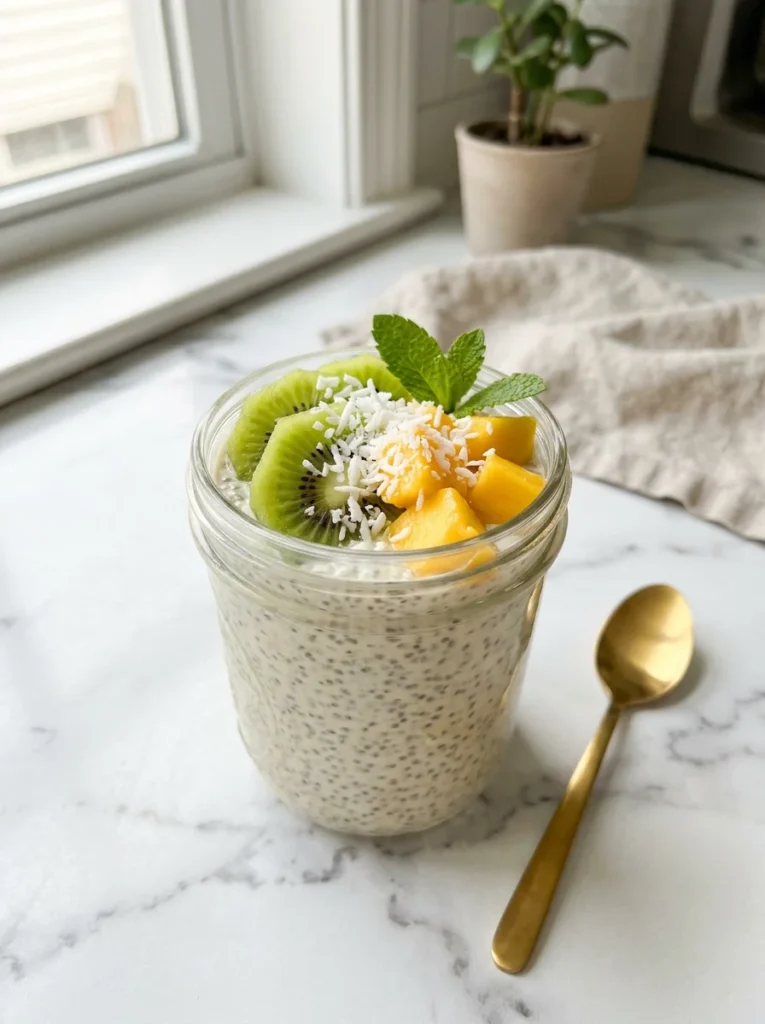
Overnight chia pudding is the kind of recipe that rewards you the next morning for effort you barely remember putting in the night before chia seeds are remarkable little nutritional powerhouses, loaded with omega-3s, fiber, and a surprising amount of plant protein, and when soaked overnight they transform into a thick, creamy pudding with a gentle tapioca-like texture that feels genuinely indulgent even though it’s completely whole-food based; adding a scoop of protein powder to the base takes the protein content to a whole new level and makes this not just a snack but a legitimately filling, meal-worthy option that tastes like dessert.
Ingredients
- ¼ cup chia seeds
- 1 cup unsweetened coconut milk or almond milk
- 1 scoop vanilla protein powder
- 1 tablespoon maple syrup or honey
- ½ teaspoon vanilla extract
- Pinch of sea salt
Toppings
- ½ kiwi, peeled and sliced
- ¼ mango, diced
- 2 tablespoons toasted coconut flakes
- Optional: drizzle of honey or passionfruit pulp
Instructions
- In a jar or bowl with a lid, whisk together the milk, protein powder, maple syrup, vanilla extract, and sea salt until the protein powder is fully dissolved.
- Add the chia seeds and stir vigorously for 1 minute to make sure the seeds don’t clump.
- Stir once more after 5 minutes (this prevents seeds from all sinking together).
- Cover and refrigerate overnight, or for a minimum of 4 hours.
- In the morning, stir the pudding. It should be thick and creamy. Add a splash of milk if too thick and stir well.
- Top with fresh fruit and toasted coconut just before serving.
How to Serve It
For the best texture, stir the pudding well before adding toppings. This redistributes any liquid that has settled at the bottom and gives you that ideal thick, spoonable consistency throughout. In summer, top with tropical fruits like mango, pineapple, or passionfruit for a vivid, fresh-feeling bowl. In autumn and winter, warm the pudding slightly in the microwave for 45 seconds and top with cinnamon-spiced apple compote and a drizzle of almond butter for a cozy, comforting take. Prep three to four jars at once and keep them in the fridge. You’ll have ready-made snacks waiting every day without any additional work.
13. Crispy Chickpea and Roasted Nut Mix
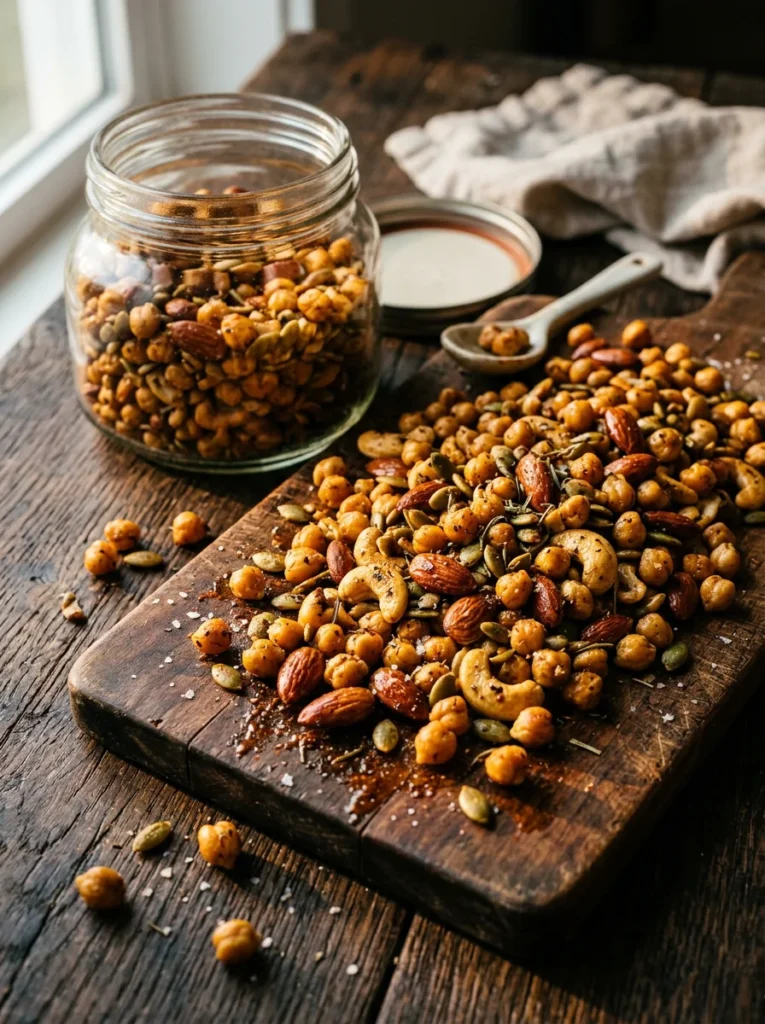
A crispy chickpea and roasted nut mix is the protein snack that replaces chips so completely and convincingly that you genuinely stop missing them the oven-roasted chickpeas develop an audible crunch and a deeply savory, spiced coating that satisfies every urge for something salty and crunchy, and combined with roasted almonds, cashews, and pumpkin seeds they create a snack mix with real staying power from protein, healthy fats, and fiber that actually keeps you going rather than just buying you 20 minutes before the next craving hits; make a large batch on the weekend and keep it in a jar on the counter for the week ahead.
Ingredients
- 1 can (15 oz/425g) chickpeas, drained, rinsed, and thoroughly dried
- ½ cup raw almonds
- ½ cup raw cashews
- ¼ cup raw pumpkin seeds (pepitas)
- 2 tablespoons olive oil
- 1 teaspoon smoked paprika
- ½ teaspoon garlic powder
- ½ teaspoon cumin
- ¼ teaspoon cayenne pepper (adjust to taste)
- 1 teaspoon sea salt
- 1 teaspoon maple syrup or honey (optional, for a touch of sweetness)
Instructions
- Preheat the oven to 400°F (200°C). Line a large baking sheet with parchment paper.
- The most important step: dry the chickpeas completely. Spread them on a kitchen towel, fold it over, and rub firmly for 2 minutes. Remove any loose skins dry chickpeas = crispy chickpeas.
- Spread dried chickpeas on the prepared baking sheet. Roast for 20 minutes, shaking the pan halfway through.
- While chickpeas roast, toss almonds, cashews, and pumpkin seeds with olive oil, all spices, salt, and maple syrup in a bowl until evenly coated.
- After 20 minutes, remove the pan and push chickpeas to one side. Add the nut mixture to the other side of the pan.
- Return to the oven for another 12–15 minutes until chickpeas are deeply golden and nuts are toasted and fragrant. Watch carefully in the last 5 minutes.
- Cool completely on the pan and continue crisping as they cool. Store in an airtight jar at room temperature for up to 5 days.
How to Serve It
Let the mix cool fully before storing even 5 minutes matters here, as residual steam trapped in a container will soften the chickpeas. Store in a wide-mouth glass jar at room temperature (not the fridge, which adds moisture) and shake the jar occasionally to keep everything evenly distributed. Serve in a small bowl on its own as an afternoon snack, or scatter over a salad for added protein and crunch. In the holiday season, add a pinch of cinnamon and a tablespoon of maple syrup to the spice mix for a sweet-savory version that works brilliantly as a homemade gift packaged in a mason jar with a ribbon.
There you have 13 protein-packed snack recipes that genuinely deliver on flavor, satisfaction, and ease. Whether you’re prepping a batch of peanut butter protein balls for the week, throwing together a tuna-stuffed pepper in 8 minutes flat, or layering up a gorgeous chia pudding the night before, every one of these options will leave you feeling fueled and glad you made the effort. Save a few that speak to you, give them a try this week, and share the ones you love with someone who could use a good snack idea. Happy cooking!
Leave a Reply