Shrimp is one of those ingredients that feels fancy but cooks incredibly fast. The problem? It cooks too fast. One minute it’s juicy and tender, the next it’s rubbery and dry. If you’ve ever pulled shrimp off the heat and wondered where it went wrong, you’re not alone.
The good news is that perfectly cooked shrimp isn’t about fancy techniques or chef skills. It’s about timing, visual cues, and a few simple rules that make all the difference. Once you understand how shrimp behaves, you’ll never overcook it again.
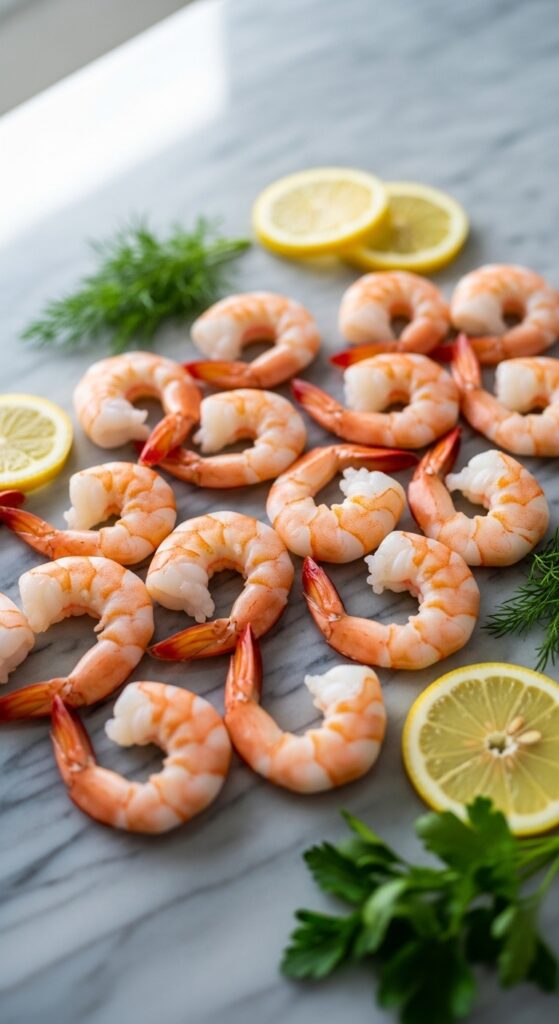
Step 1: Start With the Right Shrimp
Overcooking often starts before the shrimp ever hits the pan. Size and prep matter more than people realize.
Here’s what to look for:
- Medium to large shrimp are more forgiving than tiny ones
- Peeled and deveined shrimp cook more evenly
- Fresh or properly thawed shrimp (never cook straight from frozen)
If you’re using frozen shrimp, thaw them gently:
- Place them in a bowl of cold water for 15–20 minutes
- Pat completely dry before cooking
Extra moisture causes steaming, which leads to uneven cooking and mushy texture.
Step 2: Understand Shrimp’s Tiny Cooking Window
Shrimp cooks fast. Like, really fast.
Most shrimp only need:
- 2–3 minutes per side
- 4–6 minutes total
Once shrimp is done, there’s no buffer zone. Even 30 extra seconds can push it from tender to tough.
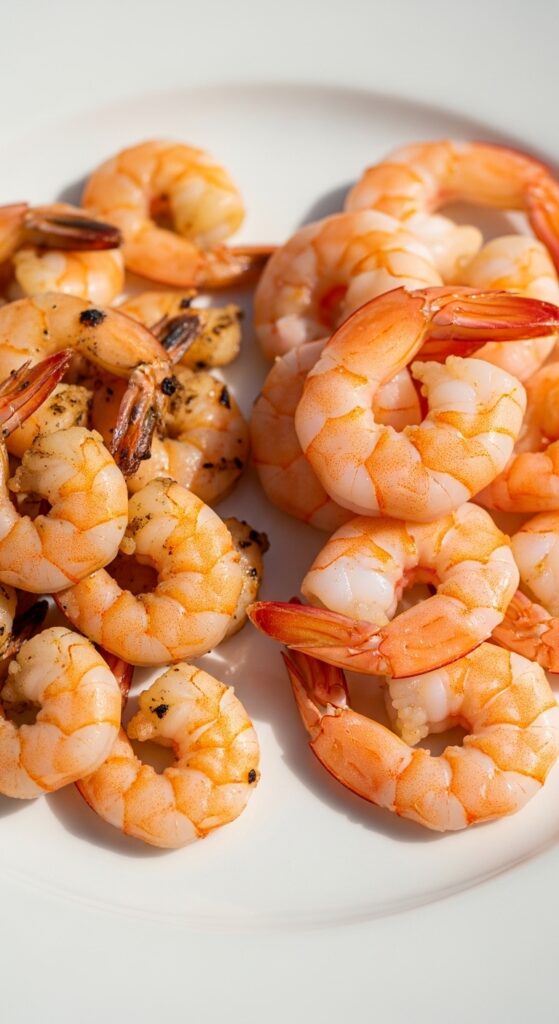
Visual cues matter more than the clock:
- Raw shrimp = gray and translucent
- Cooked shrimp = pink, opaque, and curled into a loose “C” shape
If it curls tightly into an “O,” it’s already overcooked.
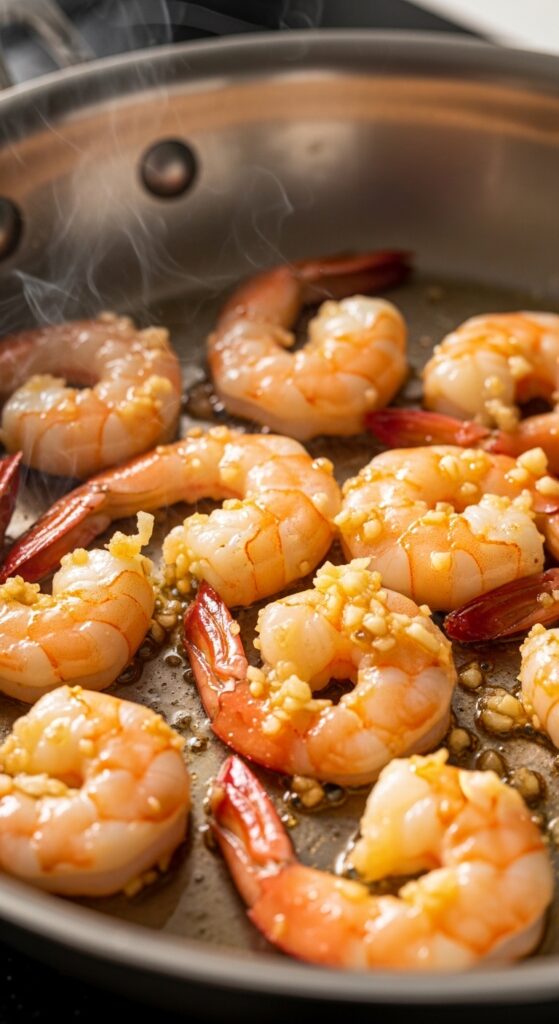
Step 3: Use High Heat (But Not for Long)
Shrimp loves hot pans and quick cooking.
Before adding shrimp:
- Heat your pan until it’s hot but not smoking
- Add oil or butter and let it shimmer
Once shrimp goes in:
- Spread it out in a single layer
- Don’t overcrowd the pan
- Leave it alone for the first minute
Crowding traps steam, which causes uneven cooking and soggy shrimp.
Step 4: Flip Once, Then Stop Touching It
One of the biggest mistakes is constantly moving shrimp around.
Instead:
- Let the first side cook until pink edges appear
- Flip once
- Cook briefly on the second side
Shrimp doesn’t benefit from repeated flipping. Each movement releases moisture and speeds up overcooking.
As soon as both sides are opaque, pull them off the heat.
Why This Works
Shrimp muscle fibers tighten quickly when exposed to heat. The longer they stay hot, the more moisture they squeeze out. That’s what creates the rubbery texture everyone hates.
Quick cooking + high heat =
- Minimal moisture loss
- Tender, juicy shrimp
- Better flavor and texture
The goal isn’t “well done.” The goal is just done.
Common Mistakes That Lead to Overcooked Shrimp
Avoid these and you’ll instantly level up your shrimp game:
- Cooking shrimp too long “just to be safe”
- Using low heat for too long
- Leaving shrimp in a hot pan after cooking
- Cooking shrimp with wet surfaces
- Adding shrimp too early before the pan is hot
Shrimp continues cooking from residual heat, so timing matters even after you turn off the stove.
Pro Tips for Foolproof Shrimp Every Time
These small habits make a big difference:
- Pull shrimp early: Take it off heat when it looks almost done
- Rest briefly: Let it finish cooking off the heat for 30 seconds
- Season at the end: Salt too early can draw out moisture
- Cook shrimp last: If adding to pasta or stir-fry, add it at the very end
If you’re unsure, cut one shrimp open. The center should be opaque and juicy, not dry or stringy.
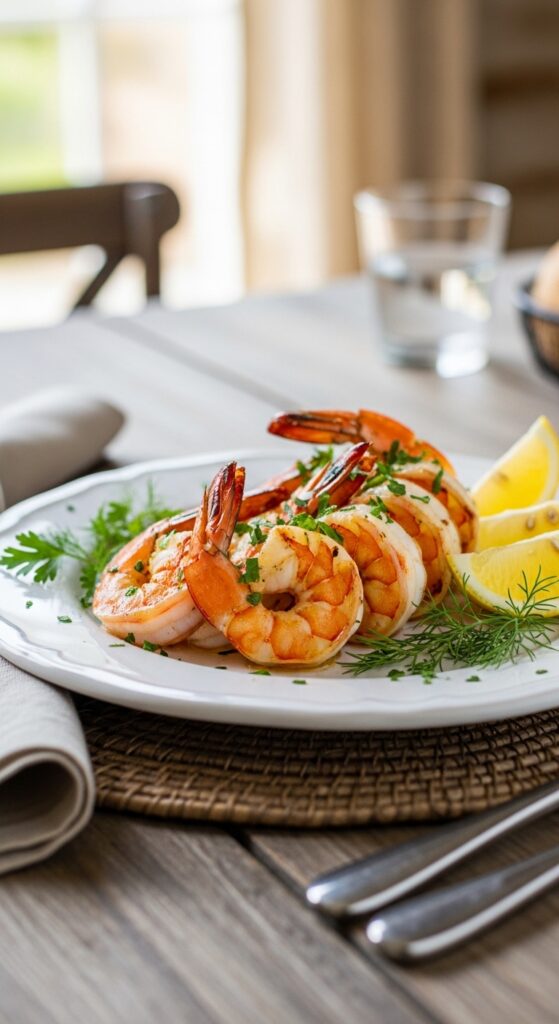
Final Touches: How to Know You Nailed It
Perfect shrimp should be:
- Pink, not white or gray
- Firm but springy
- Juicy with a clean bite
- Lightly curled, not tightly wound
When shrimp is cooked correctly, it barely needs sauce to shine.
Cooking shrimp without overcooking it is all about confidence and timing. Once you stop overthinking and start watching the shrimp instead of the clock, it becomes one of the easiest proteins to master.
Try this method next time and notice the difference immediately.
Save this for later, or pin it so perfect shrimp is always just minutes away. 🍤
Leave a Reply