A perfect sear is that golden-brown, crusty outside that makes meat look and taste restaurant-quality. It locks in flavor, adds texture, and instantly upgrades even the simplest cut. But if you’ve ever ended up with gray, soggy meat instead of that beautiful crust, you’re not alone.
The good news? Getting a pro-level sear isn’t about fancy tools or secret chef tricks. It’s about a few simple steps done right. Once you know what to focus on, you’ll get consistent, mouthwatering results every time.
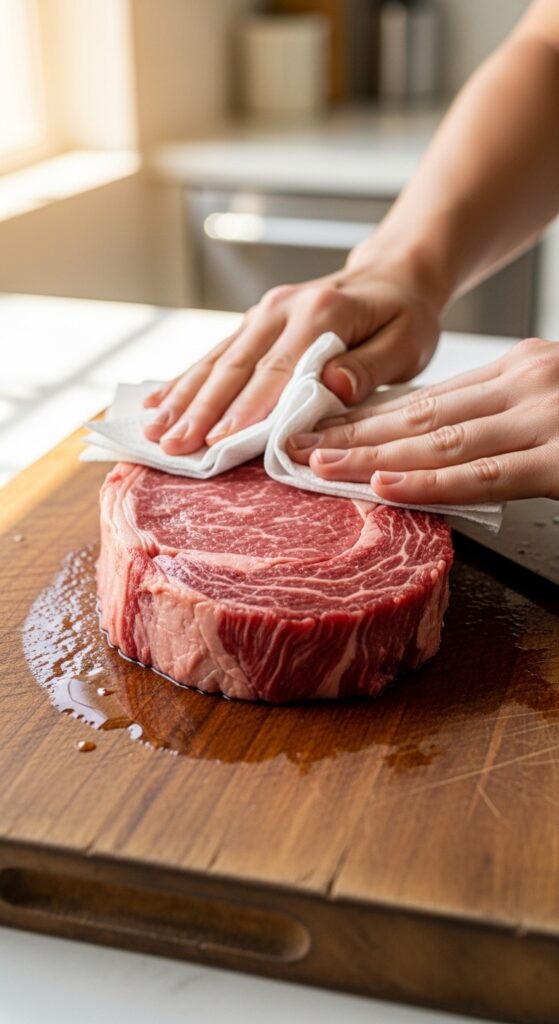
Step 1: Start With Dry Meat (This Matters More Than You Think)
Moisture is the enemy of a good sear. If your meat is wet, it will steam instead of brown.
Before cooking:
- Pat the meat dry thoroughly with paper towels
- Dry every side, not just the top
- Let it sit uncovered for a few minutes if needed
This simple step helps the surface heat up quickly and form that crisp, flavorful crust instead of turning pale.

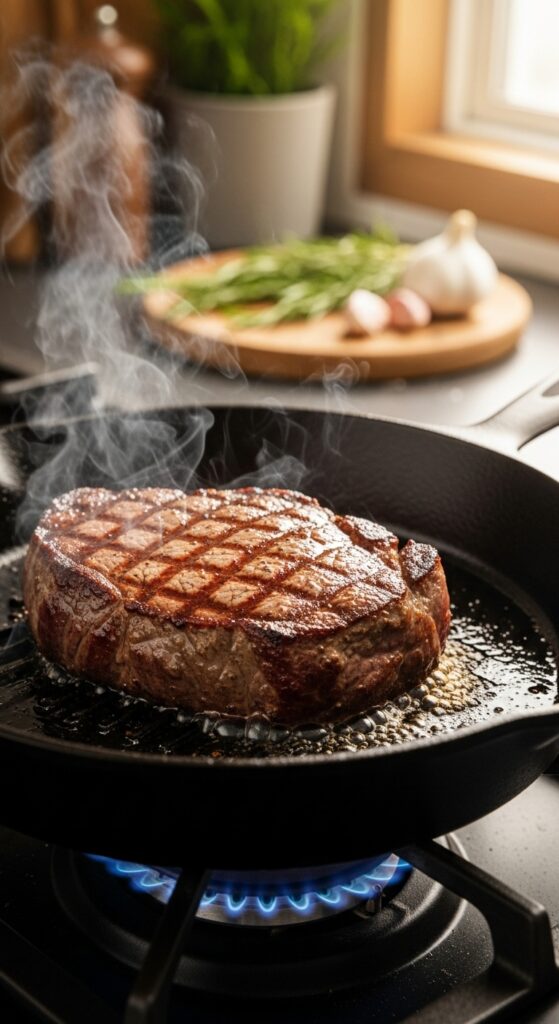
Step 2: Use the Right Pan and Heat It Properly
A hot pan is non-negotiable. If the pan isn’t hot enough, the meat won’t sear—it will stick and slowly cook.
Best pans for searing:
- Cast iron
- Stainless steel
- Heavy-bottomed skillet
How to heat it:
- Place the empty pan over medium-high to high heat
- Let it heat for several minutes
- Add oil only after the pan is hot
You should see the oil shimmer slightly. That’s your sign the pan is ready.
Step 3: Choose the Right Oil (And Not Too Much)
Not all oils are searing-friendly. You want something that can handle high heat without burning.
Good options:
- Avocado oil
- Canola oil
- Grapeseed oil
- Light olive oil
Use just enough to coat the bottom of the pan. Too much oil lowers the temperature and prevents proper browning.
Step 4: Season Simply and Right Before Cooking
Salt is your best friend when searing meat. It draws out moisture initially, then helps create a flavorful crust.
Best practice:
- Season generously with salt just before cooking
- Add pepper after searing if you want to avoid burning
Avoid marinades or sugary seasonings during searing. They burn quickly and interfere with browning.
Step 5: Don’t Touch It (Seriously)
Once the meat hits the pan, leave it alone. Constant flipping or moving prevents a crust from forming.
Here’s what to do:
- Place the meat in the pan and let it cook undisturbed
- Wait until it naturally releases from the pan
- Flip once for an even sear
If it sticks, it’s not ready yet. Patience pays off here.
Why This Works
Searing is all about heat and contact. When dry meat hits a hot pan, the surface browns quickly, creating flavor and texture. This reaction is what gives meat that deep, savory taste you associate with steakhouse cooking.
When you rush, overcrowd, or lower the heat, you lose that magic.
Common Mistakes That Ruin a Sear
Avoid these if you want pro-level results:
- Overcrowding the pan
- Using a cold or lukewarm skillet
- Skipping the drying step
- Using butter too early (it burns fast)
- Flipping too often
If you’re cooking multiple pieces, work in batches and keep the pan hot.
Pro Tips for an Even Better Crust
Want to take your sear to the next level?
- Let meat come close to room temperature before cooking
- Press lightly with tongs to ensure full contact
- Add butter and herbs after searing for flavor
- Finish thick cuts in the oven if needed
These small upgrades make a big difference.
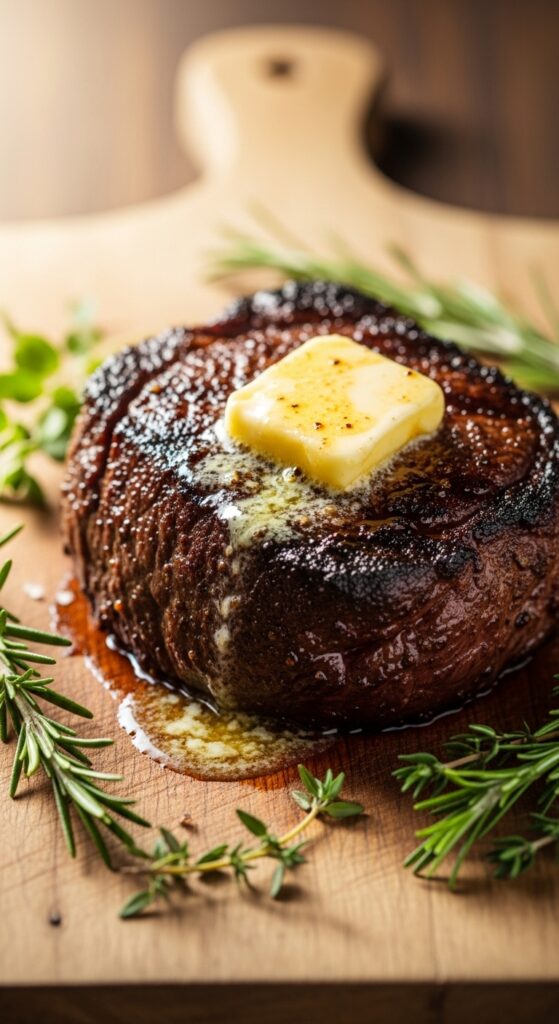
Final Touches: Let It Rest
After searing, let the meat rest for a few minutes. This helps juices redistribute so your meat stays tender and juicy when sliced.
Once you master these steps, you’ll get that perfect sear every time—crispy on the outside, juicy on the inside, and packed with flavor.
Save this for later, and try it the next time you cook meat at home. 🍳🔥
Leave a Reply