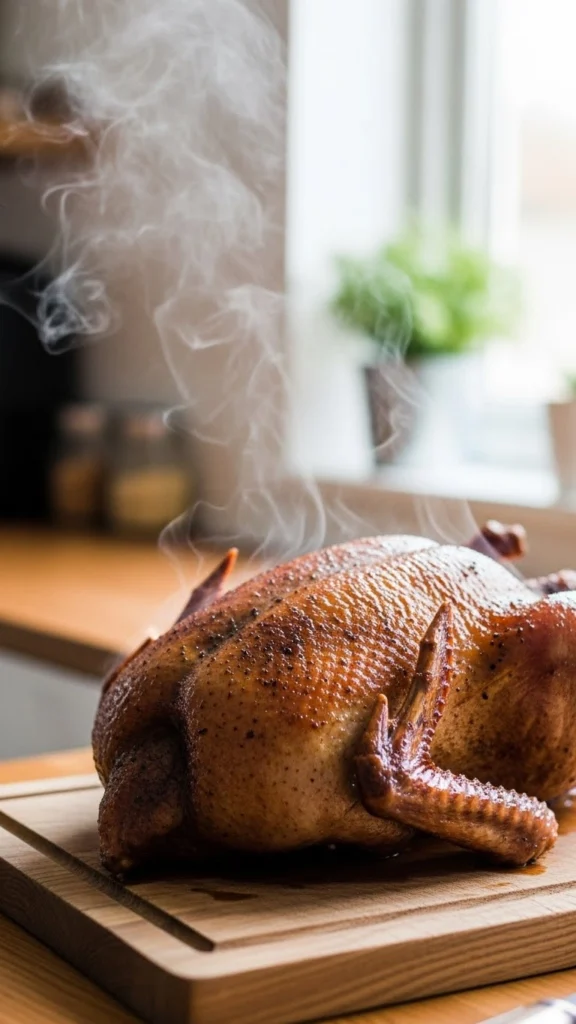
Duck is one of those dishes that feels restaurant-only—rich, elegant, and slightly intimidating. The biggest fear? Soggy skin. You can cook duck perfectly inside, but if the skin isn’t crisp, it just doesn’t feel right.
Here’s the truth: crispy duck skin is all about technique, not luck. Once you understand how duck fat behaves and follow a few simple steps, you can achieve crackly, golden skin at home—every single time.
Let’s walk through it slowly, confidently, and stress-free.
Why Duck Skin Is Different From Chicken Skin
Duck skin is thicker and packed with fat. That fat is your best friend if you render it properly.
Here’s what needs to happen:
- Fat must slowly melt out of the skin
- Skin must dry and brown
- Heat must be controlled to avoid burning
Rushing this process is the 1 reason duck skin turns rubbery instead of crispy.
Choosing the Right Duck Cut
You can make crispy skin with different cuts, but some are easier than others.
Best Options for Beginners
- Duck breast (most popular and forgiving)
- Duck legs (great but take longer)

Tip: Look for duck with thick, even skin and no tears.
Preparing Duck for Maximum Crispiness
Preparation is where crispy skin is won or lost.
Step 1: Dry the Skin Completely
Moisture prevents crisping.
- Pat duck skin very dry with paper towels
- Air-dry uncovered in the fridge for 1–8 hours if possible
Step 2: Score the Skin (Very Important)
- Use a sharp knife
- Cut shallow diagonal lines
- Do not cut into the meat
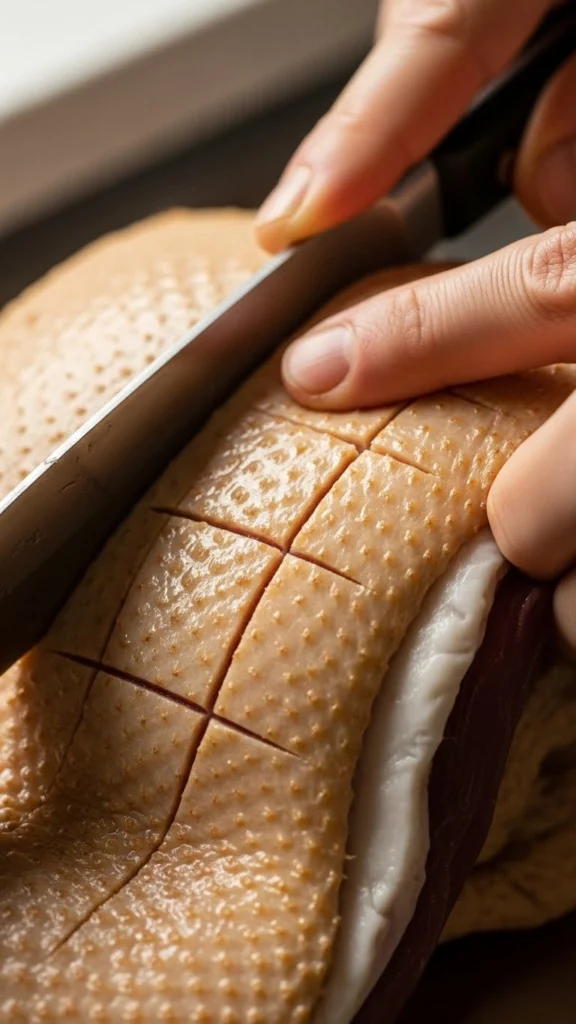
Scoring helps fat escape evenly and prevents curling.
Seasoning Duck the Right Way
Duck doesn’t need much.
Simple Seasoning Works Best
- Salt (essential for crisping)
- Black pepper (optional)
- No sugar, no marinades on the skin
Avoid: Honey, glazes, or sauces before crisping they burn fast.
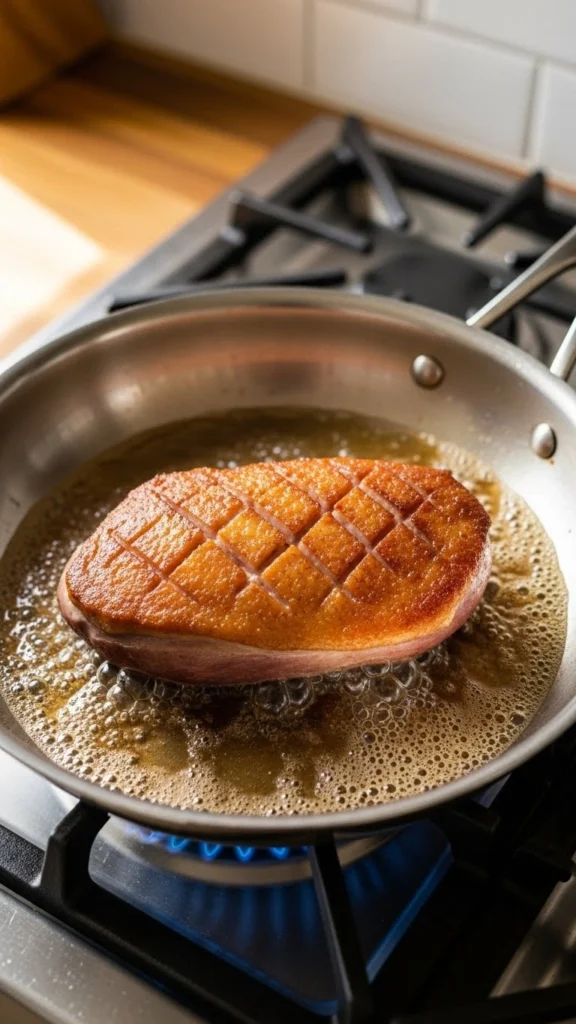
Cooking Duck Breast for Crispy Skin (Stovetop Method)
This is the most reliable method for beginners.
Step-by-Step Instructions
- Start with a cold pan
Place duck breast skin-side down in an unheated pan. - Turn heat to medium-low
Let the fat slowly render out. - Do not flip early
Cook skin-side down for 8–12 minutes.
4. Pour off excess fat
Carefully remove extra fat as it collects.
5. Flip briefly
Cook the meat side for 1–3 minutes depending on thickness.
6. Rest the duck
Rest skin-side up for 5 minutes before slicing.
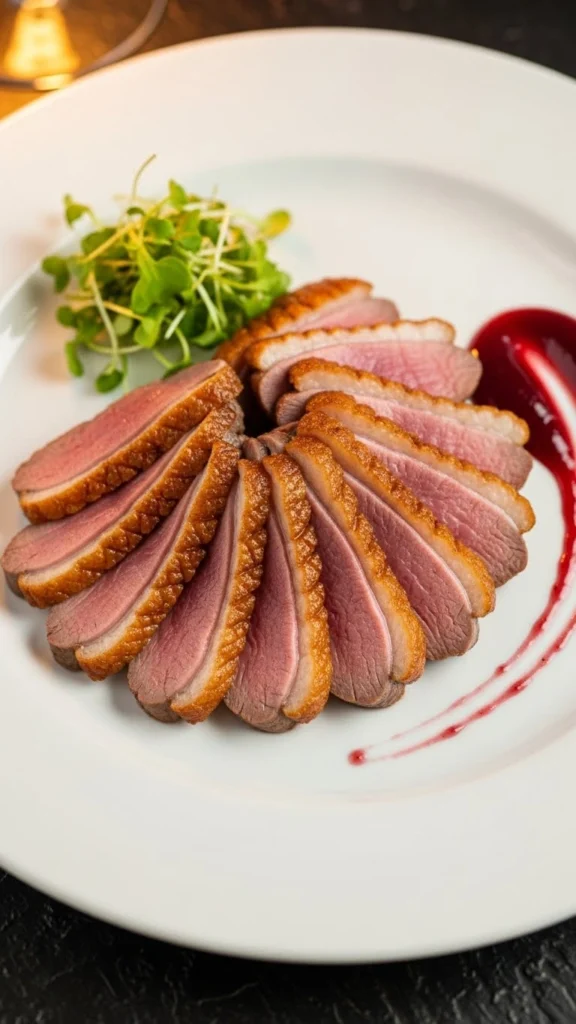
Tip: The skin should look deep golden and feel firm to the touch.
Cooking Whole Duck with Crispy Skin (Oven Method)
Whole duck takes longer but the results are worth it.
Key Steps
- Prick skin all over with a skewer (avoid meat)
- Roast at low heat first to render fat
- Finish at high heat to crisp
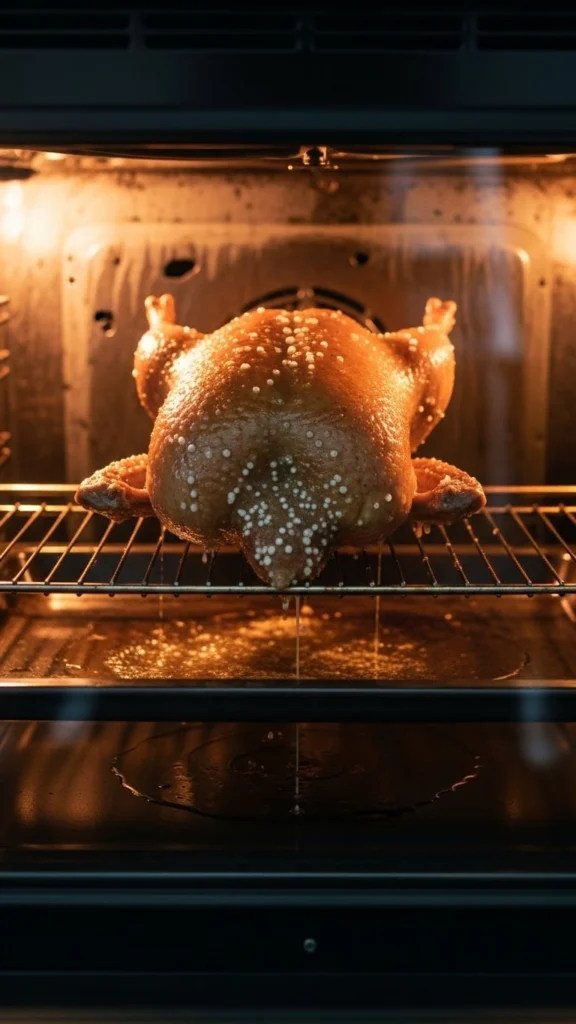
Temperature Guide
- 325°F (165°C) for fat rendering
- 425°F (220°C) for final crisp
Rotate the duck occasionally for even browning.
Common Duck Skin Mistakes to Avoid
Even small mistakes can ruin the crisp.
Don’t Do These
- Cooking on high heat from the start
- Skipping drying time
- Crowding the pan
- Adding sauce too early
- Flipping repeatedly
Patience equals crunch.
How to Keep Duck Skin Crispy When Serving
Timing matters.
- Slice just before serving
- Keep skin exposed to air
- Avoid covering with foil
- Add sauces under the meat, not over the skin
Final Takeaway: Crispy Duck Is About Control
Perfect duck isn’t complicated it’s controlled heat, dry skin, and patience. Once you respect the fat and let it do its job, crispy skin becomes predictable, not scary.
Save this guide for later, and the next time you cook duck, you’ll hear that satisfying crunch before you even take a bite.
Leave a Reply