Christmas dinner should feel warm, joyful, and full of flavor—not stressful. Yet the turkey often steals all the attention, leaving home cooks worried about dry meat or complicated steps. The good news? A juicy roast turkey is surprisingly easy when you follow a few simple, flexible techniques. No complicated equipment, no fancy tricks—just real steps anyone can manage.
Whether you’re hosting a full house or having a cozy dinner for a few, this guide walks you through everything you need—from seasoning to roasting to carving—with stress-free tips along the way.
Why Turkey Gets Dry (And How to Avoid It)
Turkey dries out easily because the breast cooks faster than the thighs. The secret is learning how to help them cook more evenly. Keep these ideas in mind:
- Spread softened butter under the skin
- Add moisture-rich aromatics inside the cavity
- Start with a hotter oven, then lower it
- Let the turkey rest before carving
These simple habits make a bigger difference than any fancy technique.
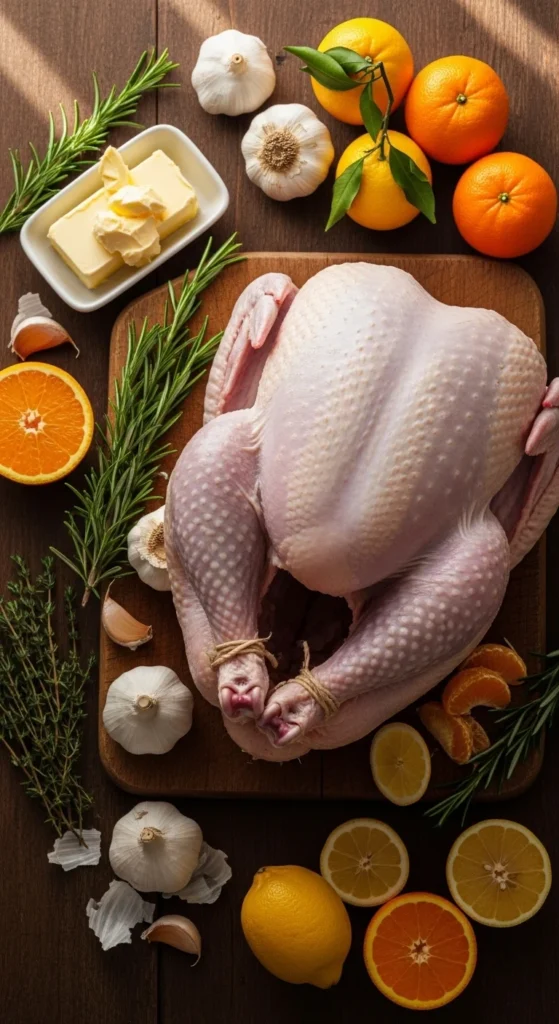
Step 1: Prep Your Turkey Like a Pro
Prepping the turkey properly is half the magic. Take your time here—it pays off later.
What you’ll need:
- A thawed turkey (10–14 lbs. is easiest)
- Softened butter
- Salt and black pepper
- Garlic and herbs (rosemary, thyme, sage)
- Lemon or orange slices
- Onion halves
Pat the turkey dry with paper towels so the butter sticks better. Then season generously with salt and pepper, including inside the cavity.
Slide your fingers gently under the skin of the breast to create space for butter. This keeps the breast juicy even if you overcook it by a few minutes.
Fill the cavity with the citrus, garlic, and onion. These add moisture and aroma while the turkey roasts.
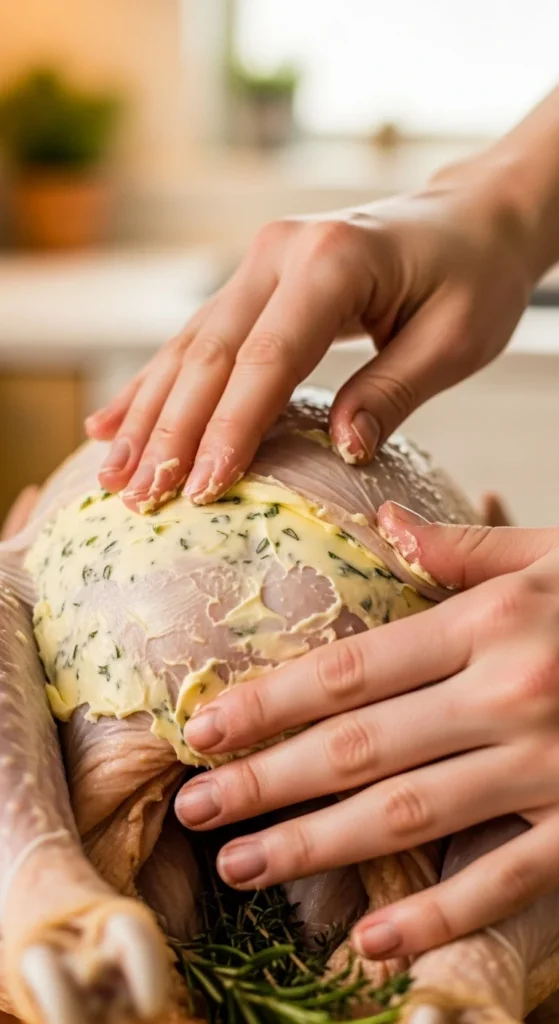
Step 2: Build Flavor With Herb Butter
Herb butter transforms a simple turkey into something special.
Make a quick herb butter:
- 1 cup softened butter
- 4 cloves minced garlic
- 1–2 tablespoons chopped herbs
- Lemon zest
- A pinch of pepper
Mix everything together until smooth. Spread half under the skin and half on top. Don’t worry if it looks messy—it melts evenly as it cooks.
For extra color, brush a little oil over the skin. It helps it crisp beautifully without burning.
Step 3: Set Up the Perfect Roasting Plan
This step keeps your turkey stress-free.
Roasting temperature:
- Start at 425°F (220°C) for 20 minutes
- Drop to 325°F (160°C) for the remaining time
The initial high heat helps crisp the skin and seals in juices. The lower heat cooks the turkey gently so the breast stays juicy.
Place the turkey breast side up on a rack inside a roasting pan. The rack helps air circulate so everything cooks evenly.
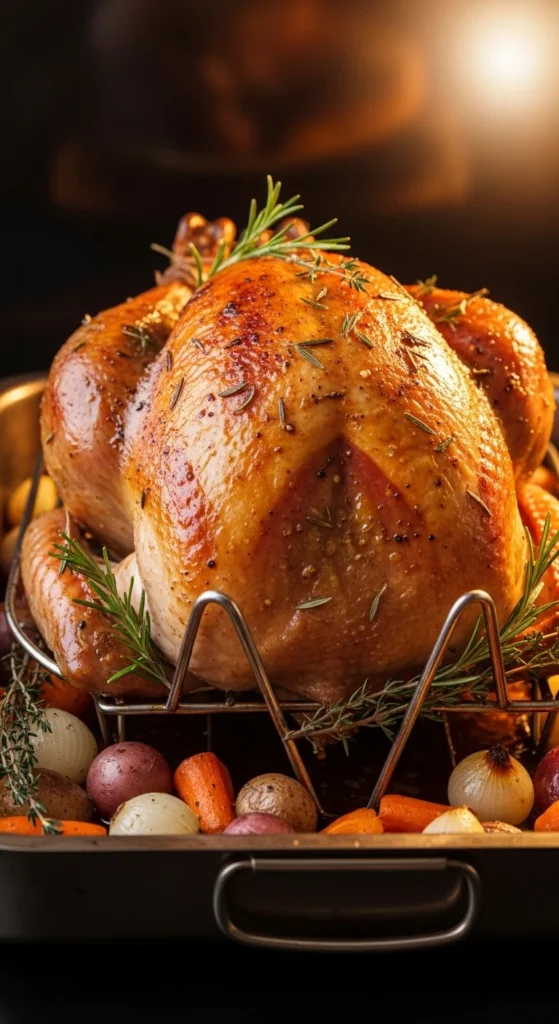
Rough cooking guide:
- 10–12 lbs → about 2.5 hours
- 12–14 lbs → about 3 hours
- 14–16 lbs → about 3.5 hours
Always check with a thermometer—safe internal temperature is 165°F (74°C) in the thickest part of the thigh.
No thermometer? Wiggle a drumstick; if it moves easily, the turkey is likely done.
Step 4: Basting (Optional But Helpful)
You don’t have to baste a turkey constantly. In fact, opening the oven too often slows down cooking.
A simple plan:
- Baste once after the first hour
- Then every 45–60 minutes
If your turkey is buttered well, it will still turn out juicy even without basting. So skip it if you prefer an easy, no-fuss method.
Step 5: Rest Before Carving
Resting is the secret behind juicy slices.
After the turkey comes out of the oven:
- Cover it loosely with foil
- Let it rest for 20–30 minutes
This allows the juices to settle, preventing dryness.
Use this time to finish your sides—potatoes, stuffing, gravy, vegetables, or salads.
Step 6: Carve With Confidence
Carving feels intimidating, but it’s simple when broken down into steps.
Carving method:
- Remove the legs and thighs first
- Slice the breast off the bone in large pieces
- Cut the breast into even slices
- Serve on a warm platter
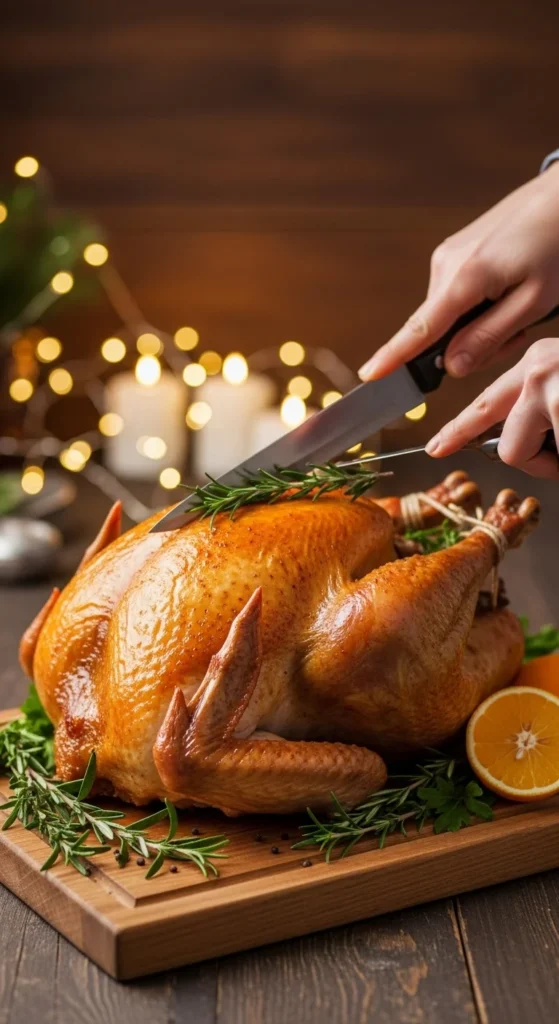
You’ll get cleaner cuts and better presentation when the turkey is fully rested.
Extra Tips for Zero-Stress Turkey Success
Use disposable roasting pans
They make cleanup easier, especially during busy holidays.
Skip fancy stuffing inside the bird
Stuffing slows down cooking. Bake it separately and pour pan drippings over it instead.
Add broth to the pan
Pour 1–2 cups chicken broth in the bottom of the roasting pan. This keeps drippings from burning and helps create flavorful gravy.
Make gravy early
If the turkey stresses you out, prepare gravy using broth before the turkey is even done. Then finish it with drippings at the end.
Don’t overthink it
Turkey is forgiving. Good seasoning, butter, and proper resting handle most of the work.
The Final Touch: Presenting Your Turkey
Once carved, arrange the turkey slices on a platter with herbs, citrus, or cranberries. Small details make the table feel warm and inviting.
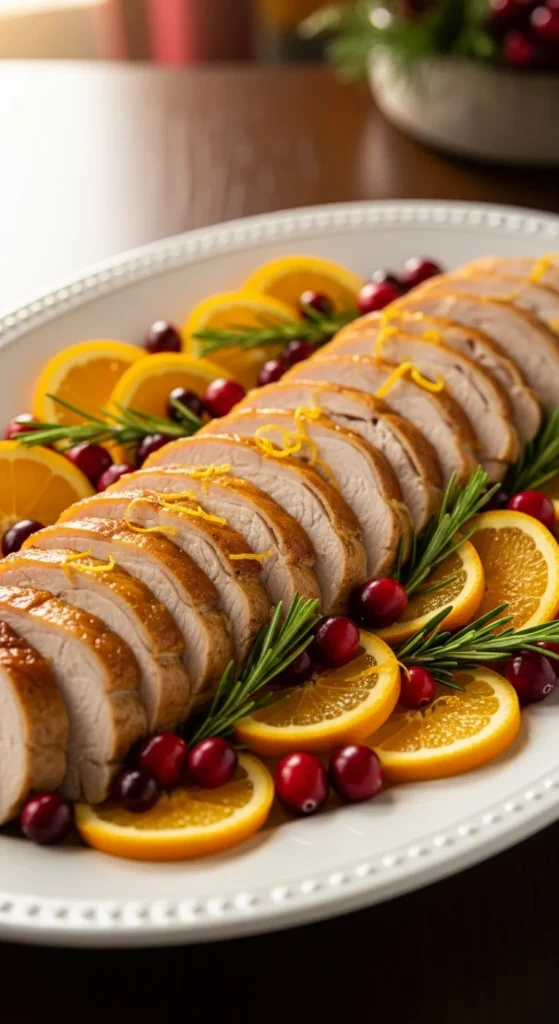
Place it at the center of your Christmas table and watch everyone’s eyes light up.
Save This for Your Christmas Dinner!
A juicy roast turkey doesn’t require complicated steps or all-day cooking. With simple prep, a good roasting plan, and stress-free techniques, your Christmas dinner becomes easier—and tastier—than ever.
Save this guide for later so your holiday turkey turns out amazing every single time!
Leave a Reply